Why Do Straps on MOLLE Backpacks Loosen Mid-Hike and How Do You Stop It?
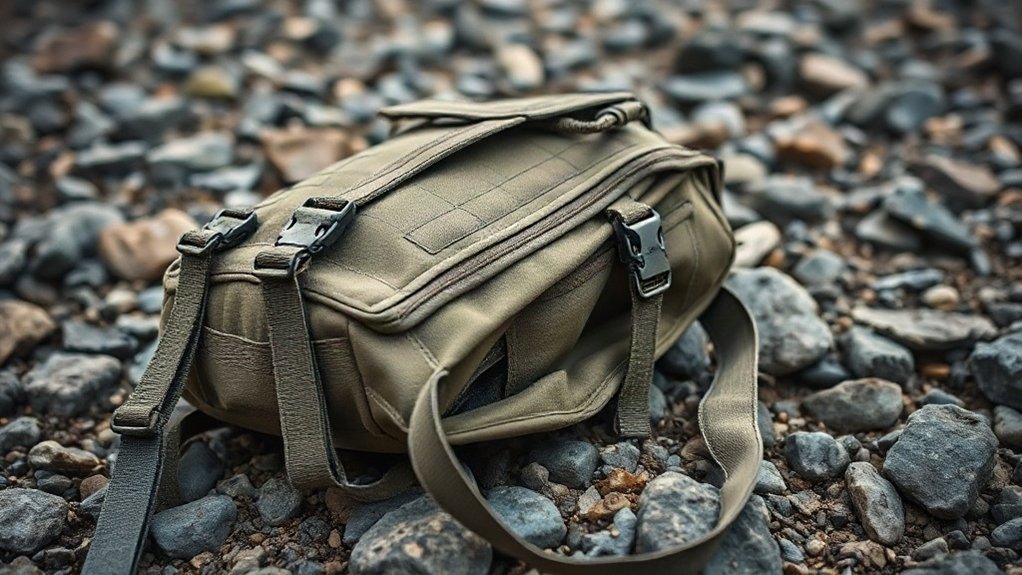
I find MOLLE backpack straps loosen mid-hike when shifting loads, poor fit, or changing layers and conditions reduce tension. First, center and snug the hip belt over your iliac crest, then tighten shoulder straps just enough to remove gaps. Set load lifters near a 45-degree angle and keep heavy gear close to your back. Pause on stable ground to readjust, then walk briefly to check the fit. I’ll cover more ways to keep your pack stable and comfortable.
Key Takeaways
- Straps loosen as shifting loads, walking movement, softened webbing, weather, sweat, or changing clothing alter pack tension.
- Poor fit or uneven weight distribution makes the pack bounce; center the hip belt over your iliac crest and keep heavy items close to your back.
- Tighten the hip belt first, then snug shoulder straps, set load lifters, and adjust the sternum strap without restricting comfort or breathing.
- Pause on stable ground, make small adjustments, and walk briefly to check stability; recheck after changing layers, rearranging gear, or reducing the load.
- Check torso and frame fit if straps repeatedly shift or cause pain; strength can aid stability but cannot replace a secure, well-fitted pack.
Why Do MOLLE Pack Straps Loosen?
MOLLE pack straps loosen when the load shifts with each step, often because it’s poorly balanced or the hip belt and shoulder straps aren’t fitted securely. I check whether the waist belt rests on my iliac crest; if it sits too high or low, the pack can bounce and pull other straps out of position. Shoulder straps should contact my shoulders without gaps, but overtightening can restrict hand circulation without stabilizing the load. Padded shoulder straps distribute pressure, yet they can’t compensate for poor fit. I also set load lifters at roughly a 45-degree angle: loose lifters let the pack flop, while overly tight ones distort its balance. As materials soften, clothing layers change, or food and water run low, the original fit may no longer suit the load. I account for those changes on longer outings.
How to Tighten MOLLE Straps Mid-Hike
When my MOLLE pack straps loosen mid-hike, I pause on stable ground and tighten them in small increments. To manage strap sag, I adjust the hip belt first, centering it on my iliac crest, then snug shoulder straps until gaps disappear. I aim to carry about 80% of the pack’s weight on my hips; I won’t tighten shoulder straps enough to affect hand circulation.
Next, I set load lifters at roughly a 45-degree angle and tighten them until the pack feels stable, not floppy. I adjust the sternum strap to keep shoulder straps from sliding outward, leaving room for comfortable breathing. That’s how to tighten molle straps mid-hike without restricting movement. After changing layers, getting wet, or hiking for a while, I recheck tension because straps and pack materials can stretch or soften. A proper torso measurement can help you set the harness within its adjustment range and keep the hip belt positioned correctly.
Check Your Pack’s Torso Fit
I measure from the prominent C7 vertebra at the base of my neck to the top of my iliac crest, then compare that length with the pack’s torso-size range. I check whether the pack has a fixed torso length or an adjustable shoulder harness, and set it to match when possible. If the fit causes neck, back, or hip pain—or the straps keep shifting—I reassess the torso length. Three-day assault packs may have fixed harnesses that fit only a limited range of torso lengths.
Measure Your Torso
Start by measuring your torso to check whether the pack’s frame fits. I find the C7 vertebra by tilting my head forward and locating the prominent bone at the base of my neck. From there, I measure down to the top of my iliac crest, the upper edge of my hip bones. My measurement is 17 inches; yours may differ, so use your own result.
Compare that measurement with the pack’s stated torso-size range. A fit within the range helps position the shoulder harness and load lifters for effective weight transfer, especially under a heavy load. Then check whether the pack uses an adjustable shoulder harness or a fixed torso length. I use those details to assess fit before a hike, so I can carry gear comfortably without restricting my movement on the trail.
Match Frame Length
Once you know your torso length, check that the pack’s frame matches it. Measure from C7, the prominent bone at the base of your neck when you tilt your head forward, to your iliac crest. Compare that figure with the manufacturer’s torso-size range, not just the pack’s overall capacity. For example, Emily’s measurement is 17 inches; the frame should accommodate that length. Check whether the pack uses an adjustable shoulder harness or a fixed torso length, and verify that its stated range suits you. An aluminum frame won’t compensate for a mismatch: a frame that’s too long or short can shift load support and contribute to neck, upper-back, hip, or lower-back pain. Reassess the fit on hikes, since layers, sweat, rain, and a lighter load can change how the pack sits.
Check Harness Adjustability
Check whether the shoulder harness adjusts to your torso or uses a fixed length. To check fit, I measure from C7, the prominent bone at the base of my neck, to the iliac crest. Emily’s measurement is 17 inches; yours may differ. I compare that number with the pack’s stated torso-size range to confirm its frame suits my body. If the harness adjusts, I set it to match my measurement before loading the pack. A fixed-length harness needs to fit within its intended range, so I don’t assume the straps will compensate for a mismatched frame. Poor torso fit can cause discomfort and shifting straps, especially during heavy load hiking. If I feel pain in my neck, upper back, hips, or lower back, I reassess the fit before relying on the tactical assault pack.
Match the Frame to Your Spine Length
How can you tell if a pack’s frame fits? I measure torso length, then compare it with the frame’s size range. To measure, find C7—the prominent bone at your neck’s base when you tilt your head forward—and measure down to your iliac crest. That number guides your rucksack choice and helps you move freely without unnecessary strain.
| Check | What to do |
|---|---|
| Torso length | Measure C7 to iliac crest |
| Frame length | Match it to your measurement |
| Size range | Check the model’s listed fit |
| Harness | Confirm adjustable or fixed |
For example, Emily measures 17 inches from C7 to her iliac crest. I’d check whether a pack’s frame fits that length. Some molle backpacks offer adjustable shoulder harnesses; others have fixed torso lengths. A mismatch can contribute to discomfort in your neck, upper back, hips, or lower back. Women and shorter hikers may need a pack with a suitable torso range and an adjustable harness for a more comfortable fit.
Lift and Put On Your Pack Safely
Before you put on a heavy pack, loosen its straps so you can position it without pulling against tight webbing. For a 30-pound tactical loadout, I use controlled lifting mechanics to reduce strain before the hike. I hold the pack by its sewn webbing with one hand and grip the opposite shoulder strap with the other. Keeping my back flat, I bump the pack onto my knee, then swing it around and guide one arm through the shoulder strap. I avoid jerking or twisting under the weight; those movements can strain my back or shoulders and make the pack harder to control. Once it’s on, I settle the load before tightening the straps. A correctly fitted hip belt helps transfer weight from your shoulders to your hips. This measured approach helps me put on a heavy pack safely and start moving without unnecessary effort or injury.
Position the Hip Belt on Your Iliac Crest
I locate my iliac crest—the upper edge of each hip bone—and center the hip belt over it. I bump the pack slightly upward before fastening the belt, then tighten it to hold position while my hips carry most of the load. I recheck the fit as I hike because movement, clothing layers, and load changes can shift the belt. Keeping heavy items close to your back helps maintain a balanced center of gravity.
Find Your Iliac Crest
To find your iliac crest, place your hands on your hips and feel for the top edge of your pelvic bones. I use this landmark to position the hip belt, so the pack’s weight transfers to my pelvis instead of pulling on my shoulders.
- Identify the firm ridge beneath your hands; that’s the iliac crest.
- Set the belt’s padded center over the ridge, not high on your waist or low on your hips.
- Bump the pack slightly upward, then fasten and tighten the belt so it settles into place.
- Aim to carry about 80% of the load on your hips; tighten shoulder straps only enough to keep the pack close.
Recheck fit as you move, change layers, or use supplies. A shifting load can change belt tension and comfort, so adjust when needed.
Center the Hip Belt
Once you’ve found your iliac crest, center the hip belt’s padded section over that ridge. Before I fasten it, I bump the patrol pack slightly upward so the belt can settle at the right height. This small lift helps the belt sit on the bony ridge, not above or below it.
I then secure the belt snugly around my hips. A correctly positioned belt transfers about 80% of the pack’s weight to my hips, reducing the load on my shoulders while keeping the pack stable. If the belt rides too high or low, the pack may shift and prompt repeated adjustments, limiting comfortable movement on the trail. I also check that attached gear and molle webbing don’t interfere with the belt’s centered position.
Tighten and Recheck
With the hip belt centered on your iliac crest, bump the pack slightly upward, then tighten the belt until it holds the pack securely without pinching. I use this fit to keep the load stable while moving freely, not to clamp the belt as hard as possible. My hips should carry about 80% of the pack’s weight; the shoulders steady the remaining load.
- Check that the belt’s upper edge rests on your hip bones.
- Tighten until the pack stays in place without discomfort.
- Recheck after walking, changing layers, or reducing the load.
- Adjust side compression straps if the load shifts inside.
A molle pack’s attachments can add or change weight distribution, so I reassess the fit as conditions change. Small adjustments during the hike can prevent the belt from loosening or creating pressure points. Don’t rely on shoulder straps alone to hold the pack.
Balance Pack Weight Between Hips and Shoulders
A well-fitted pack should carry about 80% of its weight on your hips and iliac crest, not your shoulders. I position the hip belt directly over the crest and secure it so the belt transfers the load to my hips. This helps me walk freely without relying on shoulder pressure for support.
I use the shoulder straps to close any gap at my shoulders, then set the load lifters near a 45-degree angle to stabilize the pack. I avoid pulling them so tightly that the pack shifts awkwardly. Excess tension can also impair hand circulation. On MOLLE packs, mil-spec webbing and bartack stitching can reinforce attachment points, but they can’t correct poor fit. A supportive internal frame helps keep a heavy load stable and reduces pack sag. As the load lightens or straps stretch, I recheck the balance and adjust the fit.
Tighten Shoulder Straps Without Overdoing It
I tighten each shoulder strap only until it removes slack and keeps the pack close, with no gap between the strap and my shoulder or trapezius. On a molle ii rucksack, I use the straps to stabilize, not suspend, the load. Too much tension can impair hand circulation and restrict comfortable movement. For field use, I check these points:
- Set the hip belt on my iliac crest so it carries about 80% of the load.
- Tighten each shoulder strap evenly until it contacts my shoulder without pressing hard.
- Check that the pack stays close while my shoulders and arms move freely.
- Recheck tension after walking, changing layers, or noticing softened straps.
Unlike many hiking packs, military-style packs may prioritize durable construction and MOLLE attachment options over a lightweight, streamlined design. If a strap feels restrictive, I ease it slightly and reassess. I adjust as conditions change, rather than locking in one setting for the entire hike.
Set Load Lifters at About 45 Degrees
I set each load lifter at about a 45-degree angle between the shoulder strap and pack to improve balance and stability. Tighten them until the pack feels steady, but ease off if they pull uncomfortably on your shoulders. Recheck the angle and tension as you hike, since movement or changing loads can affect the fit.
Aim for 45 Degrees
Set each load lifter at about a 45-degree angle between the shoulder strap and pack to help balance and stabilize the load. I use this as a starting point, not a rigid rule; pack design and fit can affect the angle. Check that the molle attachment straps and webbing don’t interfere with the lifters.
- Tighten each lifter until the pack sits close and secure against your back.
- Stop before the straps pull uncomfortably on your shoulders or restrict movement.
- Don’t leave lifters loose; a floppy pack can shift while you hike.
- Recheck angle and tension on the trail. Movement, added or removed layers, and a lighter load can change the fit.
Make small adjustments so you can move freely without sacrificing a secure fit.
Balance Pack Stability
To balance the pack, adjust the load lifters until they sit at about a 45-degree angle and hold the pack securely without pulling hard on your shoulders. I check the angle with the pack loaded and the hip belt positioned correctly; this helps transfer weight and limits sway without restricting movement. On a modular MOLLE pack, attachment placement across the PALS grid rows can change how the load sits, so reassess the lifters after rearranging gear. If the straps feel too loose, the pack may flop as you hike. I make small tension adjustments while moving, then check again when the load gets lighter or I add or remove a layer. Keep the pack stable and comfortable, with enough freedom to walk naturally over changing terrain. Don’t judge the fit by strap tension alone.
Avoid Over-Tightening
When load lifters sit at about a 45-degree angle, they can stabilize the pack without pulling the shoulder straps too hard. I set mine to hold the load close while preserving comfortable shoulder movement. Over-tightening can lift the pack awkwardly and increase strap pressure; leaving the lifters loose can let it shift as I hike.
- Put on the loaded pack and adjust the hip belt and shoulder straps first.
- Pull each load lifter until it forms an angle near 45 degrees.
- Tighten only enough to secure the pack; check that the shoulder straps aren’t being pulled excessively.
- Recheck tension when the load changes or straps soften.
This approach works with varied molle compatibility and helps a tactical edc backpack stay stable without restricting movement. I make small adjustments rather than locking the lifters down.
Recheck Your Pack Fit as Conditions Change
As conditions change on the trail, I recheck strap tension because movement, layers, sweat, and rain can change how a pack sits. I don’t assume the fit I set at the trailhead will hold all day. Webbing can stretch or soften, so I retighten loose straps as needed, without pulling them so tight that they restrict movement or circulation.
I keep the hip belt resting on my iliac crest and the shoulder straps snug. When food or water runs low, I adjust the pack to keep the remaining load balanced and stable. I also check whether items in the hydration sleeve or attached through PALS affect how the pack rides. Make small fit changes over time, then walk a short distance to confirm the pack stays comfortable and secure.
Build Strength for a More Stable Pack Fit
A stable pack fit depends partly on the strength and coordination of your hips, core, and upper back. Stronger muscles won’t repair loose webbing, but they can help you control a loaded pack and limit shifting as you move. I build stability with targeted work before carrying a bug out bag:
- Train your hips to steady your pelvis under load.
- Strengthen your core to manage movement over uneven ground.
- Build upper-back strength to support a consistent shoulder-strap fit.
- Practice coordinated, stable movements with a backpackers’ boot camp program.
I focus on control as well as strength, since these muscle groups work together on the trail. As your stability improves, reassess strap length and pack fit; your previous settings may no longer feel right. A secure, comfortable fit helps you move freely without relying on strength alone.
Frequently Asked Questions
How to Stop Backpack Straps From Loosening?
I stop backpack straps from loosening by fitting the pack correctly, then checking adjustments as I walk. I snug the hip belt over my iliac crest so my hips carry most of the load. I tighten shoulder straps only to remove gaps, set load lifters near a 45-degree angle, and fasten the sternum strap comfortably. I recheck everything after the load shifts, layers change, or straps stretch. Don’t overtighten; it can restrict circulation.
What Is the 20% Rule for Backpacking?
The 20% rule suggests keeping your loaded backpack at or below roughly one-fifth of your body weight. I treat it as a planning guide, not a universal safety limit. If you weigh 150 pounds, aim for a pack around 30 pounds or less; weigh it with water, food, and gear included. Fit and conditioning matter, too. I adjust a well-fitted pack to carry most weight on my hips—about 80%.
How to Deal With Loose Backpack Straps?
I deal with loose backpack straps by adjusting the fit in sequence. First, I seat the hip belt on my iliac crest so it carries most of the pack’s weight. Then I tighten shoulder straps only to remove gaps, set load lifters near 45 degrees, and snug the sternum strap without restricting breathing. I recheck adjustments as I hike, change layers, or lighten the load, since straps and materials can shift.
What Is Backpack Syndrome?
Backpack syndrome means pain or discomfort from carrying a poorly fitted or overly heavy pack; I’d treat persistent symptoms as a signal to reassess your setup. A poorly positioned hip belt can leave your shoulders carrying far more than their share, increasing strain. I’d check torso length, then place the belt over your iliac crest so it supports about 80% of the load. Keep shoulder straps snug, not circulation-restricting, and adjust as your load or clothing changes.
Conclusion
I stop MOLLE straps from loosening by checking the fit, securing each adjustment, and rechecking after the load shifts. I match the frame to my torso, lift the pack safely, and tighten shoulder straps without restricting movement. I set load lifters near 45 degrees, then adjust for changing terrain or clothing. A stable pack shouldn’t bounce, pinch, or pull. Check before the hike, check during the hike, and build the strength to carry the load with control.
References
Backpack Safety, https://orthoinfo.aaos.org/en/staying-healthy/backpack-safety/
How to Fit a Backpack, https://www.rei.com/learn/expert-advice/backpack-fit.html