How Do You Pick Military-Style Backpacks That Fit Your Torso Length?
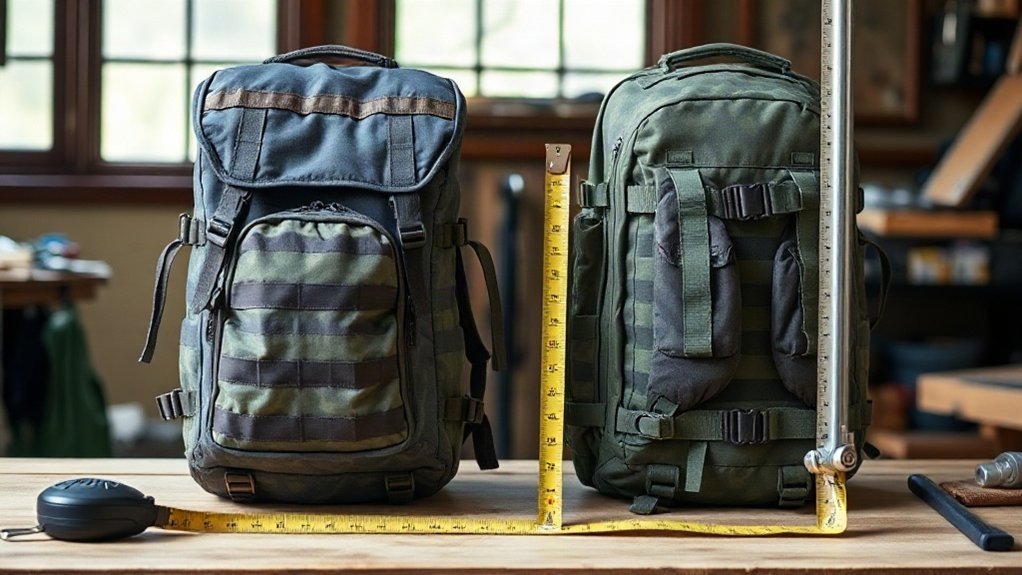
I measure from C7 at the base of my neck to the level of my hip crests, then compare that torso length with the specific pack’s sizing chart. I don’t choose by height or clothing size. If I’m between sizes, I check harness adjustability and test both packs with a realistic load, choosing the one that stays stable without gaps or pressure. I position the hip belt over my hip bones, adjust the straps, and walk around to confirm the fit. Further checks can help refine each adjustment.
Key Takeaways
- Measure from C7 at the base of your neck to an imaginary line connecting the tops of your iliac crests.
- Compare your torso measurement with the sizing chart for the specific backpack model; don’t choose by height or clothing size.
- If you’re between sizes, check harness adjustability and test both sizes with a realistic load before deciding.
- Fit the hip belt over your iliac crests, tighten it first, then adjust the harness and shoulder straps.
- Walk, bend, and turn with the loaded pack; choose a size that stays stable without gaps, pressure, or restricted movement.
Measure Your Torso, Not Your Height
Measure your torso, not your height or T-shirt size: people of the same height can need different pack sizes. I use torso length to choose a pack because the right fit helps the hip belt carry weight securely and lets the shoulder harness sit correctly. To measure, stand straight and locate C7, the prominent vertebra at the base of your neck. Find the line across your back level with the tops of your hip bones. Use a soft tape measure or non-stretching string to measure between those points. Then compare the result with the sizing chart for your specific pack; ranges vary by model. If you fall between sizes, consider sizing up when the pack offers torso-length adjustment, or ask for an in-store fitting. A secure fit supports comfortable, unrestricted movement on the trail. The right frame size helps position the load so your hips carry more weight than your shoulders.
Measure From Your Hip Crests to C7
I find my hip crests by placing a hand on each side and bending, then picture a line across my back between them. I tilt my head forward to locate C7, the prominent vertebra at the base of my neck. Standing straight, I measure from C7 to that line with a soft tape measure or non-stretching string. Compare this measurement with a pack’s torso length range to help determine whether its harness will fit you.
Find Your Hip Crests
To get an accurate torso length, find your hip crests—the top edges of your hip bones—by placing your hands on your sides and bending slightly. I use these landmarks to set a reliable lower endpoint before choosing a tactical backpack. Feel the hard ridge beneath each hand, then imagine a level line connecting the tops of both crests across the middle of your back. That line—not the waistband of your pants—anchors the measurement. A correctly sized pack places its padded hip belt over the hip bones, helping transfer weight from your shoulders for stable load distribution on the move. Keep your stance natural and avoid shifting your hands as you identify the ridges. Once you’ve pictured the line, hold that reference; you’ll use it to measure torso length accurately.
Locate Your C7 Vertebra
Stand straight and tilt your head forward to locate C7, the prominent vertebra at the base of your neck. I use this fixed landmark when checking whether military-style backpacks can support your frame without restricting movement.
Keep your earlier hip-crest reference in mind: the lower endpoint is an imaginary level line connecting the tops of both iliac crests around your back. Use a soft tape measure or non-stretching string between that line and C7. Keep it against your back rather than letting it follow outward curves. This reading helps you assess rucksack fit for a heavy load carry.
| Checkpoint | Practical cue |
|---|---|
| Upper landmark | C7 at neck base |
| Lower landmark | Level line across hip crests |
| Tool and path | Soft tape; follow back |
A consistent setup gives you a reliable fit reference and more freedom to move.
Measure Torso Length
Once you’ve located both landmarks, measure from C7 down to the imaginary line across your back that connects the tops of your hip crests. I find the crests by placing a hand on each side and bending slightly; then I picture the line joining them around my back. Lower your chin to your chest to identify C7, the prominent vertebra at your neck’s base. Use a soft tape measure, or hold non-stretching string along the same path and measure it afterward. Keep the tape aligned with your spine rather than measuring around your body. Record the result, then compare it with the specific military rucksack’s torso-length chart; sizing ranges vary by pack. A correct fit lets you adjust load lifter straps without molle webbing or gear shifting your measurement.
Compare Your Measurement With the Pack Chart
I compare my C7-to-hip-crest measurement with the pack maker’s chart, not with my height or clothing size. I check the model’s stated range and, if I’m between sizes, confirm that an adjustable torso length covers my measurement. If the chart’s unclear or I’m near a cutoff, I ask a store fitter to verify the fit. Some military-style packs offer adjustable harnesses that help accommodate women and smaller frames.
Measure Your Torso
To measure your torso, find the top of your hip bones, or iliac crests, by placing a hand on your side and bending; imagine a line between them across your back. I use this line as the lower endpoint.
- Lower your chin to your chest to locate C7, the prominent vertebra at your neck’s base.
- Place a soft tape measure or non-stretching string at C7.
- Measure down your back to the imagined line.
- Keep the tape or string aligned with your spine; don’t measure around your body.
- Record the result so you can compare it with the specific pack’s chart.
Choose by torso length, not height or clothing size. Pack ranges vary. If your measurement falls between sizes, I’d consider sizing up when torso adjustment is available. A correct fit helps the hip belt, lumbar support pad, and sternum strap work with your loadout, while keeping your movement unrestricted.
Check the Pack Chart
Compare your C7-to-hip-bone measurement with the sizing chart for that specific backpack, since ranges vary by model and brand. I choose by torso length, not height or T-shirt size: two people with the same height may need different sizes. Check the chart for each tactical assault pack or daysack you’re considering; a hydration bladder sleeve doesn’t determine fit.
| Check | What to do |
|---|---|
| Measurement | Match it to the listed torso range |
| Between sizes | Check whether torso length adjusts |
| Unclear chart | Ask for an in-store fitting |
If your measurement falls between sizes, sizing up may work when the pack offers adjustable torso length. I’d confirm that option before choosing. When the chart or size range isn’t clear, try the pack in store to verify your chart-based choice and keep your load-carrying setup suited to independent travel.
Account for Adjustments
Once you’ve measured from C7 to the line level with the tops of your iliac crests, check that measurement against the specific pack’s torso-length chart. I never rely on height or shirt size: a 5’8″ hiker with a short torso may need a small. Read the chart’s actual range, especially for combined sizes.
- Match your measurement to the pack’s listed torso range.
- Treat each brand’s sizing labels as pack-specific.
- Between sizes? Consider sizing up if the torso adjusts.
- Set the torso length, then check shoulder and hip contact.
- Secure the load with compression straps; inspect aluminum frame stays.
I fine-tune the fit under realistic weight before heading out. A well-adjusted tactical pack should move with you, not restrict your stride. Choose the chart range that gives you room to adjust while keeping the load stable, so you can travel freely over varied terrain.
Choose a Military-Style Pack That Fits
Choose a military-style pack by torso length, not height or T-shirt size, because sizing varies by model. I measure from C7, the prominent vertebra at my neck’s base, to the line across my back at the tops of my hip bones. Then I compare that torso length with the pack’s sizing chart.
| Fit check | What I look for |
|---|---|
| Sizing chart | My measured torso range |
| Harness | Fits my frame |
| Hip belt | Rests atop hip bones |
| Shoulder straps | Lie evenly |
| Contact | No gaps, pinching, or slipping |
I try the pack on when possible, loading its MOLLE webbing as I expect to use it. I check that the belt stays positioned and straps remain secure as I move. A properly fitted pack supports freer movement without relying on height-based guesses. Adjustable harnesses can help shorter frames achieve a more comfortable fit.
Size Up or Down When You’re Between Sizes
Between sizes? I compare my measured torso length with the specific military-style backpack’s sizing chart; ranges vary by model. Sizing up can work if the pack’s torso adjustment accommodates my frame, but I verify the fit rather than relying on the label.
Measure your torso against the model’s chart, then test both sizes to find the best fit.
- I check that the hip belt rests over my iliac crest.
- I make sure the shoulder straps contact my shoulders without gaps.
- I try both sizes with weight inside.
- I walk in each pack to compare comfort and stability.
- I choose the size that fits and carries well, not one based on height or clothing size.
A secure fit supports control on the move and helps me use the pack’s durability without fighting poor load transfer. If the larger option shifts or leaves gaps, I choose the smaller size instead. A well-fitted hip belt helps transfer the load off my shoulders and onto my hips, reducing shoulder pressure.
Pack Your Gear Before Testing the Fit
Before I judge a military-style backpack’s fit, I load it with the gear I expect to carry; weight and balance affect how it sits on my torso. I place soft, light items, such as a sleeping bag or tent section, at the bottom. Dense gear goes in the middle, close to my back, while lighter items ride near the top. I keep rainwear and snacks accessible, so I can reach them without unpacking. Packing cubes help me organize a bug out bag, but I still balance the contents from side to side. Avoid treating the pack like a footlocker packing exercise: uneven weight can distort the fit and pull against my body. Compression straps can help stabilize the load and keep gear from shifting as I move. Before I put it on, I loosen the hip belt, shoulder straps, load lifters, and sternum strap.
Position the Hip Belt Over Your Hip Bones
I position the hip belt over the top of my iliac crest, the ridge of my hip bones, rather than low on my hips. This placement helps the belt carry the pack’s weight while keeping my movement free. I check the fit this way:
- Center the buckle near my belly button.
- Leave about an inch of adjustment space on each side.
- Tighten the hip belt before snugging the shoulder straps.
- Keep the belt level and secure as I walk.
- Check for pinching or slipping during movement.
A correct position matters when I assess torso length: the belt should rest on my hip bones, not ride below them. If it won’t fit comfortably, I ask whether the pack accepts a compatible extender or a swappable belt. That lets me choose a fit that supports the load without restricting my stride. For heavy loads, a well-fitted belt works with the pack’s frame and stays to help prevent sagging.
Adjust the Straps and Load Lifters
Once the hip belt sits over your hip bones, I loosen the shoulder straps, load lifters, and sternum strap to start from a neutral fit. Then I pull the shoulder straps down and back until they feel snug, with padding extending at least an inch below my armpits. I tighten the load lifters to draw the pack closer to my back and direct weight toward my hips. Aim for roughly a 45-degree angle between the lifters and shoulder straps. Adjust the webbing evenly; don’t crank it tight or restrict your movement. Set the sternum strap across your mid-upper chest, where it stabilizes the shoulder straps without carrying weight or pulling them inward. These steps apply whether I’m fitting an assault pack or a larger rucksack, so I can carry gear securely and move freely.
Walk Around to Check Comfort and Fit
With the straps set, I load the pack with representative gear and walk around to check its balance and fit under weight. An empty military-style pack can hide pressure points, so test it with the load and layers you expect on the trail. Make small adjustments as you move:
Load your pack as you would on the trail, then walk around to check its balance, fit, and pressure points.
- Center the hip belt over your hip bones and snug it first.
- Set shoulder straps so they contact both shoulders evenly.
- Adjust load lifters to stabilize the pack without pulling hard.
- Check for gaps, slipping, neck pinching, or shifting.
- Aim to carry about 80% of the weight on your hips and 20% on your shoulders.
Walk, bend, and turn; your pack should stay balanced and move with you. If discomfort develops, pause and fine-tune the straps before committing to a longer route. A comfortable fit preserves energy and freedom.
Frequently Asked Questions
How to Find Torso Length for Backpack?
To find your backpack torso length, I measure from C7—the prominent vertebra at the base of your neck—to the level of your iliac crests. First, I locate those hip bones by placing my hands on my sides and bending, then imagine a level line across my back. I stand straight and use a soft tape measure or non-stretching string. Finally, I compare the result with the pack’s sizing chart; I’d get an in-store fitting if I’m between sizes.
What Is the Best Military-Style Backpack?
I’d choose the best military-style backpack by fit and comfort, not by brand or “men’s” or “women’s” labels. Measure your torso from the C7 vertebra to the line level with your hip bones, then check the pack’s sizing chart; height alone won’t tell you the right size. Load it, place the hip belt over your hip bones, and adjust the straps. I’d pick the pack that stays balanced and lets your hips carry most of the load.
What Are Military Style Backpacks Called?
I call military-style backpacks tactical backpacks or military packs. Larger versions built to carry gear on extended trips are usually called rucksacks, or simply rucks. If you want a pack with attachment webbing, look for a MOLLE or modular tactical backpack. Names vary by design and intended use, so I’d check the listed features—such as capacity, materials, and attachment system—rather than relying on the label alone when choosing your pack.
What Are the Standard Dimensions of a Military Backpack?
There aren’t standard dimensions for a military backpack; I’d expect measurements to vary by model, capacity, and intended use. Published height, width, and depth describe the pack body, not the torso length it fits. I’d check the manufacturer’s sizing chart and torso-length range, since size labels aren’t consistent. To find your torso length, measure from C7 at your neck’s base to the line across your back at the top of your hip bones. Also check adjustability.
Conclusion
I choose a military-style backpack by matching its size to my torso measurement, not my height. I measure from my hip crests to C7, compare the result with the manufacturer’s chart, then test the pack with my actual gear. I set the hip belt over my hip bones and adjust the shoulder straps and load lifters. A short walk helps me spot pressure or shifting before I commit. Getting the fit right from the start saves a lot of grief on the trail.
References
Backpack Safety – OrthoInfo, https://orthoinfo.aaos.org/en/staying-healthy/backpack-safety/
Backpack Safety, https://www.healthychildren.org/English/health-issues/injuries-emergencies/Pages/Backpack-Safety.aspx
Backpack Safety, https://www.stanfordchildrens.org/en/topic/default?id=backpack-safety-90-P01957