How Can Beginners Choose Fixed-Blade Survival Knives Without Overspending?
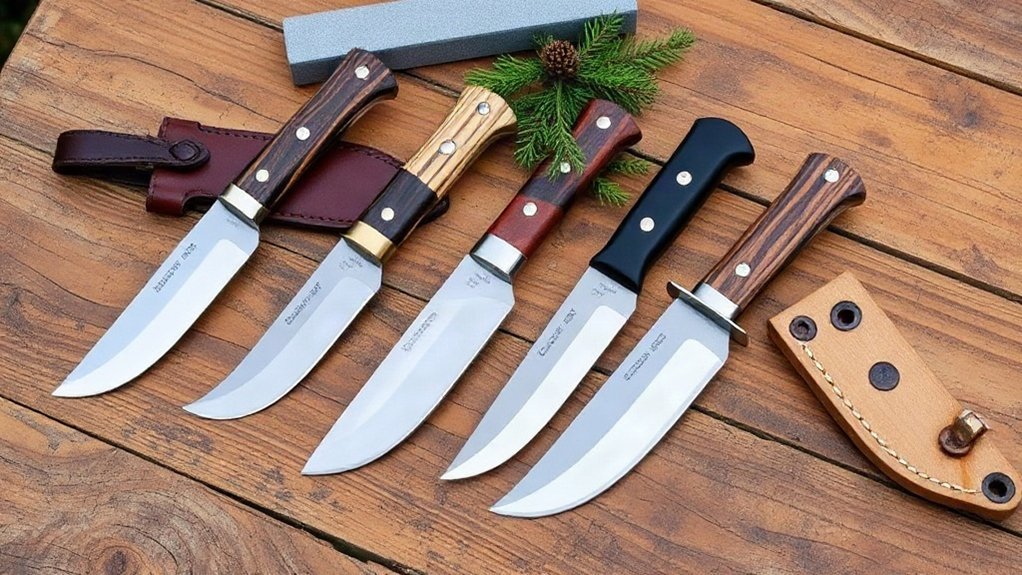
I’d match a fixed-blade knife to your trips, then set a firm budget that includes a secure sheath and basic sharpener. For most beginners, a manageable 4–5-inch blade with sturdy construction, a comfortable grip, and an easy-to-maintain grind handles routine camp chores without costly extras. Choose stainless steel for lower upkeep or carbon steel if you’re willing to dry and oil it. Check carry laws before buying, and keep going to compare practical options and care tips.
Key Takeaways
- Set a firm budget that includes the knife, a secure sheath, and a basic sharpening tool.
- Choose a manageable 4–5-inch blade for versatile camp chores; avoid oversized knives and unnecessary extras.
- Prioritize sturdy construction, a comfortable textured grip, and a maintainable grind over tactical styling or premium steel.
- Compare steel maintenance, sheath security, and price; consider affordable options like the Ganzo G806, G807WB, and G808.
- Practice sharpening, clean and oil the blade as needed, and check current local carry laws before buying.
Match a Survival Knife to Your Trips
The right knife depends on where and how you travel. I start with trip distance: for day hikes and light camping, a compact fixed blade with a 3–4-inch edge handles food prep, cord cutting, and carving without weighing me down. For general camping and bushcraft, I prefer 4–6 inches; that range gives me room for feather sticks, cordage, and light batoning while staying manageable.
Terrain demands matter, too. In dense forests, a larger blade can help with camp tasks, while a smaller knife is usually easier to carry and sufficient in open country. If I’m heading somewhere remote by vehicle, I may bring a heavier or longer knife since space and weight matter less—but it won’t replace an axe or saw for heavy wood processing.
I also match the carry system to the outing. A comfortable belt sheath suits regular walking; on longer hikes, I choose a compact, lightweight knife that sits securely in my pack.
Set Your Budget Before You Shop
Before comparing knives, I set a firm price ceiling so premium features don’t push me into spending more than I need. That limit gives me room to choose freely without letting flashy claims dictate my purchase. I also reserve money for hidden costs: a secure sheath and a basic sharpening tool. Both support safe carry and keep the knife useful over time, so I compare the combined price rather than the knife alone.
As a beginner, I don’t need exotic steel or decorative extras to learn. I look for an affordable option from a reputable maker, with sound construction, a manageable 4–5-inch blade, and a grind I can sharpen. I avoid unknown brands and unsupported “military grade” claims; neither promises quality. I consider care costs, too: carbon steel suits me if I’ll maintain it, while stainless steel may cost more but needs less upkeep. A clear budget helps me spend on practical needs, not features I won’t use.
Choose a Fixed-Blade Survival Knife
For outdoor reliability, I choose a fixed blade with a full tang or another sturdy, well-built tang. A dependable Blade tang helps a knife handle demanding camp chores, giving you confidence to work independently without paying for features you don’t need. For a first knife, I’d look for a blade around 4–5 inches. That length balances carving and food preparation with light batoning and fire prep.
Consider grind selection, too. I like a Scandi grind for beginners because it’s straightforward to sharpen in the field. A drop-point blade also suits general cutting and everyday camp tasks. Match the steel to your care habits: stainless steel resists corrosion, while carbon steel sharpens easily but needs drying and rust protection.
Before buying, hold the knife and check that its handle feels secure in your grip. Make sure the sheath retains the knife safely and rides comfortably where you plan to carry it. Choose practical reliability, not hype.
Pick the Right Blade Length and Shape
I’d start with a 4–5-inch blade for a useful mix of carving, food prep, and light woodwork. Choose a drop-point or clip-point shape for versatile campsite cutting. If you need more reach, remember that longer blades add weight and sacrifice some control.
Match Length to Tasks
Choose blade length by the work you expect to do: a 4–5-inch blade gives a beginner useful reach for camp chores while staying manageable for carving and food prep. I match blade length to task demands, so you can carry one practical tool without paying for unnecessary bulk. Use this guide:
| Blade length | Typical use |
|---|---|
| 3–4 inches | Hiking, food, carving |
| 4–5 inches | Camp chores, detail work |
| 4–6 inches | Cord, carving, light batoning |
| 7 inches or longer | Chopping, with extra weight |
For a first knife, I’d favor 4–5 inches; it balances control and reach. A 3–4-inch blade suits light loads but can limit heavier woodwork. Long blades add weight and hinder fine tasks. For heavy processing, I’d choose an axe or saw instead, freeing your knife for everyday camp jobs.
Choose a Practical Shape
Which blade shape and length make the most sense? I’d start with a 4–5-inch blade: it gives you control for carving and food prep, plus enough reach for light batoning and fire preparation. A 4–6-inch knife handles most camp and survival jobs, from cutting cordage and making feather sticks to basic shelter work.
For a practical shape, I’d choose a Drop Point. Its versatile edge works well for cutting, carving, and preparing food. A Clip Point is another beginner-friendly option. Think about how you’ll carry your knife, too: a compact 3–4-inch blade packs easily for light hikes, while a 4–6-inch blade offers more capability around camp. Unless you specifically need extra chopping reach, I’d skip blades 7 inches or longer. They add weight and make fine tasks less convenient, limiting the freedom a useful knife should offer.
Balance Reach and Control
For a beginner, a 4–5-inch blade balances reach with control for carving, food prep, and light camp work. I’d start here: it’s versatile without weighing down your pack or limiting your freedom outdoors. A drop-point or clip-point shape handles general cutting, carving, and meal prep well.
| Blade length | Best fit |
|---|---|
| 3–4 inches | Hiking, food prep, detailed carving |
| 4–6 inches | Feather sticks, cordage, light batoning |
| 7 inches or longer | Heavier chopping; more weight |
A shorter blade offers grip control for precise tasks, but gives you less Blade reach for heavier work. A 4–6-inch option adds reach for fire preparation while staying manageable. I’d avoid a 7-inch-plus blade unless chopping matters most; its extra weight makes fine work less convenient. Choose the length that suits your trips, not the biggest blade on display.
Compare Survival Knife Steel and Upkeep
If you camp in wet or humid conditions, stainless steel can save you rust upkeep, but you’ll still need to clean and dry the blade after use. I’d choose it when less Steel corrosion care gives me more freedom outdoors. Some stainless steels, though, can be harder to sharpen.
Carbon steel may suit you better if sharpening ease and reliable ferro-rod sparks matter. It can hold an edge well, but I dry it carefully and apply a light coat of mineral or food-safe oil to guard against rust. Either way, match edge retention to the upkeep you’ll actually do.
I wouldn’t pay extra just for an exotic steel name. Heat treatment and blade geometry matter, and you should be able to sharpen the blade with a basic whetstone or guided sharpener. To keep costs down, I’d pick reputable, maintainable steel and touch up the edge before it gets dull. That practical choice beats buying a premium blade you won’t maintain.
Check the Handle and Sheath
A secure, comfortable handle matters as much as the blade, especially when your hands are wet or gloved. I look for enough texture to maintain a Wet grip without making the knife uncomfortable during extended use. Micarta, G-10, rubber composite, and textured hardwood can all work well. Avoid slick or blocky shapes that hinder controlled carving. The handle should fit your hand and give you control over firm cuts and lighter detail work, so you can work confidently without fighting your tool.
Next, I check the sheath. Leather and Kydex are practical choices if they protect the blade and offer dependable sheath retention. I want the knife to stay secure during movement, yet draw and re-sheath safely when needed. Check that the sheath attaches comfortably to your belt or pack and suits how you carry gear. If you’re left-handed, make sure it supports a comfortable, accessible draw. These checks help you choose a knife that feels reliable on the trail and gives you freedom to move.
Skip Costly Survival Knife Gimmicks
I’d prioritize dependable construction, a comfortable grip, a secure sheath, and steel you can sharpen over tactical styling or flashy claims. For most camp chores, a manageable 4–6-inch blade beats an oversized knife you’ll rarely need. I’d skip costly extras and choose a well-made budget knife you can maintain and use safely.
Prioritize Practical Features
When you’re comparing affordable survival knives, prioritize solid construction over flashy claims: look for a full tang or well-built skeleton tang and reliable heat treatment, not a “military grade” label or exotic steel name. I avoid a weak Rat tail tang for demanding camp work.
For a beginner, a 4–5-inch blade balances control, portability, and light batoning; 4–6 inches covers most camp tasks. Choose a manageable Scandi or flat sharpenable grind that you can maintain with a basic whetstone. Check that the handle stays secure when wet, and that the sheath holds safely while fitting your belt or pack. Match steel to your care habits: stainless needs less rust prevention, while carbon steel sharpens easily but needs drying and occasional oiling. These practical choices leave you free to focus on useful skills, not costly extras.
Ignore Tactical Marketing
Although tactical styling can make a knife look capable, it doesn’t prove quality. I look past Combat aesthetics and Marketing claims, including “military grade” labels, to judge what matters in camp. You can choose freely without paying for features that don’t improve performance:
- Check that the fixed blade feels solid, the grip stays comfortable, and the sheath holds securely.
- Compare steel by corrosion resistance, edge retention, and ease of sharpening—not impressive names or unsupported promises.
- Skip costly coatings, decorative details, and add-ons unless they improve cutting, safe carry, or maintenance.
- Favor sound design and an affordable price over a premium image.
Good technique and regular sharpening matter more than tactical branding. I’d rather spend less on a dependable knife and keep control of my budget than buy a look or claim.
Avoid Oversized Blades
A longer blade may look more capable, but most beginners will find a 4–5-inch fixed blade easier to control for carving, food prep, and other camp chores. I’d choose a 4–6-inch blade for enough reach without sacrificing precise carving or compact carry. Blades of 7 inches or more add weight and feel clumsy during fine work, so I’d buy one only if I regularly needed extra chopping power.
I’d also skip costly exotic steels, tactical finishes, and decorative survival gimmicks. A practical knife with reliable construction, a secure handle, and a dependable sheath gives you more freedom in camp than flashy features do. Choose steel you can maintain and a blade suited to cutting. I wouldn’t expect any knife to replace an axe, pry bar, or shovel; use the right tool for each job.
Compare Budget Ganzo Survival Knives by Use
If you want a light knife for hikes and routine camp chores, I’d start with the Ganzo G806: its 3.9-inch 8Cr14 stainless blade, PP+TPR handle, and included sheath make it a practical budget choice. To choose confidently, I’d match each model to your plans:
- For day hikes and basic camp jobs, the G806 keeps carry simple and affordable without taking up much room.
- In a Ganzo G806 vs G807WB comparison, I’d favor the G807WB for more substantial camping or bushcraft, but check its size and weight before buying.
- For varied outdoor chores, the G808 task comparison comes down to its specifications and price against the G806 and G807WB.
- In wet or humid weather, listed stainless steels such as 8Cr14, 8Cr13MoV, 9Cr14MoV, and 440C can resist corrosion. I’d still compare grip, sheath security, and blade geometry, then pick the best fit for your budget and freedom to roam.
Learn to Sharpen and Care for Your Knife
I sharpen my knife before it gets dull, since regular touch-ups are easier than restoring a neglected edge. After each outing, I clean and thoroughly dry the blade, then apply a light coat of oil to help prevent rust. I’ll show you how to make these simple habits part of your knife care routine.
Sharpen Before It Dulls
Sharpen your knife before it becomes noticeably dull; maintaining a working edge is easier than restoring a badly dulled one. I treat edge maintenance as a small habit that keeps me prepared and independent outdoors. With regular sharpening practice, you won’t have to struggle with a neglected blade when a task matters.
- Learn on a basic whetstone or guided sharpener; either can help you build steady, repeatable technique.
- Choose a grind that’s simple to maintain. I like a Scandi grind because its bevel makes field sharpening straightforward.
- Test the edge carefully after sharpening, and practice before you depend on the knife for outdoor work.
- Keep the knife sharp in its sheath, so it’s ready when you need it.
You don’t need expensive gear or expert skills. A little practice helps you keep control and confidence wherever the trail leads.
Clean, Dry, and Oil
After each outing, I clean off dirt and food residue, dry the blade thoroughly, and apply a light coat of oil—especially on carbon steel, which can rust if neglected. This simple post use cleaning routine supports corrosion prevention and helps keep my knife ready for the next trip. I use mineral or food-safe oil, applying just enough to protect the steel. Stainless steel resists corrosion better, but I still clean and dry it after every use; no material benefits from neglect.
I also inspect the handle, fasteners, and sheath for wear, then store the clean, dry knife securely in its sheath. With basic care, I can rely on an affordable fixed blade without letting upkeep become a burden. Regular maintenance preserves my freedom to head outdoors with dependable gear, rather than replacing a knife too soon.
Check Local Knife Carry Laws
Before buying a fixed-blade survival knife, I check current local laws: rules may limit blade length or restrict carry, and they can differ for a knife worn on a belt, stored in a backpack or vehicle, or taken into certain places. A little research helps me choose responsibly without paying for a knife I can’t legally carry.
I verify four points before I buy:
- Blade limits: I check whether my jurisdiction sets a maximum blade length or restricts fixed blades.
- Carry method: I confirm whether rules differ for open or concealed carry, including a sheathed knife on my belt, in a backpack, or in a vehicle.
- Age and purpose: I look up Legal age limits and any rules about permitted purposes; a sheath doesn’t automatically make carry lawful.
- Where I can go: I check restricted locations, including schools and public buildings, before bringing a knife there.
I rely on current official guidance, since laws vary and change. Knowing the rules protects my freedom to choose and carry gear responsibly.
Frequently Asked Questions
What Is the Best Fixed Blade Knife for Survival?
I’d choose a reputable, budget-friendly fixed blade with a full tang and a 4–5-inch blade. That size gives you control for carving and food prep, plus enough reach for light batoning. Look for a Scandi grind, beginner handle ergonomics, and a secure sheath. Pick stainless steel for wet conditions, or carbon steel if you’ll dry and oil it. I’d skip flashy upgrades and learn to sharpen and maintain your knife.
What Is the Holy Trinity of Knives?
I call the “holy trinity” three outdoor blades: a small knife for precise cutting, a mid-sized fixed blade for general camp work, and a larger chopper, such as a hatchet or machete, for heavy wood processing. I’d match Knife Steel Types and Handle Materials to your tasks, comfort, and maintenance needs. You don’t need all three at once; I’d start with one reliable 4–5-inch knife and add tools only when your adventures call for them.
What Fixed Blade Do Navy SEALS Use?
There’s no single fixed blade every Navy SEAL uses. I picture SEAL knife selection as a trail with several routes: mission, unit, and personal preference guide each choice. The information here doesn’t name an official standard model, so I’d check reliable sources before trusting specific claims. Military knife standards don’t make “military grade” automatically superior. For your own outdoor use, I’d favor sound construction, a secure sheath, easy maintenance, and lawful, safe carry.
What Is the Best Blade Length for a Survival Knife?
I recommend a 4–6-inch blade for most survival knives; it balances cutting power and portability across common camp tasks. For your first knife, I’d start with 4–5 inches for batoning, fire prep, and detail work. Choose 3–4 inches if you value light carry, control, and food prep, or 7 inches and up for chopping. Choosing blade length for different survival tasks means matching your knife to what you’ll actually do—and carry.
Conclusion
I choose a survival knife by matching it to my trips, setting a firm budget, and prioritizing a sturdy fixed blade I can maintain. I compare blade size, steel, and practical features rather than paying extra for gimmicks. A good budget Ganzo may suit your needs, but no knife replaces safe handling, regular sharpening, and checking local carry laws. Remember, “the best tool is the one you know how to use.” Buy thoughtfully, practice safely, and let your knife serve your adventures.