How Do Military-Style Knives Handle Demanding Outdoor Tasks?
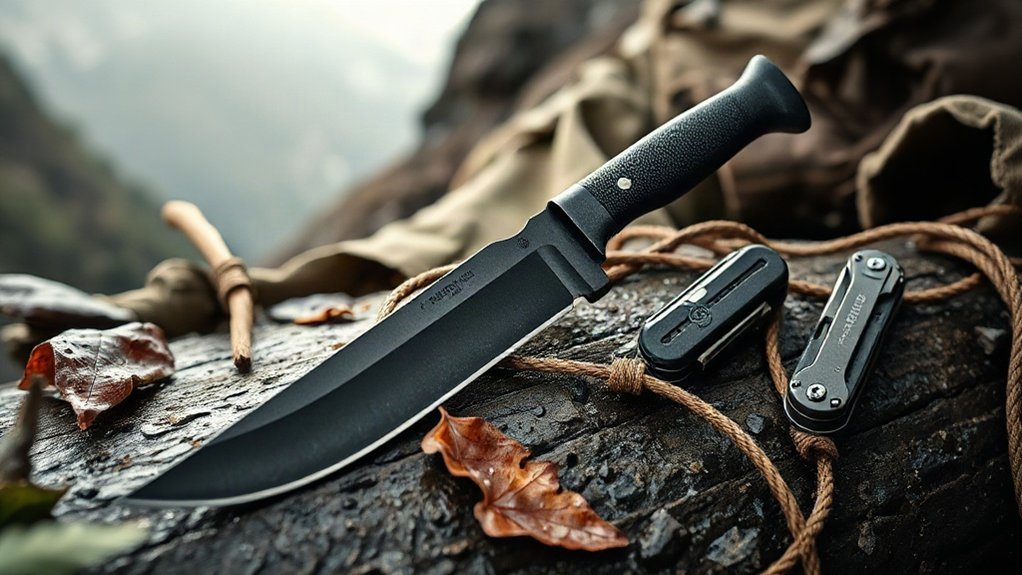
I choose a military-style knife for outdoor tasks by matching its blade, weight, grip, and sheath to the work. A sturdy 4–5-inch full-tang blade handles carving, camp repairs, food prep, and small-kindling batoning without excessive bulk. I keep the blade sharp, use a separate saw for larger cuts, and avoid twisting a stuck knife. Carbon steel needs prompt drying and light oiling, while a secure, comfortable sheath makes carry easier. The right details make each task safer and more manageable.
Key Takeaways
- Choose a full-tang fixed blade suited to the task; 4–5-inch blades balance camp utility, control, and carry comfort.
- Thick, sturdy blades handle small-kindling batoning, but use a saw for larger branches and an axe for heavy chopping.
- Sharp, plain edges excel at carving, food preparation, and repairs; a square spine can scrape tinder or strike a ferro rod.
- Secure, textured grips and a well-fitting sheath help maintain control and comfort in wet conditions and during movement.
- Clean and dry non-stainless blades promptly, then apply a thin coat of oil to help prevent rust.
What Can a Military-Style Knife Do Outdoors?
A sturdy military-style fixed blade can handle many light outdoor tasks, from cutting rope and fabric to preparing food and making camp repairs. I like having one dependable tool when I’m moving freely outdoors, but I match each task to the blade’s limits.
With care, I can baton small, straight-grained wood for kindling. I avoid knots, never twist the blade, and leave large logs to an axe or folding saw. A sharp 4–5-inch blade can carve shelter notches and feather sticks; a shorter blade often gives me better control for detail. If the spine is square and exposed, I can scrape tinder or strike a ferro rod. A rounded or coated spine calls for a separate striker.
Serrations can cut fibrous material, while a plain edge handles many lighter chores. I keep my knife accessible during Wildlife observation and can use it to prepare materials for emergency signaling, without expecting it to replace dedicated equipment.
Choose a Military-Style Knife for Camp Tasks
Choosing a camp knife starts with the jobs you expect it to handle, how much weight you’ll carry, and whether its grip and sheath feel secure—not with military branding. I’d set my camp task priorities first: carving, notching, food prep, or light wood processing. A 4–5-inch fixed blade with a full tang, flat or convex grind, and a blade about 5/32–3/16 inch thick offers a useful balance without needless bulk. Check knife weight comfort in hand and on your belt; a secure grip and sheath help you move freely.
For controlled carving and food preparation, I’d choose a plain edge. A square, exposed spine can scrape a ferro rod, but I’d carry its striker for dependable fire-starting. In damp conditions, stainless steel needs less rust care. Carbon steels such as 1095 Cro-Van and SK-5 need cleaning, drying, and light oil. I’d reserve the knife for small jobs, use a saw or axe for larger wood, and never twist or pry with it.
Compare Four Knives by Task and Carry
Four knives serve different camp tasks, and I’d compare their cutting strengths with their carry trade-offs. Choose the balance that lets you work confidently without weighing down your time outdoors.
| Knife | Task and carry |
|---|---|
| KA-BAR Fighter 1269 | Its 8-inch, 12.4-ounce blade splits wood strongly, but length and weight reduce carving ease and carry comfort. |
| Cold Steel SRK (SK-5) | A versatile, budget-friendly 6-inch, 8.2-ounce option; clean, dry, and oil its non-stainless steel. |
| KA-BAR Becker BK2 Campanion | Its 5.25-inch, quarter-inch-thick blade handles heavy chores, but 16 ounces hinder carving and food prep. |
| Gerber StrongArm Camp | A light 4.8-ounce knife with a 4.1-inch blade suits carving, notching, and lighter cuts; its sheath mounts on a belt, horizontally, or on MOLLE. |
I’d weigh Blade toughness against the freedom to carry comfortably. The BK2 is the heaviest; the StrongArm offers the lightest, most flexible carry. Consider blade length, weight, and sheath attachment before choosing your camp companion for the miles ahead.
Baton Small Kindling Without Twisting the Blade
For splitting small kindling, I’d choose a sturdy, full-tang fixed blade with a 4–5-inch blade and roughly 5/32–3/16-inch stock—thick enough for controlled batoning without being too bulky for other camp chores. I wouldn’t baton a partial-tang knife; it may not handle the impact safely.
I’d set the kindling on a solid surface and check its wood grain, avoiding knots. For reliable baton placement, I’d lay the edge across the grain, then strike the knife’s spine with a separate wooden baton. I’d aim over the wood, not at the far-edge overhang, and drive the blade through gradually.
If the wood resists, I’d stop and shift the blade away from a knot or choose another piece. I’d never twist the knife to free a stuck blade; levering can damage its edge or tip. Instead, I’d use a wedge to release the split and keep my knife ready for the next camp task. This careful method lets me work independently without risking needless damage.
Carve Notches and Feather Sticks With Control
I find a 4–5-inch fixed blade with a flat or convex grind easier to control than an oversized or serrated knife. Brace dry, straight wood on a stable surface, then guide a straight stop cut and shallow angled cuts to shape a notch. For a feather stick, I use long, shallow strokes and stop each curl before it detaches.
Choose A Controllable Blade
When I carve notches or feather sticks, I reach for a 4–5-inch blade because it gives me more control than a long fighting knife; blades over about 6 inches can make notching awkward. That blade length helps me shape wood precisely without sacrificing practical versatility. I also look for a sharp plain edge and a flat or convex grind; this edge profile supports controlled shaving.
- I set the edge at a shallow angle and push steadily, leaving attached curls that show whether the blade is carving well.
- For a notch, I make a straight stop cut, then angled cuts from both sides. I deepen it gradually to avoid removing too much wood.
- For feather sticks, I choose dry, straight, knot-free wood and stop each shaving before its curl detaches. Detached curls can signal a dull edge or steep angle; no curls may mean sharpening is needed.
Brace Wood And Guide Cuts
Before carving, I brace straight, knot-free wood against a solid surface and keep my hands clear of the edge. To make a feather stick, I hold the knife at a shallow angle and push with steady pressure, shaving curls that remain attached. I stop each shaving before it detaches; loose curls can signal a dull edge or an angle that’s too steep. For a notch, I make a straight stop cut, then use angled cuts from both sides to lift a small chip. I deepen it gradually for better control. A four- to five-inch blade feels easier to manage than one over about six inches, while a sharp, flat or convex grind helps guide cuts. Brace wood securely, and never twist the blade to free a binding cut.
Shape Notches And Feather Sticks
For controlled notches, I make a straight stop cut, then carve angled cuts toward it from both sides to lift a small chip. I repeat gradually for a deeper, cleaner seat, shaping a notch to fit the task.
- Choosing notch shapes: I match the notch to its purpose, whether it needs to hold a pot or secure a joint. A sharp, controlled 4–5-inch blade gives me better precision than one over about six inches.
- Prepare the wood: For feather sticks, I brace dry, straight, knot-free wood against a solid surface.
- Maintain feather curl consistency: I use a shallow edge angle and long, steady strokes, stopping before each curl detaches. Detached curls may mean my blade’s dull or my angle’s too steep; I check sharpness and adjust to keep tinder ready for an independent fire.
Scrape Tinder and Strike a Ferro Rod Safely
A flat, square, uncoated knife spine can scrape bark into fine tinder dust, while a rounded or coated spine may work poorly. For tinder preparation, I choose dry bark when available and scrape it over a stable surface, keeping my fingers clear of the edge. I clear loose fuel from the area before striking; a stray spark shouldn’t start an unintended fire.
For spark placement, I hold the ferro rod close to the prepared tinder and keep the knife steady. Then I draw the rod back so sparks land where I want them. I keep my fingers outside the rod’s path and work on firm ground to reduce slips. A square, 90-degree spine can scrape a ferro rod, but I don’t assume every knife spine will suit the job. I carry the rod’s own striker when possible. With deliberate movements and a clear workspace, I can make sparks safely and stay in control of my fire-starting setup.
Protect Carbon Steel From Rust in the Field
I clean and dry SK-5 or 1095 Cro-Van steel after wet or muddy use because it isn’t stainless. I apply a light coat of oil before storage, and I don’t forget that a coating leaves the cutting edge exposed. In persistently damp conditions, I’d consider a stainless-steel knife such as the Gerber StrongArm Camp in 420HC.
Clean And Dry
Because SK-5 and 1095 Cro-Van aren’t stainless, I clean and dry the blade after each use to limit rust. This simple routine supports rust prevention and moisture management, so I can rely on my knife without letting damp conditions dictate my plans.
- I wipe away dirt and residue after cutting, then dry the blade completely with a clean cloth.
- When rain, creek water, or wet vegetation leaves moisture behind, I wipe the blade promptly. I pay close attention to the exposed edge, since a coating won’t protect it.
- Before storing the knife, I make sure no dampness remains. If I expect frequent wet-weather use, I may choose a stainless-steel option such as the Gerber StrongArm Camp with 420HC to reduce upkeep and keep my gear ready for the next outing.
Apply Light Oil
After I clean and dry a carbon-steel blade, I apply a thin film of oil to exposed steel, including the cutting edge. Knives made from 1095 Cro-Van or SK-5 aren’t stainless, so moisture can start rust. I use just enough oil to protect the blade without leaving it greasy. Check coating compatibility before choosing an oil, and don’t assume a blade coating protects the edge.
| Field condition | My response |
|---|---|
| Blade is dry | Apply a light film |
| Blade gets wet | Dry, then reapply |
| Blade is cleaned | Dry, then reapply |
This simple habit helps keep your knife ready for the next task, without adding needless weight or tying you to a complicated maintenance routine. Don’t leave a damp blade in its sheath; take a moment to protect the steel and get back outdoors.
Protect Exposed Edges
A light oil film helps protect exposed steel, but it can’t shield the sharpened edge. Carbon steels such as 1095 Cro-Van and SK-5 aren’t stainless, so I clean and dry my blade after use, especially after water or damp materials. I also check the edge: its edge exposure leaves it vulnerable to moisture and rust, regardless of coating durability.
- Wipe the blade dry as soon as you can after field use.
- Apply a light coat of oil to exposed steel, then inspect the cutting edge for moisture or rust.
- In persistently damp conditions, consider a lower-maintenance stainless option, such as the Gerber StrongArm Camp with its 420HC blade.
These steps help me keep my knife ready without giving up the freedom to travel light and work outdoors.
Know When to Use a Saw or Tomahawk
When should you reach for a saw or tomahawk instead of your knife? I choose a folding saw for cross-grain cuts and larger branches. It moves through wood more safely and efficiently than a knife, preserving my blade for jobs it handles well. Good saw selection means matching the tool to the cut, not forcing a knife to do everything.
For chopping, I reach for a tomahawk. Tomahawk chopping suits heavier woodwork, while my knife gives me better control for cutting, carving, and notching. I may baton a small, straight round into kindling, but I avoid knots and stop if the wood resists; twisting can damage the blade. Even a thick camp knife isn’t a substitute for a saw or axe on large wood.
For a practical field kit, I pair a four- or five-inch fixed-blade knife with a folding saw, adding a tomahawk when chopping matters. Choosing the right tool keeps me capable, self-reliant, and ready for demanding outdoor tasks.
Carry Your Knife Comfortably and Securely
I choose a sheath that matches my knife’s weight and how I plan to carry it, then check that it stays secure as I move. My setup should support freedom of movement without letting the blade shift or snag. I compare three practical options:
- Belt carry keeps the knife accessible, while MOLLE attachment works with compatible packs and gear.
- Horizontal carry can keep a compact fixed blade from hanging against my leg.
- I try the knife and sheath together while sitting and wearing my pack to judge seated comfort.
I make retention testing part of that trial: I walk, bend, and turn, then confirm the knife remains secure and draws as intended. The handle matters too. Textured G-10, Micarta, or rubberized grips can help me keep control in wet or cold conditions, so I choose what feels steady in my hand. Before carrying, I check local rules; blade length and carry method may affect what’s legal.
Frequently Asked Questions
What Is the Holy Trinity of Knives?
I call the outdoor knife “holy trinity” a fixed-blade knife, a folding knife, and a larger chopping tool, such as an axe or hatchet. Together, they offer blade versatility without forcing one tool to do every job. I’d use a 4–5-inch fixed blade for carving, a folder for light cuts, and an axe for wood. That practical mix reflects knife history while letting you choose freely for each task.
What Is the Best Knife for Outdoor Use?
I’d choose a 4–5-inch full-tang fixed blade: it’s the Swiss Army knife of outdoor confidence, without pretending to do every job. Versatile camp knives with flat or convex grinds handle carving, notching, and light woodwork well. I’d look for weatherproof blade materials, a secure Micarta or G-10 grip, and a sheath that suits your carry style. For bigger wood, I’d pack a saw or axe instead.
What Is the Most Banned Knife?
There isn’t one “most banned” knife worldwide; laws vary by location. I’d pay particular attention to switchblade restrictions, since some places limit their possession, sale, or public carry. Knife import bans may also target specific designs, including automatic knives or double-edged daggers. A military-style look alone doesn’t determine legality. Before buying or traveling with a knife, I’d check current local rules so you can make an informed choice and protect your freedom responsibly.
What Brand of Knife Does the US Military USe?
The U.S. military doesn’t use one knife brand across every service, unit, or task. I’d check the specific branch and assignment before calling any model an official issue. The Ontario OKC3S, for example, is a documented Marine Corps bayonet; KA-BAR is historically associated with the military, but that doesn’t mean everyone gets one. For military knife standards and authorized field blades, I recommend verifying current service guidance rather than trusting a brand’s reputation alone.
Conclusion
A military-style knife can handle demanding camp jobs, but it isn’t a substitute for every tool. You may wonder whether a sturdy blade is worth carrying if a saw or hatchet works better for heavy cutting. I see the knife as the versatile tool you reach for first: it can baton kindling, carve tinder, and tackle small tasks with control. Choose a design that fits your hand, maintain its edge, and use the right tool when the job calls for more.