How Do You Choose Military-Style Knives for Bushcraft and Wilderness Use?
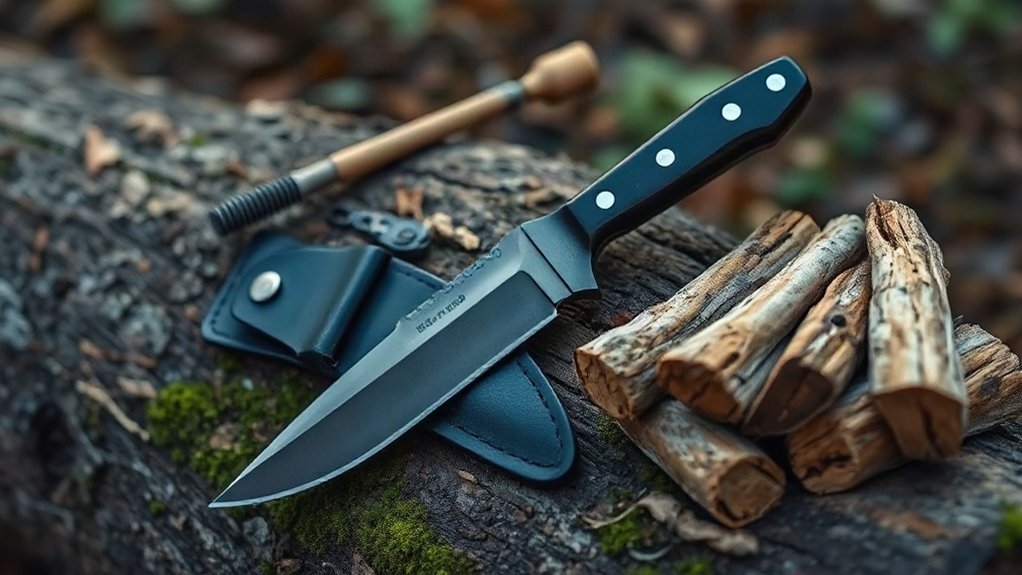
I’d choose a full-tang, 4–5-inch fixed blade for controlled carving, shelter work, and splitting small rounds. I’d look for a plain-edge drop point, a flat or convex grind, and a square spine that works for baton strikes and ferro-rod scraping. A textured, comfortable handle and secure sheath matter in wet conditions. I’d check local carry rules, use a folding saw for crosscuts, and avoid twisting a stuck blade. A few more details can help you choose confidently.
Key Takeaways
- Choose a full-tang fixed blade with a 4–5-inch drop-point blade for a balance of strength, control, and versatility.
- Match the edge to your tasks: a plain edge suits woodwork, while partial serrations can help with rope and fabric.
- Consider stainless steel for wet conditions or 1095 Cro-Van for easy sharpening, and check that the spine is square and 5/32–3/16 inch thick.
- Look for a comfortable, secure wet-grip handle and a durable sheath that safely retains the knife.
- Baton carefully with controlled strikes, avoid knots and twisting, and carry a folding saw for cross-grain cuts.
Choose a Military-Style Knife for Bushcraft
For bushcraft, choose a full-tang fixed blade with a 4–5-inch blade: it’s strong enough for batoning and shelter work yet manageable for carving and notching. I value a dependable tool that lets me work confidently outdoors without unnecessary bulk. A square, flat spine can take controlled baton strikes and scrape sparks from a ferro rod. I favor a plain edge with a flat or convex grind because it cuts and splits wood well, and I can maintain it in the field.
A grippy G10 or Micarta handle helps me keep control when rain or sweat makes my hands slick. I also choose a secure sheath that protects the blade during carry. When batoning, I strike the spine over the wood, avoid knots and the tip, and never twist the blade to force a split. Military knife history can inform a knife’s design, but I check legal carry rules before heading out, so I can travel responsibly and focus on the freedom of the trail.
Pick the Right Blade Length, Shape, and Steel
Once I’ve chosen a full-tang knife, I consider its blade dimensions and steel. A 4–6-inch blade balances control and cutting power; I find 4–5 inches especially manageable for carving, notching, and splitting wrist-thick rounds. For blade geometry, I favor a plain edge with a flat or convex grind for controlled woodwork.
| Feature | Choice | Best use |
|---|---|---|
| Length | 4–5 inches | Carving, notching |
| Length | 5–6 inches | More cutting power |
| Point | Drop or clip | General or precise work |
| Grind | Flat or convex | Controlled woodwork |
A drop point suits varied tasks; a clip point gives me a finer tip, while a tanto favors strength over delicate carving. I choose stainless steel when water exposure is frequent. Tough high-carbon steel, such as 1095 Cro-Van, sharpens readily with basic field stones but demands rust-preventive steel maintenance. Serrations may cut rope or tough fabric, yet they’re harder to sharpen and less effective for carving. I choose for my conditions, not fashion.
Choose a Fixed Blade for Hard Wilderness Work
For hard wilderness work, I’d choose a full-tang fixed blade because its continuous construction handles shock better during batoning. I’d look for a 4–5-inch blade to balance control for carving and notching with the ability to split wrist-thick rounds. Longer blades can make fine work harder.
Full-Tang Construction
When hard wilderness work demands a knife you can trust, choose a full-tang fixed blade: its steel runs through the handle, reducing weak points under the shock of batoning. I value that continuous construction because it spreads force along the knife rather than concentrating it at a narrow handle connection. This Tang stress distribution helps protect against failure when I’m splitting wood or tackling other demanding tasks. A partial-tang knife can loosen or separate under repeated spine strikes, leaving you without a dependable tool when you need one most. I also look for a sturdy, comfortable handle in G10 or Micarta; solid materials support handle durability and a secure grip. With a full tang, you can work confidently and stay self-reliant in the backcountry, where dependable gear gives you more freedom.
Optimal Blade Length
Choose a fixed blade for hard wilderness work because its solid construction has no folding mechanism to fail during batoning, shelter building, or game processing. I’d start near four to five inches: that span gives you useful cutting power without sacrificing control. Four inches can split wrist-thick rounds and still handle fine carving. Consider these Blade length tradeoffs before choosing:
- A 10–15 cm blade covers varied bushcraft tasks.
- Shorter blades improve precision but may struggle with larger wood.
- Longer blades add Cutting reach and support heavier work.
- Blades over six inches feel less nimble for notches and feather sticks; treat them as choppers.
For military-style survival, five to seven inches may suit demanding cuts. I’d choose shorter for versatile, precise work, or longer when heavier cutting matters most—your kit should serve your needs and freedom outdoors.
Check the Tang, Grind, and Spine
A knife’s construction matters as much as its steel in hard wilderness use. I’d choose a full-tang design, with the blade running through the handle, to better withstand the shock of batoning and demanding woodwork. For blade thickness, I’d look between 5/32 and 3/16 inch: the thicker option favors heavier tasks, while the thinner one balances cutting with food preparation.
I’d also consider grind geometry. A flat or convex grind can pass through wood without binding, helping you work efficiently instead of fighting the blade. A convex edge has solid support behind its cutting edge, which is useful when field tasks get rough. Check the spine, too: I want it flat and square, without rounding, jimping, or saw teeth where a baton lands or a ferro rod scrapes. Since I value control for carving and notching without losing practical splitting ability, I’d pair these features with a four-to-five-inch blade.
Choose a Grippy Handle and Secure Sheath
Grip matters most when conditions turn slick. I look for textured G10, Micarta, or molded rubber because each can provide wet weather grip through rain, mud, and cold. A comfortable, shock-absorbing shape also matters when I carve, chop, or slice for extended periods. Choose a handle that fits your hand and helps you stay in control.
- Check the texture: Hold the knife with wet hands, if possible; avoid scales that feel slick or abrasive.
- Assess the shape: A guard or raised contour can help keep your hand from sliding forward during hard use.
- Test the sheath retention: A dedicated Kydex or heavy-duty nylon sheath should cover the edge and secure the knife with a strap or snap.
- Check access and carry: Make sure you can draw and replace the knife conveniently. MOLLE compatibility or a fire-starter attachment may suit your setup.
I’d choose gear that stays dependable without limiting how I move through the backcountry.
Use Your Knife Safely for Batoning and Notching
I baton only with a full-tang knife, setting wood on a solid surface and striking the spine with controlled blows. If the blade binds, I move to a knot-free spot or choose another piece rather than twist it. For notching, I make a stop cut, angle cuts to remove a chip, and deepen the notch gradually with a secure, precise grip.
Safe Batoning Technique
When I baton wood, I use a full-tang knife with a flat, square spine and a blade about 5/32 to 3/16 inch thick—never a partial-tang knife. Safe batoning lets me prepare fuel independently, but I keep every movement deliberate. I follow four rules:
- Set the wood on firm ground, with the grain accessible and knots avoided.
- Lay the edge across the grain, then strike the spine with a sturdy stick directly above the wood.
- Use controlled strikes, driving the blade through gradually instead of forcing a split with one blow.
- Keep impacts away from the tip, and never twist the blade. If the wood resists, shift away from the knot or use a wedge.
This measured approach protects my knife and hands while preserving self-reliance outdoors.
Precise Notching Steps
The same controlled approach I use for batoning helps me cut precise notches without rushing. I brace a straight, knot-free pole on a stable surface and plan my stop cut placement before setting the blade. With a sharp tip, I make a controlled, shallow cut to the desired depth. Then I angle the blade toward that cut from each side, lifting out a small chip at a time. Gradual chip removal gives me control and helps prevent overcutting.
For finer work, I choke up on the handle, place my thumb on the square spine, and keep my fingers behind the edge and clear of the cut. Precise tip control near the choil matters more than a large blade. When batoning, I strike over the wood, not its far-edge overhang; I never twist a stuck blade. I move away from knots or use a wedge.
Decide Whether Serrations Are Worth It
For carving, feather sticks, and notching, I’d choose a plain edge because it offers better control and is easier to sharpen in the field. When I’m working mainly with wood, serrations add little and make edge maintenance more complicated. I’d consider them only if rope cutting or slicing webbing and tough fabric is a regular need.
- Plain edge: I can make precise cuts and restore the edge with simple field tools, keeping my knife ready for everyday bushcraft.
- Serrated edge: Its teeth can bite into fibrous material, useful for military-style tasks or emergencies, but they’re awkward on wood.
- Partially serrated: I get a smooth section for controlled work and teeth for rope, though sharpening both sections takes more effort.
- Spine choice: I’d favor a plain, square spine for scraping a ferro rod; it offers more practical value than serrations for my usual needs.
Choose for the work you actually expect, not an imagined worst case. A plain edge keeps your options open and your maintenance straightforward.
Build a Simple Kit for Shelter and Fire
To build shelter and fire, I keep my kit simple: a 4–5-inch full-tang knife with a 5/32–3/16-inch spine, a flat, square back, a secure wet-grip handle, and a flat or convex grind. This setup gives me control for splitting wood and carving shelter parts without weighing down my pack. I add a folding saw for cross-grain cuts, a ferro rod for sparks, and a small sharpening stone for field upkeep.
For shelter joints, I carve shallow notches that help poles sit securely. To split dry wood from larger rounds, I baton over the wood—not the blade’s tip. I avoid knots and never twist a stuck knife; I reposition the wood instead. For tinder preparation, I shave attached curls from dry, straight wood, keeping them protected until needed. I also plan water storage separately, choosing a container that fits my route and carries enough for the conditions. A compact, dependable kit lets me move independently and make camp with less gear.
Frequently Asked Questions
What Are the Best Knives for Wilderness Survival?
I’d choose a versatile fixed blade survival knife with a 4–5-inch full-tang blade, a plain edge, and a sturdy 5/32–3/16-inch spine. For wilderness knife selection, I’d favor tough, easy-to-sharpen steel like 1095, or stainless steel if I expect frequent wet conditions. A flat spine, practical grind, grippy G10 or Micarta handle, and secure sheath give me dependable field performance. I’d carry a folding saw for larger cuts and avoid twisting the blade.
What Are the 5 C’s of Bushcraft?
The 5 C’s of bushcraft are cutting tool, cover, combustion, container, and cordage—the five keys that turn wilderness from a locked door into an open path. I use a dependable knife to carve shelter parts, prepare tinder, and cut cordage for repairs. For Shelter Building, I make controlled notches and angled cuts. I carry a sturdy container for water, then practice Water Purification by boiling it over a carefully managed fire.
What Is the Holy Trinity of Knives?
The wilderness “holy trinity” isn’t three knives: it’s a fixed-blade knife, a folding saw, and an axe or tomahawk. I use the knife for carving, notching, feather sticks, and batoning wrist-thick rounds; the saw handles crosscuts efficiently, while the axe chops. For knife roles in wilderness, I favor a 4–5-inch, full-tang blade—essential blade characteristics for control and strength. I’d add a ferro rod and small sharpening stone for fire and field maintenance.
What Is the Best All-Around Knife for Bushcraft?
I’d choose a full-tang, 4–5-inch fixed blade—it’s the Swiss Army knife of the wild. A 5/32-inch blade balances carving, shelter work, and light batoning; choose 3/16 inch if you split wood harder. For Blade profile, favor a flat or convex grind, a plain edge, and a square spine. Prioritize handle ergonomics with grippy Micarta or G10, and carry it securely. I’d match stainless steel to wet conditions or maintain high-carbon steel carefully.
Conclusion
I choose a military-style knife for the work ahead, not the look: a tough fixed blade, sensible length, sturdy tang, grippy handle, and secure sheath. Then I test its edge and spine, practice safe batoning, and decide whether serrations earn their place. I pair it with simple shelter and fire essentials, because even the finest blade can’t do everything. Think of it as a faithful trail companion—not Excalibur, but a dependable tool that helps me meet the wilderness on its own terms.