Why Do Survival Tarps Keep Collapsing and How Do You Fix It?
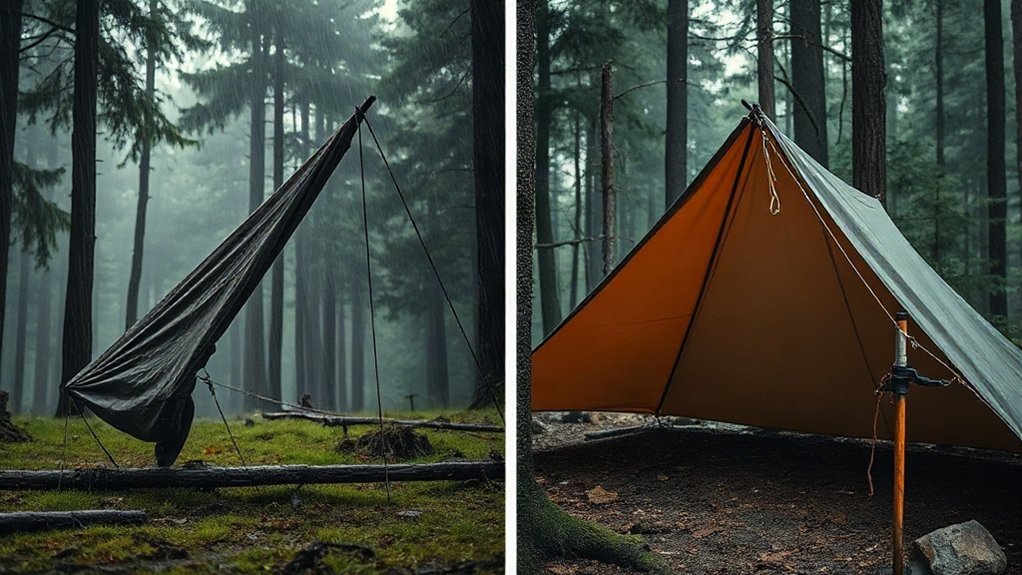
I keep a survival tarp from collapsing by securing sound anchors, tensioning the ridgeline, and retightening tie-outs as weather changes. I check trees for rot, cracks, loose roots, and dead limbs, then fasten the line firmly, with an adjustable knot at the opposite end. I center the tarp, stake its corners and sides, and keep panels taut without stressing grommets. In gusts, I pitch low and face the narrow end into the wind. I’ll cover the setup and adjustments that keep it stable.
Key Takeaways
- Weak, damaged, or shifting anchors can let a tarp collapse; inspect them carefully and use the strongest anchor for the heavily loaded end.
- A loose ridgeline causes sagging; tension it firmly, secure one end, and use an adjustable knot on the other for retightening.
- Uneven or inadequate tie-downs let panels flap or sag; stake corners evenly and add side pegs or guy lines.
- Wind, rain, and pooling water strain the shelter; pitch low with a steep slope, face the narrow end into wind, and adjust promptly.
- Slipping knots, pegs, or bungee hooks can release tension; inspect attachments, seat hooks securely, and recheck the tarp after adjustments.
Why Does a Survival Tarp Sag or Collapse?
A survival tarp usually sags when its ridgeline loses tension, leaving the fabric slack and vulnerable to wind and rain. I check both ends first: even slight initial sag can work, but I tighten and secure the ridgeline at both anchor points before relying on the shelter. If I leave it loose, gusts can shift the tarp or collapse it before I finish securing the corners and sides.
Corner tie-outs alone don’t control the whole canopy. Unsecured edges can flap, shed tension, and pull the fabric out of position. I add guy lines along the sides and use stakes or extra tie-downs to keep those edges steady. I also keep paracord coiled rather than scattered on the ground; loose cord can tangle and delay setup when weather turns.
A taut, fully secured tarp gives me more dependable cover while preserving room to move. I inspect the tension again after setup, especially if wind or rain increases. In high winds, I pitch the tarp low and turn its narrow end toward the wind to reduce its exposure.
Choose Strong Anchors for Your Survival Tarp
I run the ridgeline between sturdy anchors, such as sound trees or a vehicle’s roof rack, and tie the more heavily loaded end to the stronger point. I secure the paracord coil so it feeds cleanly, then use an adjustable knot at the other end to set and retension the line. I pull the ridgeline firm; a little sag is acceptable, but it must hold the tarp in position. In treeless, windy terrain, use trekking poles or cut sticks to pitch an A-frame or flying-V, with the windward edge staked low and tight and the tarp turned end-on to the wind to reduce resistance.
Choose Sturdy Anchor Points
Choose two sturdy anchors, such as solid trees, that can hold the ridgeline under tension. During campsite selection, I check trunks for rot, cracks, loose roots, and dead limbs overhead. A sound anchor protects your tarp shelter from sudden sagging and helps keep you safer in changing weather. I tie the more secure ridgeline knot to the stronger anchor, then put an adjustable sliding knot at the less heavily loaded end. Use paracord rated for the expected load, and don’t trust thin branches or unstable posts. If I include a vehicle, I attach only to a secure basket or roof rack, not a loose fitting. I pull the ridgeline tight; slight initial sag is acceptable, but a weak anchor can drop the whole tarp. Before draping the tarp, I test both anchors firmly.
Position Lines for Tension
Once both anchors pass inspection, I run a ridgeline between them at a height that gives the shelter usable headroom. I secure the stronger end, then use a truckers hitch at the less-loaded end to adjust tension. Pull the line taut before laying on the tarp; slight sag is manageable, but a loose ridge leaves fabric slack and invites collapse.
- Drape the tarp over the ridge and fold it across the line to form the backbone of an a-frame pitch.
- Peg each corner firmly, keeping the tarp centered and evenly tensioned.
- Add side tie-downs to resist gusts and keep the shelter windproof.
I check every knot and stake before settling in, then retighten if the fabric shifts. A stable line helps you stay sheltered while preserving room to move freely.
Keep Paracord Untangled and Ready

Before pulling out the line, I secure the fresh paracord coil so it won’t spill across the ground and tangle during setup. For survival tarps, I keep the 100-foot main line contained and ready; loose cord can trip you, snag gear, and delay shelter deployment.
| Step | Field method |
|---|---|
| Coil | Wrap paracord around a to-go mug. |
| Secure | Fasten the coil with a ball bungee. |
| Check | Confirm the cord stays contained but pulls free. |
The bungee holds the coil together while letting me grab and unwind the line quickly. That supports quick setup without leaving loops underfoot, where they could catch a boot or shift your footing. I avoid winding cord around the other item shown in the demonstration: it’s awkward to pack and difficult to remove, so it can waste time when weather turns. Store the coil where you can reach it, but keep it clear of walking paths. Before deployment, inspect the line for snags and release only what you need. A tidy, accessible main line helps me work efficiently and move freely. Practicing your pitch beforehand and preparing a pre-tied ridgeline can help your tarp shelter deploy faster.
Tie an Adjustable Knot at One End
At the less heavily loaded end of the ridgeline, I tie an adjustable sliding knot so I can remove slack as the line sags. This gives me a quick way to restore tension without rebuilding the shelter. I use this sequence:
- I wrap the cord around the anchor point, pass it underneath, and form a loop.
- I take the working end over and under the cord, then pull the two sections together to create the sliding knot.
- I slide the knot to tension the ridgeline, checking that the tarp stays taut and the anchor remains secure.
To loosen the line, I pull the knot apart and slide it back, then retighten it as needed. I keep this adjustment at the lighter-loaded end; don’t confuse it with a bowline knot, which serves a different purpose. Trekking poles can support the tarp, but check their footing. Keep cord clear of the waterproof coating to prevent abrasion. A steep ridge helps rain run off the tarp instead of pooling on it.
Secure the Ridgeline With a Firm Knot
With the ridgeline between two sturdy anchors, I secure the stronger end—usually to a tree—with a firm knot that holds tension. I pass the working end over the standing line and through the opening, wrap it around again, then finish with a half hitch and a second securing turn. Pull the line tight and set the knot firmly; slight initial sag is acceptable. Keep the adjustable sliding knot at the lighter-loaded end, where you can loosen or tighten it by pulling the knot apart.
A rectangular tarp with reinforced tie-outs gives you reliable attachment points for a secure pitch.
| Check | Action | Why it matters |
|---|---|---|
| Anchor | Choose sound wood | Prevents a dangerous release |
| Knot | Add securing turns | Holds fast under load |
| Line | Inspect for damage | Protects your shelter |
Before sheltering, check that the knot won’t slip and the tree won’t shed dead branches. A secure ridgeline supports a lean-to pitch, tarp tent, or wind break, giving you room to move with confidence. Tie clear of overhead hazards, and don’t trust a weak or cracked anchor.
Tighten the Survival Tarp Ridgeline
I run the ridgeline between sturdy anchors at a height that keeps the tarp clear of hazards. I secure one end with an adjustable sliding knot and tie the other firmly to an anchor, adding a half hitch to help hold tension. Before draping the tarp, I pull the line taut; if it loosens, I retighten it. Many survival tarps have reinforced tie-outs that help them hold firm in windy conditions.
Choose Strong Anchor Points
Choose two sound trees or other sturdy anchors, then run the ridgeline between them high enough to give the tarp useful clearance. For a hammock tarp or storm pitch, I check each anchor for damage and stability before loading the line. A durable shelter starts with supports that won’t shift under tension or wind.
- I secure the heavily loaded end to the stronger anchor with a firm wrap, half hitch, and backup securing knot.
- I attach the opposite end with an adjustable sliding knot, leaving room to tension the line.
- I pull the ridgeline taut, position the tarp, then retighten it; slight initial sag is fine, but a loose line invites droop.
I test both anchors under tension before settling in. If either moves, I choose a safer point rather than risk shelter failure.
Tie Adjustable Knots
Once both anchors hold firm, tie an adjustable knot at the less heavily loaded end of the ridgeline. Loop the cord around the anchor, pass it underneath, form a loop, then take the working end over and under the standing cord. Pull the knot’s two sections together until it grips but still slides when you adjust it. Move it to tighten the line, or pull the sections apart to loosen it. At the opposite end, use a sturdy anchor, such as a tree, and secure the cord with a firm knot and half hitch. Tighten the ridgeline before draping your diamond tarp over it; slight sag is acceptable, but a taut line helps prevent collapse and maintain rain protection. I practice these knots beforehand, so I can retension a lightweight shelter quickly when weather shifts.
Secure and Tension the Line
With both anchors secure, run the ridgeline between them at a height that gives the tarp adequate clearance. I use the line as the tarp’s backbone, keeping it high enough for shelter while avoiding overhead hazards.
- Tie one end to a sturdy anchor with a knot that holds under load. Secure the other with an adjustable sliding knot so you can tension or release the line.
- Pull the ridgeline taut before draping your hex tarp over it. Slight sag is acceptable; excess slack can cause collapse and let rain pool, even on waterproof fabric.
- Peg the corners, then recheck tension. Adjust the line and use pegs or bungees to secure the tarp as conditions change. Keep tension even around the grommets, and inspect anchors before bad weather arrives.
Drape the Tarp Into a Stable A-Frame
To build a stable A-frame, run a ridgeline between two sturdy anchors, drape the tarp over it, and fold the fabric across the line. Choose a height that gives you usable shelter without making the structure unnecessarily exposed to wind. I check that the line sits securely before placing the tarp, since a slipping anchor can bring the shelter down.
Set the tarp’s corners on both sides of the ridgeline to form two sloping panels. Secure the corners and sides with tent pegs and tie-downs, pulling the fabric taut enough to limit sag without straining the material. If the line has a little initial sag, adjust the ridgeline and tarp until the A-frame holds its shape. In gusty conditions, I use bungees to attach and retension the tarp quickly as it bends or shifts. Keep clear of loaded lines, and inspect the anchors before settling beneath your shelter. A well-shaped frame helps you stay mobile and protected outdoors. Since an A-frame uses only about half the tarp’s flat area as floor space, an 8×10-foot tarp is a practical minimum for two people, while a 10×12-foot tarp leaves room for gear and storm pitching.
Stake the Survival Tarp Corners and Sides

I stake each tarp corner to hold the A-frame steady and prevent the fabric from shifting. I add side pegs and pull the tie-downs taut, leaving enough slack for the tarp to flex without tearing. After setup, I check every stake and tie-down; in strong wind, I use bungees to tension the sides quickly.
Stake the Corners
Once the tarp’s ridgeline is secure, stake down its corners to form an A-frame and keep it from sagging or shifting. I stake the corners evenly, keeping the fabric taut without overstressing its grommets. This stable pitch helps shed rain and gives you a more dependable rain fly when weather turns.
- Set each corner at a consistent distance from the ridgeline, then drive its peg into firm ground at an angle away from the tarp.
- In gusts, use bungees on corner tie-downs; they’re easier to control by hand and let the tarp flex without pulling free.
- Inspect the pitch from several angles. If a panel sags, adjust the peg or tie-down before water pools.
I also check seams for wear; seam sealing helps keep a sound shelter weather-ready.
Secure the Sides
With the corners staked, secure the sides so wind can’t lift or collapse the tarp. I add tent pegs and tie-downs along both edges, spacing them to distribute the load rather than concentrating strain at one point. This keeps the A-frame stable and limits shifting when gusts hit. If I’m using ripstop nylon, I still check every attachment; tough fabric won’t prevent a loose peg from pulling free.
I pull each side taut, then leave enough give for the tarp to flex slightly. A rigid setup can transfer wind force to the fabric or anchors. Bungees let me tension the sides quickly and reposition them as conditions change. In gusty weather, I secure corners and sides as I raise the tarp, not afterward. I test the anchors before settling underneath.
Use Bungees for Quick Tarp Adjustments
When wind makes tying knots difficult, I use bungees to secure tarp corners and sides quickly. I hook each bungee between a tarp attachment point and a tent peg, avoiding several slow knots. This versatile option works with a shelter half or a ground sheet when I need a fast, adjustable setup.
- Attach securely: I check that each hook is fully seated on the tarp and peg before releasing it.
- Allow controlled flex: Bungee stretch lets the tarp move with gusts while maintaining tension, reducing sudden strain on attachment points.
- Adjust promptly: If a side sags or conditions change, I reposition or tighten the bungee to restore a usable shape.
When I’ve packed a full kit, bungees can be quicker to adjust than prusik knots or other cordage. I keep clear of the stretched line while handling it; a slipping hook can snap back. This simple adjustment helps me maintain shelter without wasting time or limiting my freedom to move.
Secure Your Survival Tarp Against Wind and Rain

Bungees make quick adjustments easier, but I still build the shelter to resist wind and rain. I run a ridgeline between two sturdy anchors and drape my tarp over it to create a simple A-frame. I tension the line firmly; slight initial sag is acceptable, but a taut ridge helps keep fabric from pooling rain or collapsing in gusts.
I peg every corner and secure the sides with tie-downs, preventing wind from lifting or shifting the shelter. I choose stakes and anchor points that hold in the ground, and I avoid setting up beneath dead branches. These steps matter whether I’m pitching silnylon, a polyester tarp, or a reflective tarp; each needs secure support and properly anchored edges. If wind makes knots or pegs slow to set, I use bungees for adjustable tension. I keep the layout simple and practice setting it up, so I can secure my shelter quickly and move freely with confidence.
Recheck Tarp Tension as Weather Changes
After wind or rain shifts, I recheck the ridgeline and tarp because changing conditions can loosen tension and create sagging. A small amount of initial sag is acceptable, but the line must stay taut enough to support the fabric and shed water. I make quick adjustments in this order:
- Tighten the ridgeline with its adjustable anchor knots, taking up slack without overloading the line or anchor points.
- Retension the corners and sides with tent pegs or bungees. These let me respond quickly as the tarp flexes in gusts.
- Inspect the shelter again from beneath and outside. Check for pooled water, loose anchors, and fabric pulling unevenly; fix hazards before settling in.
I keep the setup simple, not perfect. In bushcraft, a dependable tarp gives me flexible shelter and shade, but only if I monitor it as weather changes. In cold-weather conditions, I recheck after each shift so sagging fabric won’t trap water or threaten the shelter.
Frequently Asked Questions
How to Keep a Tarp in Place?
I keep a tarp in place by stretching it over a ridgeline between two sturdy anchors, then securing every corner and side with pegs and tie-downs. I fasten one ridgeline end firmly and use a sliding knot at the other to adjust tension. For quick retensioning in gusts, I use ball bungees. A little sag is fine initially; I tighten and reposition attachments as needed, checking that anchors remain secure and safe.
How to Reinforce a Tarp?
I reinforce a tarp by spreading its load, like a bridge sharing weight across supports. Run a taut ridgeline between sturdy anchors, drape the tarp into an A-frame, and peg its corners and sides with extra tie-downs. I use bungees to retension quickly as wind shifts, then tighten adjustable anchor knots. Keep the fabric taut but flexible; excessive rigidity can strain tie-outs and cause failure. Check anchors before sheltering beneath it.
Which Tape Is Best for Repairing Tarps?
I recommend tarp-repair tape or heavy-duty outdoor repair tape made for your tarp’s fabric; polyethylene, nylon, and silnylon may need different adhesives, so check the label. Clean and dry the damaged area first. Apply tape to both sides when possible, extend it well past the tear, and press out air pockets. For a tear under tension, use rounded patch corners and keep the repair clear of ridgelines and tie-outs. Test before exposure to wind or rain.
How to Straighten a Tarp?
I straighten a tarp by giving it a taut ridgeline to ride, like a sail catching a steady breeze. Tie the line between sturdy anchors, drape the tarp evenly over it, and tension one end with an adjustable knot. Pull each corner outward and stake it down, then secure the sides to smooth wrinkles. I add ball bungees in gusts for quick retensioning. Keep cord clear, and check anchors before sheltering beneath the tarp.
Conclusion
When my survival tarp sags, I check the anchors, ridgeline knot, corner stakes, and cord for looseness or tangles before tightening anything. I add adjustable knots or bungees where needed, then reassess the pitch so rain can drain and wind won’t catch the fabric. I never rely on a weak branch or unstable stake; a failure can expose me to dangerous weather. Conditions change, so I recheck tension regularly. A few careful adjustments can keep shelter from coming apart at the seams.
References
Tarp Shelters, https://www.fs.usda.gov/visit/know-before-you-go/camping
Leave No Trace: Plan Ahead and Prepare, https://lnt.org/why/7-principles/plan-ahead-and-prepare/
Outdoor Emergency Plan, https://www.nps.gov/articles/000/outdoor-emergency-plan.htm
1 comment