How Do You Size Utility Belts So Pouches Sit at Your Hip?
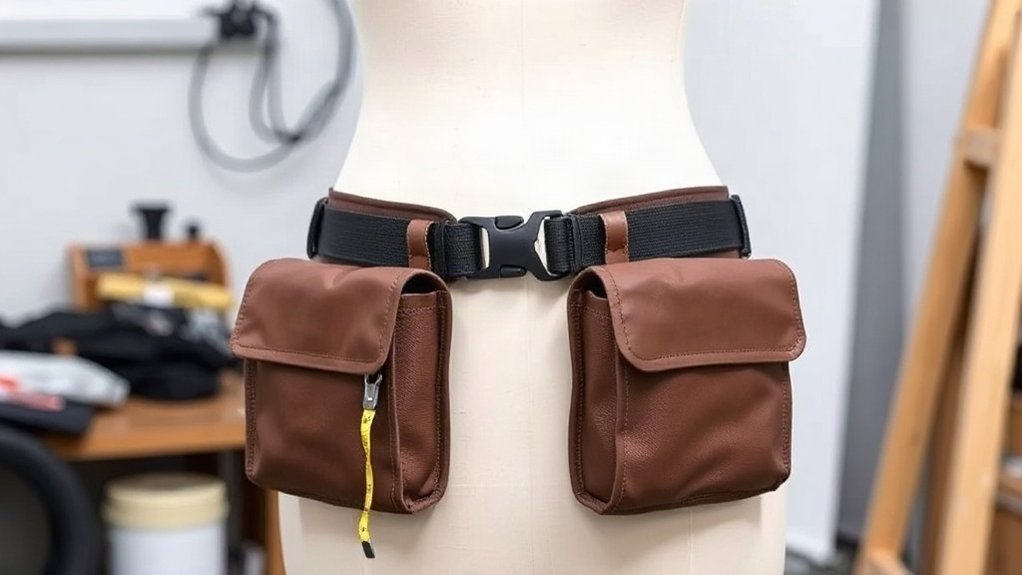
I size a utility belt over the work clothes I normally wear, measuring snugly around my hips where the belt will sit. I match that measurement to the maker’s chart—not my pants size—and choose the larger option between sizes. I position pouches level, mostly behind my hips, then buckle the belt and check for a 1–4-inch end gap. With my usual tools attached, I walk, crouch, and reach to check for shifting or pressure; the steps below help fine-tune the fit.
Key Takeaways
- Position the belt low over your hip bones, keeping it level, with pouches behind your hips and within easy reach.
- Measure your hips over your usual work clothes where the belt will sit; don’t rely on your pants size.
- Match that measurement to the maker’s size chart, choosing the larger size if you fall between sizes.
- Buckle the belt over your work clothes and aim for a 1–4-inch gap between the ends.
- Load your pouches, then walk, crouch, and reach to check the belt stays secure without digging in or restricting movement.
Position Tool Pouches Behind Your Hips
Position tool pouches behind your hips to keep them from bumping your stomach or getting in the way when you bend, crouch, or stand. I keep my utility belt level at my chosen hip position, then check that each loaded tool pouch hangs evenly and doesn’t rotate as I move. Back-worn pouches may feel awkward at first, so I practice reaching around for tools until the motion feels natural.
Before relying on the setup, I walk, crouch, climb, and reach overhead. The pouches should stay put without restricting my movement. If the belt shifts or turns, I try a tighter adjustment hole. I want a secure waist fit that holds steady without digging into my hip bones, so I can work freely and reach tools without fighting the belt. Keeping heavier items balanced across the belt can help distribute weight and reduce strain during a full day of work.
Measure Your Hips Over Work Clothes
Before choosing a utility belt, I put on the work clothes I’ll wear on the job, including any hoodie or jacket. I decide where I want hip carry, usually low over my hip bones, then wrap a soft tape around that spot. I keep it snug without compressing the layers.
| Step | What I do |
|---|---|
| Dress | Wear typical job layers |
| Position | Mark the belt’s resting spot |
| Measure | Wrap tape snugly over clothes |
| Check | Use my bulkiest usual outfit |
I use this working circumference—not my pants or dress-belt size—to size a work belt. Tool-belt sizing can run 4–7 inches larger than pants sizing. Seasonal layers matter: measuring over my bulkiest typical outfit helps the belt fit comfortably year-round and lets me move freely. I don’t assume pants size predicts my measurement. A properly sized belt helps keep pouches at your hip for a stable, comfortable carry position.
Match Your Measurement to the Size Chart
I match my measured hip circumference to the belt’s size chart, not my pants size. If I fall between sizes, I choose the larger one so I can adjust the fit. A belt with adjustable sizing can help smaller-waisted users keep pouches positioned at the hip without bunching.
Compare Your Hip Measurement
Once you’ve measured your working circumference over your typical work clothes, compare it with the belt’s size chart—not your pants or dress-belt size. Keep the tape snug, but don’t compress your clothing; that number reflects how a duty belt, padded belt, or webbing belt will fit where you’ll wear it. Tool-belt sizing often runs 4–7 inches above pants size. For example, if you wear size 34 pants, your hip measurement may be 38–42 inches. I’d use the measured circumference, not that estimate, to find your chart range. Bolt Belts lists sizes from S to 4XL by working circumference and offers custom sizing between standard sizes. Match the chart to your measurement so the belt sits at your hips and leaves you free to move while working.
Choose The Larger Size
If your working hip measurement falls between sizes, choose the larger one; a belt that’s too small can’t be adjusted to fit. I measure over my usual work clothes, then match that circumference to the maker’s size chart—not my pants size. Utility belts often run 4–7 inches larger than trouser sizing, so guessing can leave you restricted.
After buckling, I check for a 1–4-inch gap between the belt ends. No gap means I may need the next size up. That extra room helps me position pouches comfortably and move without binding. A 2 inch webbing belt with a stiffened belt core can support loaded pouches, while hook and loop velcro helps secure the fit. If the chart doesn’t cover your measurement, ask the maker about custom sizing before ordering.
Choose the Larger Size Between Sizes
When your hip measurement falls between two sizes on the chart, choose the larger one. I measure where I’ll wear the belt, usually low over my hip bones, with my usual work clothes and layers on. A smaller belt can’t be adjusted to fit; the larger size gives me room to buckle comfortably and move freely.
| Check | What I do |
|---|---|
| Measure | Wear typical layers |
| Choose | Select the larger size |
| Load | Add usual pouches and tools |
I don’t let stiffness alone decide between a riggers belt and a range belt; I prioritize a comfortable fit with my actual load. Then I walk and crouch. The belt should stay secure without shifting or restricting movement, so I can work freely throughout the day. Stiff webbing and a supportive liner can help a utility belt resist sagging and rolling over time.
Check the Belt-End Gap for Fit
After choosing the larger size when you fall between sizes, check the belt-end gap with your usual work clothes on. Layers change how a utility belt sits, so I assess the fit over the clothing I’ll actually wear. Buckle the belt at your hip and aim for a 1–4-inch gap between the ends. That space gives you room to adjust the fit without sacrificing support.
If the ends meet, the belt’s too small; choose a larger size. A gap of 5 inches or more may mean it’s too large and could shift during work. I also consider how an inner belt, belt keepers, or a loaded battle belt affect the fit. Add your usual pouches and tools, then move around to confirm the belt stays secure without rotating or restricting movement. Proper belt tension helps keep the belt from sliding as you work.
Test Your Belt While Moving
Load your belt with your usual tools and pouches, then walk, crouch, climb a ladder, and reach overhead to test the fit. I check whether the outer belt stays level, with loaded pouches hanging at the same height on both sides. It shouldn’t rotate or shift as I move; either motion can throw off balance and limit freedom. Wear the full loadout for at least 30 minutes, then note any restriction, pressure points, or digging at your hip bones. The belt should feel secure without pinching. If it rotates, I try a tighter buckle hole or a smaller size. I also confirm the belt ends still have a 1–4-inch gap when buckled: no gap suggests a small fit, while five inches or more may mean looseness. A sturdy belt with load-bearing construction is less likely to crumple under the weight of your tools and pouches.
Adjust Pouches for Reach and Comfort
I position the belt low over my hip bones, then adjust each pouch so it sits level and stays put as I move. With an edc belt, I use molle webbing to place essential tools within easy reach, without crowding my hips. A utility belt’s load-bearing construction helps support pouches and tools securely as you move.
- Load your usual tools before fine-tuning pouch positions.
- Reach, crouch, and climb; check that pouches don’t rotate, rise, or restrict movement.
- Move frequently used tools forward, but keep pouch edges from digging into your hips or blocking a bend.
- If the belt shifts, tighten it one adjustment hole. If it feels restrictive or the ends meet, size up.
I aim for a secure fit that lets me move freely throughout the day. For loads over 10–12 pounds, suspenders can reduce strain on my hips and lower back while helping keep the belt secure.
Add Suspenders for Heavy Tool Loads
If your loaded tool belt weighs more than 10–12 pounds, I recommend suspenders to help carry the load. They shift some weight from your hips and lower back to your shoulders, which can reduce fatigue during long workdays. I’d still measure your working circumference over your usual clothes and check that the belt stays secure.
When Loads Exceed 10–12 Pounds
When your loaded tool belt weighs more than 10–12 pounds, add suspenders to shift some weight from your hips and lower back to your shoulders. I recommend them for carpenters, framers, and roofers carrying heavy tools through long workdays. They can reduce fatigue and help protect your spine while keeping you free to move.
- Measure your working hip circumference as usual; suspenders don’t change the belt size you need.
- Fit the belt with your tools attached, then connect and adjust the suspenders.
- Check that the belt stays level and secure as you bend, climb, and walk.
- Choose sturdy webbing and attachments that suit your setup, whether you wear a utility belt, hunting belt, or tactical rig.
A stable fit keeps pouches positioned at your hip without relying on a tighter belt.
How Suspenders Reduce Strain
For tool loads over about 10–12 pounds, add suspenders to shift some weight from your hips and lower back to your shoulders. I recommend them for roofers and anyone carrying tools through a long workday: sharing the load can reduce fatigue and help protect your spine.
Suspenders don’t change how you measure your utility belt. Fit the belt to keep pouches sitting at your hip, then adjust the suspenders so they support the load without restricting your movement. With the straps carrying part of the weight, you may wear the belt slightly looser while keeping it stable.
Check that the suspenders attach securely to your belt, whether it uses molle webbing or 1000d cordura. Balance heavy items, including a dump pouch, to maintain a comfortable, steady setup as you work.
Fine-Tune the Fit for Work Layers
To get an accurate fit, put on your typical work outfit—including your work belt and usual shirt, hoodie, or jacket—before measuring. I measure over my bulkiest seasonal layers so the utility belt won’t restrict movement when temperatures drop.
- Wrap a soft tape snugly around your hips, low over the hip bones where the belt will sit. Don’t compress your clothing.
- Match that working circumference to the size chart. Between sizes? I choose the larger size for comfortable layering.
- Buckle the belt and check that it sits level and secure, with a 1–4-inch gap between the ends.
- Use the adjustment holes when clothing changes; keep the fit stable without limiting your freedom to bend, reach, or walk.
A plastic stiffener and cobra buckle or side release buckle won’t replace accurate sizing.
Frequently Asked Questions
How to Wear a Belt on Your Hips?
I wear a belt low over my hip bones, where it feels secure without restricting movement. Put on your usual work clothes first, then wrap a soft tape measure around that spot, keeping it snug without compressing your clothes. Choose a belt based on this measurement, not your pants size; if you’re between sizes, go larger. After buckling, check the fit with your pouches loaded, then walk, crouch, and reach comfortably.
How Do I Know What Size Belt I Need to Buy?
I find my belt size by wrapping a tape around my hips, where the belt will sit, over my usual work clothes. I use that working measurement—not my pants size—and compare it with the maker’s chart. If I land between sizes, I choose the larger one for room to adjust. After buckling, I look for a 1–4-inch gap between the ends; no gap means I need a larger belt.
How to Wear a Utility Belt?
I wear a utility belt low over my hip bones, over my usual work clothes, and fasten it level and snug. Leave about 1–4 inches between the ends when buckled; it shouldn’t pinch or restrict movement. I position pouches evenly so they don’t dig into my hips, then load my usual tools. Walk, crouch, climb, and reach overhead to check the belt stays put. If it sags under heavy tools, add suspenders.
Where Should a Backpack Hip Belt Sit?
A backpack hip belt should sit low over your hip bones, not at your trouser waistband. I think of it as a sturdy anchor for a mountain of gear. Measure around that spot over your usual hiking clothes, keeping the tape snug without compressing layers. Buckle the belt level and secure, but leave room to move freely. Load your pack, then walk, bend, and climb; adjust if it shifts, pinches, or digs in.
Conclusion
I size a utility belt over my work clothes, then position its pouches just behind my hips for a balanced reach. One useful benchmark: a 2023 U.S. Bureau of Labor Statistics report counted 5,283 fatal work injuries—an important reminder that comfortable, secure gear matters. I check the belt-end gap, walk, bend, and reach before loading up. If the fit shifts or pinches, I adjust the belt, move the pouches, or add suspenders. Recheck the fit when layers change.
References
NIOSH, *Personal Protective Equipment*, https://www.cdc.gov/niosh/ppe/
OSHA, *Ergonomics*, https://www.osha.gov/ergonomics
Bureau of Labor Statistics, *National Census of Fatal Occupational Injuries in 2023*, https://www.bls.gov/news.release/archives/cfoi_12192024.htm