The 5-Pound Rule: How to Build a Military Survival Bag You Can Actually Carry
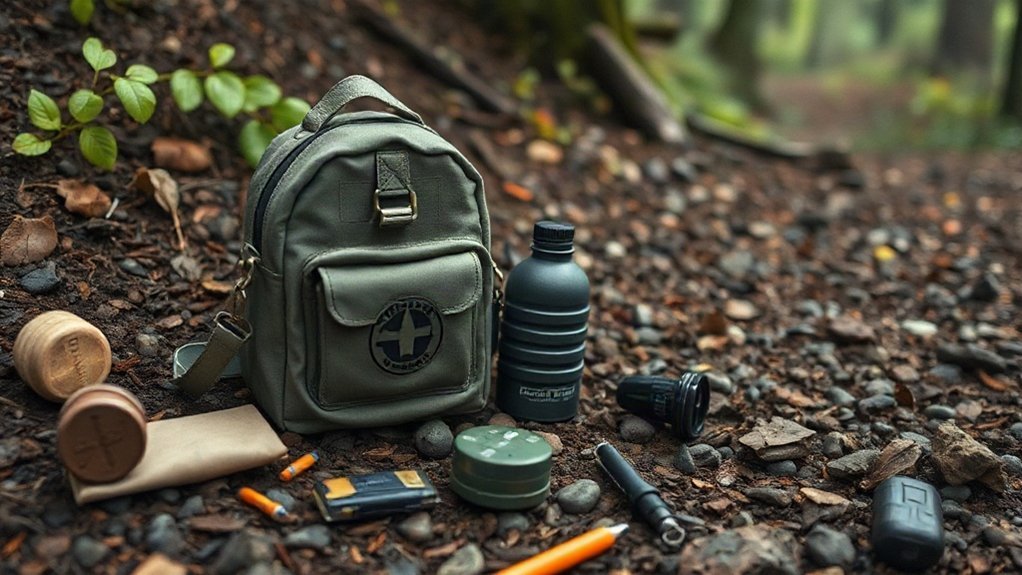
I build a practical five-pound survival kit by choosing proven essentials, not chasing the lightest possible load. I count the backpack and test comfort with a well-fitted frame, aiming for about five pounds without water. My compact kit covers shelter, warmth, food, water treatment, fire, and basic dental care. I adjust it for the forecast, route, and season, then test it on real trips and remove gear I don’t use while keeping what I need to stay safe. The details show how.
Key Takeaways
- Aim for roughly five pounds excluding water, but include the backpack’s weight when assessing comfort and fit.
- Test the kit on several outdoor trips, then remove unused gear without sacrificing essentials for warmth, water, food, fire, or hygiene.
- Pack compactly: nest small items in a metal cook pot, keep essentials accessible, and carry practical food such as jerky, sardines, and tortillas.
- Treat water by boiling it or using purification tablets according to their instructions; carry tablets as a lightweight backup.
- Match shelter and insulation to the forecast: use a poncho and bivvy in warm weather, and add a sleeping bag and pad when it’s cold.
Build a Comfortable Kit Around Five Pounds
To build a comfortable kit around five pounds, excluding water, focus on staying dry and warm, eating, drinking, making fire, and basic dental care. Treat pack weight as a practical limit, not a contest: a light kit gives you more freedom to move, but comfort tradeoffs matter when the weather turns rough.
In warm, rainy summer conditions, I’d pair a poncho with a breathable SOL Escape bivvy for shelter and a dry place to sleep without a sleeping bag. The bivvy can double as a ground layer. A sleep pad adds comfort, though I’d leave it out if weight matters more; a hammock may suit wet ground or insects.
Military-style MOLLE backpacks can add weight, so include the pack itself when assessing whether your kit is comfortable to carry.
I’d test the setup outdoors, then remove what I don’t use. After three to five trips, I’d reassess what earns its weight.
References
Ten Essentials, https://www.nps.gov/articles/10essentials.htm
The Ten Essentials, https://www.rei.com/learn/expert-advice/ten-essentials.html
Wilderness Safety, https://www.fs.usda.gov/visit/know-before-you-go/wilderness-safety
Pack Essentials in a Compact Cinch Bag
Once I’ve chosen the essentials, I pack them in a waxed PNW Bushcraft cinch pack. It resists water, though it isn’t waterproof, and folds small enough to stash in my back pocket. This freedom-friendly setup keeps Cinch Bag Organization simple:
The waxed PNW Bushcraft cinch pack resists water, folds into a back pocket, and keeps essentials simple to carry.
- Nest a drawstring bag of small items inside my Stanley cook pot to use empty space.
- Add sardines in olive oil: each can provides 170 calories.
- Pair sardines with tortillas or potato chips.
- Pack beef jerky for compact, calorie-dense food.
- Carry 4–4.5 feet of paracord; stripping it gives me seven inner fibers.
Keep frequently used gear easy to reach by placing it in accessible pockets rather than burying it beneath less-used items.
These Packable Containers and compact provisions support a couple of nights outdoors. With food included but water excluded, my complete kit weighs about five pounds. I can carry useful essentials without letting the bag weigh me down.
References
Ten Essentials — National Park Service, https://www.nps.gov/articles/10essentials.htm
The Ten Essentials — National Outdoor Leadership School, https://www.nols.edu/en/resources/blog/the-ten-essentials/
Hiking and Camping Safety — Centers for Disease Control and Prevention, https://www.cdc.gov/healthywater/drinking/recreational/water-health.html
Stay Dry With a Poncho and Bivvy
When summer rain sets in, I use a lightweight poncho for shelter and a breathable SOL Escape bivvy as my place to sleep beneath it. This compact pairing helps me stay mobile without surrendering a dry night to frequent showers. I spread the bivvy beneath me as a ground layer, so I can rest off leaves and dirt without carrying a sleeping pad. In a downpour, I crawl inside and remove clothes soaked by rain and sweat. If wet ground or insects make sleeping low uncomfortable, I’ll bring a hammock to supplement or replace the bivvy. This setup suits warm conditions; for winter, I add insulation, such as a sleeping bag. I also value the poncho’s versatility for emergency signaling and shelter repairs, keeping my options open when plans change. A military-style backpack can help organize this compact shelter kit, but choose one that’s comfortable to carry.
References
Ten Essentials for Hiking, https://www.nps.gov/articles/10essentials.htm
Hypothermia, https://www.cdc.gov/disasters/winter/staysafe/hypothermia.html
Be Prepared for a Wildfire, https://www.ready.gov/wildfires
Choose Trail Food and Treat Your Water
I pack compact trail food like beef jerky or calorie-dense sardines, which pair well with tortillas or chips. I boil creek water in a lidded metal pot because its source may be unsafe. I also carry purification tablets as a backup, wait 30 minutes after using them, and expect a possible change in taste.
Compact Trail Foods
Choose compact foods that deliver useful calories without taking up much room in your bag. I look for calorie-dense choices that support a lighter load and greater freedom on the trail. Canned sardines packed in olive oil offer about 170 calories per can, and beef jerky also travels well. For portable meal pairings, I combine sardines with tortillas or potato chips for a simple meal.
- Pack sardines when you want a compact, calorie-rich option.
- Choose jerky for a ready-to-eat protein source.
- Add tortillas for a convenient, filling pairing.
- Carry potato chips to complement sardines.
- Treat creek water before drinking; upstream sources may be unsafe. Use purification tablets and wait 30 minutes, though they may affect the taste.
I keep food practical and water treatment in mind, so my bag stays useful without weighing me down.
References
Food and Nutrition: Hiking and Backpacking, https://www.nps.gov/articles/health-and-safety-hiking-food-and-water.htm
Food Safety for Hiking, Camping & Boating, https://www.fsis.usda.gov/food-safety/safe-food-handling-and-preparation/food-safety-basics/food-safety-hiking-camping-boating
Drinking Water Treatment for Hikers and Campers, https://www.cdc.gov/healthywater/drinking/travel/backcountry_water_treatment.html
Boil Water Safely
Because creek water can carry unknown contamination, I boil it in a covered metal cook pot before drinking. I can’t know what entered the water upstream, so I don’t gamble with untreated sources. I bring water to a rolling boil, keeping the lid on to conserve fuel and reduce splashing. At elevation, water temperature drops, so I allow for a longer boiling duration rather than relying on a fixed time that may not suit conditions. I let the pot cool while covered, then pour carefully into a clean container. This simple routine helps me stay in control of a basic need without depending on an uncertain source. I pack a lightweight metal pot and plan fuel use before setting out; practical preparation gives me more freedom to travel independently.
References
Emergency Disinfection of Drinking Water, https://www.cdc.gov/drinking-water/about/about-emergency-disinfection-of-drinking-water.html
Making Water Safe to Drink, https://www.epa.gov/ground-water-and-drinking-water/emergency-disinfection-drinking-water
Boil Water Notices, https://www.cdc.gov/water-emergency/about/index.html
Pack Purification Tablets
Alongside my metal cook pot, I pack water-purification tablets as a lightweight backup for uncertain creek water. Unknown upstream sources can make a clear stream unsafe, so I don’t rely on appearance alone. I follow the label’s treatment timing and wait 30 minutes before drinking. Chlorine tablets may affect the water’s taste, but that’s a small trade-off for carrying less and staying independent.
- Keep tablets sealed and dry.
- Treat water according to the package directions.
- Wait the full 30 minutes before drinking.
- Use my lidded metal pot to boil water when practical.
- Pack compact food, too: sardines provide about 170 calories per can, while jerky travels easily. I pair sardines with tortillas or potato chips for a simple meal without bulky cooking gear.
Even when I plan to boil, tablets give me another option if fuel or time runs short.
References
Drinking Water Treatment for Hikers and Campers, Centers for Disease Control and Prevention, https://www.cdc.gov/healthywater/drinking/travel/backcountry_water_treatment.html
Backcountry Water Treatment, National Park Service, https://www.nps.gov/articles/000/water-treatment.htm
Drinking Water Treatment, U.S. Environmental Protection Agency, https://www.epa.gov/ground-water-and-drinking-water/emergency-disinfection-drinking-water
Carry a Lighter, Shelter Cord, and Dental Care
Since fire can be essential for warmth and cooking, I carry a BIC lighter as my primary source and pack a backup fire-starting method. This redundancy gives me another option if one tool fails and helps me stay self-reliant.
For a basic shelter, I pack about 4–4.5 feet of paracord. It’s light and useful, and its seven inner strands can be separated for smaller tasks. I can also use the cord for quick gear repairs.
I include a toothbrush and flosser to clean my teeth, especially after eating sticky beef jerky. Wet wipes help me stay clean in hot, humid, or water-scarce conditions. These compact essentials support comfort and independence without adding much weight to my bag.
References
Fire Safety Outdoors, https://www.nps.gov/articles/000/fire-safety.htm
The Ten Essentials, https://www.nps.gov/articles/10essentials.htm
Oral Health Tips, https://www.nidcr.nih.gov/health-info/oral-hygiene/oral-health-tips
Add Warmth for Winter and Elevation for Wet Ground
I skip a sleeping bag in summer, but I add one and an insulating layer when winter’s coming. For cold or damp ground, I pack a sleep pad; in wet conditions, I can use a hammock to stay above soggy ground and insects. I’ll match my sleep setup to the conditions and the comfort I need. Because military-style backpacks can add substantial weight, I keep my sleep system compact to help make it worth the weight on long trails.
Add Winter Insulation
When temperatures drop, I add a sleeping bag and an insulating layer beneath my poncho to stay warm. My poncho still blocks the weather; supplemental insulation helps me adapt without carrying a bulky winter shelter year-round. I choose thermal layering that matches the forecast and my route, so I can move freely and stay ready.
- Pack a sleeping bag for cold-weather trips; skip it only in reliably warm conditions.
- Add a sleep pad when cold makes ground insulation and comfort essential.
- Use a breathable SOL Escape bivvy as a ground layer over leaves and dirt.
- Consider a hammock when wet ground or insects threaten a comfortable rest.
- Pair any winter shelter with enough insulation to retain warmth.
I check conditions before leaving and adjust my sleep kit accordingly. A little planning keeps my load practical while giving me more freedom to travel through changing weather.
References
Cold Weather Safety, https://www.weather.gov/safety/cold
Cold Stress Guide, https://www.cdc.gov/niosh/cold-stress/about/index.html
Cold Weather Camping, https://www.nps.gov/articles/000/cold-weather-camping.htm
Sleep Above Wet Ground
A warm-weather sleep kit can stay light, but wet ground calls for a different plan. I may skip a sleeping bag in summer and focus on shelter from rain and wind. A breathable SOL Escape bivvy gives me a place to sleep beneath a poncho, while serving as ground insulation between me and leaves or dirt. In heavy rain, I can shelter inside it and change out of clothes soaked by rain or sweat.
A sleep pad adds comfort, but I can sleep directly on the ground when saving weight matters more. For wet terrain or insect protection, I can add a hammock or swap it for the bivvy. When I expect winter cold or high elevation, I pack a sleeping bag and insulating layer. That extra warmth helps me stay ready to move freely.
References
Ten Essentials, National Park Service, https://www.nps.gov/articles/000/10-essentials.htm
Hypothermia, Centers for Disease Control and Prevention, https://www.cdc.gov/niosh/outdoor-workers/about/hypothermia.html
Camping and Hiking Safety Tips, National Park Service, https://www.nps.gov/articles/000/camping-and-hiking-safety.htm
Test Your Kit and Remove Unused Gear
Test your kit on several outdoor trips before you depend on it, and spend a few nights outside to find out what works. I use a post-trip gear review to spot dead weight and protect the freedom to move. After each outing, I list what stayed untouched, then reassess after three to five trips.
- Can I stay dry and warm?
- Do I have enough food and water?
- Can I reliably start a fire?
- Did I use basic dental care supplies?
- Does the pack stay comfortable all day?
Set unused items aside, but don’t cut essentials just to chase a lower number. Field-tested packing choices matter more than theory. A roughly five-pound kit carried me for three days on a 150-mile bike trip, including nights beside the road. Real miles reveal what belongs. A well-fitted load-bearing frame helps distribute heavy gear and reduce pack sag.
References
Ten Essentials for Hiking, National Park Service, https://www.nps.gov/articles/10essentials.htm
The Ten Essentials, The Mountaineers, https://www.mountaineers.org/blog/what-are-the-ten-essentials
Backpacking Checklist, REI Co-op, https://www.rei.com/learn/expert-advice/backpacking-checklist.html
Frequently Asked Questions
Is a Five-Pound Survival Bag Suitable for Every Climate?
No, I wouldn’t rely on a five-pound survival bag in every climate. Your needs change with temperature, rain, wind, and available water. I’d treat five pounds as a starting limit, then choose Climate specific gear that protects you from the hazards you’re most likely to face. Seasonal shelter planning matters, too: a setup that works in mild weather may fail in freezing conditions. Keep your freedom to adapt by reviewing your route, forecast, and skills before each trip.
What Should I Do if My Pack Exceeds Five Pounds?
If your pack exceeds five pounds, I’d review every item and trim what doesn’t earn its weight. Reduce duplicate purpose items, replace heavier gear with lighter alternatives, and weigh each component. Before adding anything, practice the “need, use, carry” test: Do you need it, know how you’ll use it, and willingly carry it? Keep what supports your freedom and safety, then reassess the total after each change. A lighter load makes moving easier.
How Often Should I Inspect or Replace Emergency Supplies?
I inspect my emergency supplies every three months and after each use, then replace anything expired, damaged, or depleted. I use supply expiration tracking to monitor food, water, medications, batteries, and other time-sensitive items, rotating stock before it goes bad. During routine kit inspections, I test equipment and confirm everything still works. This simple schedule helps you stay ready, protect your independence, and choose your next move without relying on last-minute resupply.
Can I Carry a Five-Pound Kit in Checked Airline Luggage?
Yes, I can usually pack a five-pound kit in checked luggage, as long as its contents meet airline baggage rules and checked luggage limits. I’d check my airline’s restrictions before flying, since batteries, fuel, knives, tools, and other items may be prohibited or require special handling. I’d also secure sharp objects, protect fragile supplies, and keep essentials I might need during travel in my carry-on, subject to cabin rules. That keeps my trip flexible and hassle-free.
What Survival Skills Should I Learn Alongside Carrying a Kit?
Learn navigation skills, emergency signaling, first aid, water purification, fire-starting, and shelter-building. I’d practice each skill outdoors, then test it without relying on a phone or packed gear. Learn to read a map and compass, signal rescuers with a whistle or mirror, treat common injuries, and find safe water. These abilities give you more freedom to respond calmly when plans change—and help you make the most of the kit you carry.
Conclusion
I treat the five-pound limit like a small boat: every item must earn its place, or the load sinks my comfort before the trail begins. I pack shelter, water, food, warmth, and a few reliable tools, then carry the bag on real walks. If something stays unused, I leave it ashore. Your kit doesn’t need to conquer the wilderness; it needs to help you cross it safely, one steady step at a time.