How Do You Choose MOLLE Backpacks That Carry Heavy Loads Without Sagging?
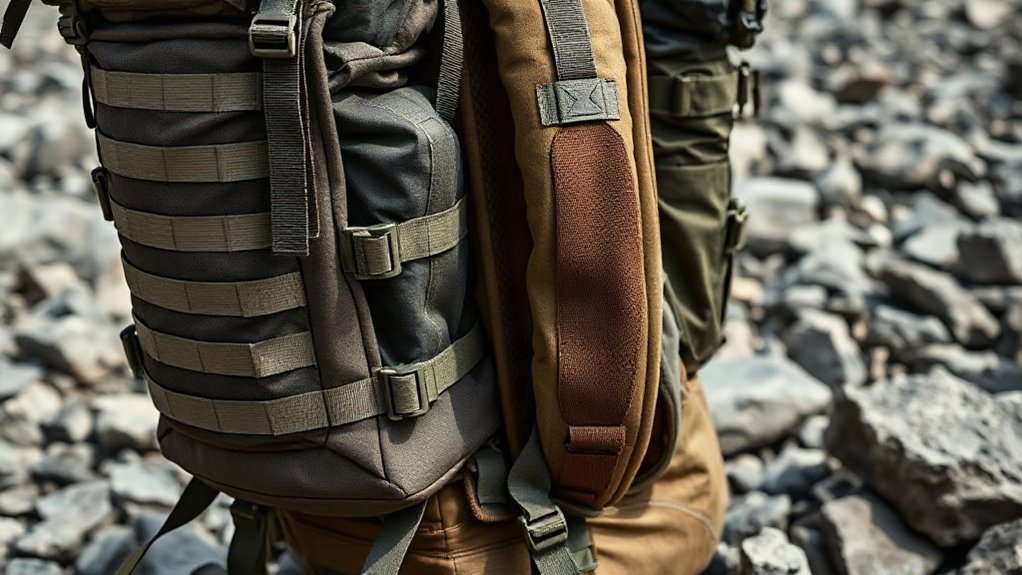
I choose a MOLLE backpack by first listing my actual gear, then matching its volume to the trip, season, and resupply plan. For heavy loads, I look for a supportive internal frame, adjustable harness, and padded hip belt that transfers weight to my hips. I pack dense items close to my back, attach pouches high and evenly, and tighten compression straps to limit movement. I test the loaded fit before a demanding trip; the details below help refine each choice.
Key Takeaways
- Choose a firm internal frame, supportive hip belt, padded shoulder straps, and load lifters suited to your expected weight.
- Match pack capacity and dimensions to your complete seasonal loadout instead of relying on extra MOLLE pouches to add space.
- Fit the harness to your torso, snug the hip belt over your hip bones, and test the loaded pack before a demanding trip.
- Keep dense gear close to your back and high, distribute MOLLE pouches evenly, and tighten compression straps to stabilize the load.
- Secure pouch straps and inspect webbing and stitching; remove or redistribute gear if the pack still bulges, shifts, or sags.
Choose a MOLLE Backpack After Selecting Your Gear
Before choosing a MOLLE backpack, select your sleeping system, clothing, food, water, and other gear so you can size the pack for the load you’ll actually carry. I wouldn’t choose capacity from trip length alone; first, I’d gather the items I plan to bring and check how they fit together. Bulky equipment or a resupply plan can change what I need, so I’d treat any capacity estimate as a starting point, not a rule. I’d also compare pack shape because similar-volume molle backpacks may differ in height and width, affecting how efficiently my gear fits. For heavy loads, I’d inspect the aluminum frame, shoulder straps, and waist belt, then load the pack and test its stability. A fitted suspension can transfer about 80% of pack weight to my hips. Load-lifter straps help stabilize a heavy pack by drawing the upper load closer to the wearer.
Match MOLLE Pack Volume to Trip Length and Season
I use trip length as a starting point: up to 3 days often fits 50 L or less, 3–5 days may call for 50–80 L, and longer trips may need 70 L or more. I adjust for food, clothing, climate, and gear bulk, allowing extra space for cold-weather layers or bulky seasonal equipment. A compact 3-day pack can hold a weekend’s essentials when packing style makes efficient use of its usable volume. After selecting your gear, I’d compare both pack capacity and dimensions so the bag fits your actual load.
Match Volume to Trip Length
Match your MOLLE pack’s volume to the trip, but treat duration as a starting point, not a rule: up to 50 L often suits 1–3 days, 50–80 L can work for 3–5 days, and trips longer than five days may call for 70 L or more. I choose my rucksack after selecting gear, so capacity reflects what I’ll actually carry.
| Trip length | Starting volume | Check before choosing |
|---|---|---|
| 1–3 days | Up to 50 L | Food and clothing |
| 3–5 days | 50–80 L | Gear bulk |
| Over 5 days | 70 L or more | Resupply options |
For heavy load hiking, count meals between resupply points; frequent stops can mean a smaller pack. Use molle webbing to attach compatible gear, but don’t let add-ons replace a suitable main compartment.
Account for Seasonal Gear
Seasonal gear can change the volume you need, even on a short trip. I size my MOLLE pack for the complete loadout, not just the number of days. Winter layers, rainwear, extra food, and a sleeping system can crowd out space that summer clothing would leave free. As a rough guide, I consider 50 L or less for one to three days, 50–80 L for three to five, and 70 L or more beyond five; resupply can lower those needs.
I also compare pack dimensions, since two packs with similar stated capacity may fit gear differently. Before buying a tactical assault pack, I check whether its interior holds my seasonal kit without filling the pals grid rows with extra pouches. That keeps a heavy load more compact and manageable while preserving freedom of movement.
Pick an Internal Frame for Heavy MOLLE Loads
For heavy MOLLE loads, I recommend a firm internal frame that connects the pack to its shoulder straps and substantial hip belt. When the suspension fits properly, it can transfer about 80% of the weight to your hips instead of letting the pack sag from your shoulders. Try the loaded pack on to check that the frame, straps, and belt sit securely. Poor load transfer can make narrow shoulder straps dig into your shoulders.
Choose a Stiff Frame
When you carry heavy MOLLE gear, choose an internal-frame pack with a stiff frame and firm back and hip-belt support. I look for a frame that connects securely to the shoulder straps and belt, keeping the pack close to my back rather than letting it sag. A lightweight pack under three pounds may use a flexible suspension designed for lighter loads, so I check its construction before choosing an internal-frame MOLLE backpack. I also inspect the load lifters, padded shoulder straps, and torso adjustment for a secure fit. Trampoline-style backs improve airflow but hold the load farther from your body, which can feel less stable with attached pouches. Before relying on a pack for demanding trips, I try it on fully loaded and confirm the frame and suspension fit securely.
Transfer Weight to Hips
A properly fitted internal-frame MOLLE backpack transfers much of its load to your hips, reducing shoulder strain. I look for a frame that connects securely to both shoulder straps and a padded hip belt; with proper fit, the belt can carry about 80% of the pack’s weight. For heavy loads, choose a supportive, sufficiently stiff frame and firm belt padding. Some ultralight packs under 3 lb use more flexible suspensions better suited to lighter gear.
Adjust torso length first, then set the hip belt snugly over your hips and tighten the shoulder straps to stabilize the frame. Don’t assume a molle ii rucksack or patrol pack will fit just because its suspension looks robust. Load it with your typical gear, secure side compression straps, and walk to check comfort and balance before choosing.
Make Sure the Hip Belt Carries the Load
Choose a MOLLE pack with a sturdy, padded hip belt that fits snugly over your hip bones, plus a frame and harness that transfer weight to it. I look for a belt that supports a heavy load without depending on shoulder straps to hold it up. With a properly adjusted suspension, your hips can carry about 80% of the pack’s weight, leaving your shoulders to stabilize the load. Adjust the belt first, then tighten the shoulder straps without lifting weight off your hips. Pack dense items close to your back and compress the contents to keep the load centered over the belt, not pulling backward and making the pack sag. Before heading out, test the tactical MOLLE pack with a weighted load. Check that its belt stays put without slipping or causing pressure points. Measure your torso length and match it to the pack’s frame and harness adjustment range for a better fit.
Fit Your MOLLE Pack and Adjust Its Suspension
Even a sturdy hip belt can’t carry a heavy load well if the pack doesn’t fit your torso. I choose a MOLLE pack by torso length and hip-belt fit, not capacity alone; a poor fit lets weight sag and limits your freedom to move. Adjust the torso length and shoulder straps until the pack sits close against your back. Center the hip belt over your hips, then tighten it so it carries most of the weight. A well-fitted suspension can transfer about 80% of the pack’s load to your hips. For a heavy loadout, I favor a supportive internal frame, firm padding, and a sturdy belt over the flexible suspension common in packs under three pounds. A modular design won’t compensate for a suspension that doesn’t match your body. Some three-day assault packs have fixed harnesses that may not fit every torso length.
Stabilize Heavy Loads With Compression Straps
After loading my MOLLE pack, I tighten the compression straps to compact the contents and pull the weight close to my back, reducing shifting as I walk. This helps control strap sag and keeps the pack more stable as I move freely over uneven ground. I check the fit again whenever the load changes or settles during a trip.
> Tighten compression straps to bring the load close to your back, reduce shifting, and keep your pack stable on uneven ground.
- Draw both sides in evenly so the load stays balanced.
- Secure bulky items with molle attachment straps where available, then cinch the compression straps to limit movement.
- Inspect mil-spec webbing for secure stitching and adjust tension without over-tightening.
Compression straps improve stability, but they can’t make an overloaded pack manageable. If the pack feels strained or remains bulky after tightening, remove items or redistribute the weight. I want a compact, controlled load—not extra strain on the pack or my body. Keeping heavy items close to your back helps maintain a balanced center of gravity.
Place MOLLE Attachments to Prevent Sag
To prevent MOLLE attachments from pulling the pack outward or causing it to sag, I place heavy pouches high and close to my back, then distribute them evenly across both sides. This keeps weight near my center of gravity and helps prevent an overloaded panel from twisting. I reserve outer pouches for lighter items I need to reach quickly, and avoid letting dense gear hang far from the webbing. I weave each pouch’s straps through the pack’s PALS rows and attachment loops, then secure them snugly so they can’t shift as I move. After loading, I tighten the compression straps to draw the attachments and main load toward the frame. When I assess a pack, I also check that its bartack stitching and 1000D Cordura nylon webbing can withstand repeated loading without loosening or tearing. I keep frequently used items in easy-to-reach positions so I can grab them quickly without disturbing the load.
Choose MOLLE Pack Pockets and Access Points
Once I’ve balanced MOLLE attachments, I choose pockets and access points that let me reach gear without unpacking the whole bag. Side or U-shaped access gives me a direct route to items deep inside, while a bottom compartment with a removable divider separates my sleeping bag or expands into one storage area.
- I keep snacks and a headlamp in top-lid pockets, bottles in secure side pockets, and check hydration sleeve compatibility before buying.
- Hip-belt pockets hold small essentials; shoulder-strap pockets keep my phone or camera ready.
- An exterior stretch pocket carries bulky, lightweight rain gear; compression straps tighten the load and improve stability.
I match pocket locations to my routine so I can move freely and retrieve essentials quickly. I also check that access points work with my packed load, not just an empty bag.
Keep Your MOLLE Pack’s Contents Dry
Because a DWR finish only sheds light rain, I use a pack liner or waterproof compression sacks to protect essential gear and fit a rain cover over the loaded pack for broader coverage. Before buying, I check whether the cover comes with the pack or costs extra. I also compare fabric claims carefully: 500d cordura can resist abrasion, but it doesn’t make a bag waterproof. Even ykk zippers need protection from direct, sustained rain. I seal the top fully; a properly closed roll-top helps block water, while a cinch-top may need a flap or added cover. After a downpour, I stash wet rain gear in an exterior stretch pocket so it can air out without soaking dry supplies inside my tactical edc backpack. This layered setup lets me travel confidently.
Test Your Loaded MOLLE Backpack Before Buying
I load the pack with gear and MOLLE pouches similar to what you’ll carry, then check whether the frame keeps the weight stable. I walk with it to see if the load stays close to my back or sags and shifts. I test the straps, hip belt, and torso adjustment under load to confirm the suspension transfers most of the weight to my hips and fits securely.
Load It Realistically
Before buying, load the MOLLE backpack with the gear and attached pouches you expect to carry; their weight and bulk can change how it fits. I’d use realistic items, not just weights, so I can assess their shape and placement. Compare models such as the 5.11 Tactical Rush 72 and Eberlestock with the same load; check whether Duraflex buckles secure the straps reliably.
- Tighten compression straps and adjust the torso length and harness while loaded.
- Walk around, noting shifting, strap slippage, discomfort, or any pull away from your back.
- Assess the frame, shoulder straps, and hip belt for comfortable weight transfer; a suitable suspension can place about 80% of the load on your hips.
I’d choose the pack that fits and supports me under realistic conditions, not simply the one with the largest stated capacity.
Check For Sagging
With a realistic heavy load in the pack, I check whether its frame, shoulder straps, and hip belt keep it upright and carry most of the weight on my hips. I ask the retailer to load it if needed, then walk around and watch for the bottom dropping, the back panel bowing, or the load pulling away from me. I tighten the hip belt and shoulder straps; the pack should stay stable, with weight evenly distributed rather than hanging from my shoulders. Compare a maxpedition falcon with a condor outdoor model at the same load, especially if you’re choosing a bug out bag. A heavier setup may need a stiffer frame and firmer back and hip-belt support. This quick check helps you choose a pack that carries securely without limiting your freedom to move.
Test The Suspension
A sagging check shows whether the pack stays upright; a suspension test shows how well it carries weight in motion. I load the MOLLE backpack near my expected field-use weight, then adjust torso length, shoulder straps, and hip belt before judging comfort. A good fit should transfer most of the load to my hips—about 80%—and keep the pack close to my back.
- Walk with the loaded pack; watch for a dropping bottom, a load pulling away, or shifting straps and seams.
- Check that the frame, padding, and hip belt maintain a stable, balanced carry as I move.
- Match support to your load: a flexible frame may suit a lighter range bag or drone pack, while heavy loads need a stiffer frame and firmer back and hip-belt support.
This test shows whether I can move freely without constant readjustment.
Frequently Asked Questions
How Do You Stop Your Backpack From Sagging?
I stop my backpack from sagging by tightening its load, fitting its suspension, and keeping weight balanced. First, I adjust the torso length and hip belt so the belt carries most of the load on my hips. Then I snug the shoulder and chest straps to hold the pack close. I place heavy gear near my back, distribute items evenly, and cinch compression straps. I also avoid exceeding the pack’s rated capacity or suspension limits.
What Is the 20% Rule for Backpacking?
The 20% rule says your loaded backpack should weigh about one-fifth of your body weight or less. I treat it as a trail sign, not a hard boundary: at 150 pounds, I’d aim for a 30-pound total pack, including contents. Your fitness, terrain, trip length, and pack fit can change what feels manageable. I’d balance and compress the load, then adjust a supportive frame and hip belt to carry weight comfortably.
Which MOLLE Backpack Is the Best?
I’d choose a framed MOLLE backpack with an adjustable torso, firm padded hip belt, and compression straps; there isn’t one best model for everyone. Match capacity to your trip: up to 50 L for 1–3 days, 50–80 L for 3–5 days, and 70 L or more for longer trips. Check reinforced attachment points, then try the loaded pack on. Choose the one that fits your body and keeps weight on your hips.
What Rucksack Do Navy Seals Use?
Navy SEALs don’t all use one rucksack; their gear varies by mission, unit, and procurement. I wouldn’t trust any “official SEAL pack” claim—it can be as mythical as a bottomless rucksack. Units may select military-style models from Mystery Ranch, Eagle Industries, or other approved suppliers, and specific models change. If you’re choosing one, I’d prioritize a correctly sized internal frame, supportive hip belt, stable harness, and balanced MOLLE attachments for your intended load.
Conclusion
I choose a MOLLE backpack only after loading the gear I expect to carry. The right volume, supportive frame, fitted hip belt, and adjusted suspension keep weight on my hips instead of pulling my shoulders back. I place attachments close to the pack and balance the contents, then check pockets, weather protection, and access. Before buying, I test the loaded pack by walking and bending. A balanced load should ride like a well-packed toolbox, not a pendulum.
References
Backpack Safety, https://orthoinfo.aaos.org/en/staying-healthy/backpack-safety/
Backpack Safety, https://www.hopkinsmedicine.org/health/wellness-and-prevention/backpack-safety
Ergonomic Guidelines for Manual Material Handling, https://www.cdc.gov/niosh/docs/2007-131/