Which Bladder Size Fits Best Inside Hydration-Compatible Backpacks?
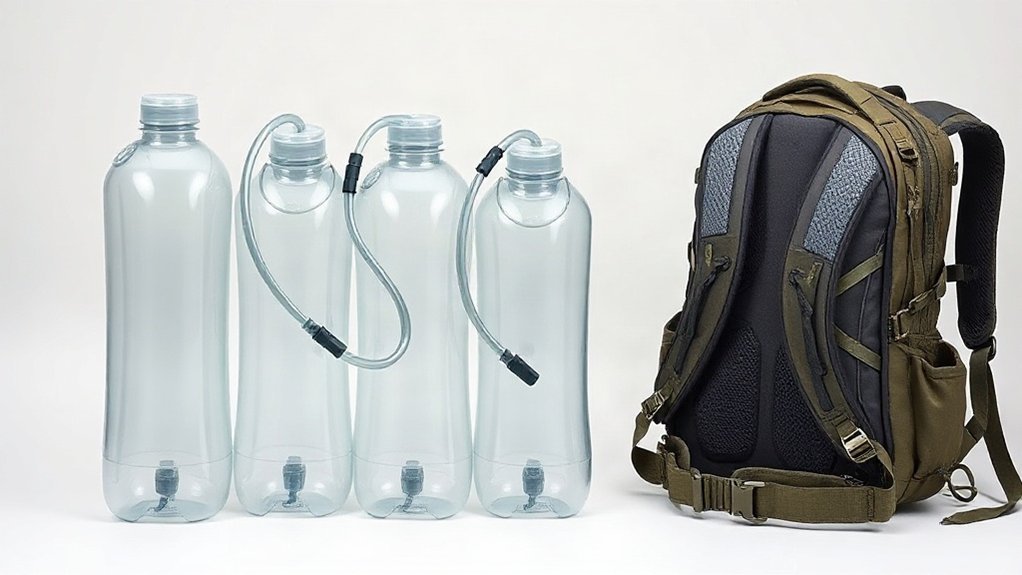
I choose a bladder size by matching my route’s water needs to the pack’s reservoir sleeve—not its cargo volume. A 2L bladder suits many backpacking packs and balances capacity with weight; 1.5L can work for short trips with reliable refills, while 3L may suit long, dry stretches if the sleeve fits. I check filled dimensions, hanger, and hose routing, then load and wear the pack to spot crowding or discomfort. The details below can help refine that choice.
Key Takeaways
- 2L is a practical fit for many hydration-compatible backpacks, balancing capacity, weight, and pack space.
- Check the pack’s stated reservoir capacity and sleeve dimensions; cargo-volume labels like 18L or 30L do not indicate bladder fit.
- Pack examples such as the Osprey Skarab 18 and Gregory Nano 18 H2O accommodate reservoirs up to 2.5L and 3L, respectively.
- Choose 1.5L for shorter trips with reliable refills, or 3L for long, dry stretches if the sleeve supports it.
- Test the bladder at your planned fill level, checking that the pack closes comfortably and the hanger and hose align.
Which Hydration Bladder Size Fits Your Pack?
Which bladder size fits your pack depends on its sleeve and how much water your outing requires: a 1.5L bladder can work in a compact pack or on a short trip with confirmed refill points, while 2L suits many backpacking packs. I’d choose a 3 liter bladder when I need more capacity, but I’d first confirm the hydration sleeve fits its filled shape and added bulk. A full 3L bladder weighs about 6.6 pounds, compared with 4.4 pounds for a 2 liter bladder, so consider the load before you head out. Check the hanger, tube exit, and hose route; the hydration bladder should sit securely without pinching the tube. I test the fit at my planned fill level, since an underfilled bladder can sit differently and pack layouts vary. Reservoir shape can affect how a bladder fits inside your backpack as it fills.
How Do 1.5L, 2L, and 3L Compare?
The main trade-off among 1.5L, 2L, and 3L bladders is capacity versus weight and bulk. I’d match your reservoir to the pack and route, while keeping the freedom to move comfortably.
| Size | Practical comparison |
|---|---|
| 1.5L | 3.3 lb full; suits a small water carry or confirmed refills. |
| 2L | 4.4 lb full; a practical choice if it fits your sleeve and plan. |
| 3L | 6.6 lb full; adds 2.2 lb over 2L, but supports long, dry stretches. |
A hydration-compatible backpack uses a bladder sleeve and hose routing to make hands-free drinking possible. For hydration-compatible backpacks, don’t choose by capacity alone. Check the filled dimensions, hanger, closure, and tube connection against your hydration pack. Then test the loaded setup for a secure fit and comfortable carry. A smaller bladder can feel freer; choose more capacity when the route calls for it.
How Much Water Do You Need on Your Route?
Plan water around the whole route, not a fixed number of hiking hours: consider how long you’ll be out, heat and exposure, effort, and what you’ve needed on similar hikes. Include the return trip and planned stops. A shaded route with confirmed refills calls for less water than an exposed stretch with no reliable source. I treat streams on maps as possibilities, not promises; availability can change, and untreated water may need filtering.
For many trips, a 2L bladder offers a practical balance. I might carry 3L for a long, dry route, but extra water adds weight: 2L weighs about 2 kg (4.4 lb), water alone. Choose hydration capacity for your actual plan, then check that your daypack’s reservoir hanger can support the bladder you intend to carry. To avoid paying for extras you won’t use, compare packs based on essential features such as a compatible reservoir hanger and a comfortable fit.
Will the Bladder Fit Your Reservoir Sleeve?
Before buying a bladder, check the pack’s stated reservoir capacity—it’s not the same as gear storage—and compare the bladder’s filled dimensions with the sleeve. A “2L hydration pack” may refer to its bladder, not its cargo space. I match the reservoir to the sleeve and its support: a full 3L bladder needs more room and structure than a 2L model. Check that the hanger or clip attaches properly, and line up the hose with the hose port. Brands such as camelbak and osprey use different layouts, so don’t assume every bladder fits every pack. Place yours in the sleeve, fill it to your planned carrying level, and make sure it sits securely. The pack should close without force, and the hose shouldn’t be trapped or sharply bent. An insulated drink tube won’t fix a poor fit. For younger riders, smaller bladders can be easier to manage in a pack sized for a shorter torso.
Will a Full Bladder Fit Your Pack?
I check the pack’s reservoir rating and sleeve, since pack capacity doesn’t indicate bladder capacity. A full 3L bladder needs more clearance and support than a 2L one, and its water adds about 6.6 lb. I load the pack, close it without forcing it, and walk to check for shifting, pressure points, or a pinched tube. In winter, hose insulation can help keep water from freezing in the drinking tube.
Pack Sleeve Compatibility
A pack’s advertised gear volume won’t tell you which bladder fits, so I check the hydration sleeve’s dimensions and stated reservoir capacity. An 18L or 30L label describes cargo space, not reservoir fit. For reference, the Osprey Skarab 18, Skimmer 16, Manta 24, and Mira 24 include 2.5L reservoirs; the Gregory Nano 18 H2O includes 3L.
I also match the bladder’s hanger or clip to the sleeve’s attachment point and confirm the drink tube passes through its exit freely. Before heading out for source hydration on the trail, I test the bladder at my planned fill level, secure it, and close the pack without forcing it. A leak proof setup and backpack rain cover help protect my kit, but neither substitutes for a compatible sleeve.
Clearance When Full
Even if the stated capacity matches, check your pack’s hydration sleeve against the bladder’s filled dimensions: a full 3L bladder weighs about 6.6 lb (3 kg) and needs enough clearance and support. For reliable clearance when full, I hang the filled bladder in its intended sleeve, pack my gear, then check that the pack closes without forcing. I also make sure the bladder doesn’t crowd the gear compartment or trap the tube in a sharp bend. Route the tube so the bite valve stays accessible, and confirm an insulated hose cover doesn’t catch on the zipper or straps. A Platypus bladder, like any model, must fit by its actual filled shape, not its label. If my loaded pack feels awkward or won’t close comfortably, I carry less water or choose a smaller bladder.
How Much Does Each Bladder Size Weigh?
Water accounts for nearly all the load: a full 1.5L bladder weighs about 1.5 kg (3.3 lb), a 2L bladder about 2 kg (4.4 lb), and a 3L bladder about 3 kg (6.6 lb). For summer hydration, I match capacity to my route and refill options. In hydration-compatible backpacks, every extra kilogram can limit freedom, especially in a mountain biking pack or running vest.
| Capacity | Water weight | Example bladder weight |
|---|---|---|
| 1.5L | 1.5 kg (3.3 lb) | Not specified |
| 2L | 2 kg (4.4 lb) | 102–142 g |
| 3L | 3 kg (6.6 lb) | 210 g |
A full 3L bladder adds about 1 kg (2.2 lb) over 2L. These totals exclude the bladder, pack, and gear; a filled 2L Platypus Hoser weighs about 2.10 kg (4.6 lb). Since daily riding and running can expose packs to repeated strain, harness wear points are worth considering alongside bladder capacity.
Can You Hang, Close, and Route the Hose?
Beyond capacity and weight, I check whether the bladder hangs securely and the hose stays easy to reach. These details keep water flowing without restricting my movement.
- I attach the bladder’s hanger to the pack’s internal loop, keeping the reservoir upright.
- I choose a slide-top opening for easier filling and cleaning, or a screw cap for compact access.
- I guide the hose through the exit port, avoiding trapped sections and sharp bends. A tube routing clip or sternum strap hose clip keeps the bite valve close.
- Before using a quick release hose connector, I close its shut-off valve and clear water from the tube to limit spills.
Some designs, including the Osprey Hydraulics LT and geigerrig, offer detachable hoses or convenient magnetic attachments. I want every connection simple, secure, and ready for the trail. Routing the hose along the pack’s straps helps prevent snags during movement.
How Can You Test the Fit Before Your Trip?
I fill the bladder to the amount I’ll carry, secure it in the sleeve, then pack my usual gear to check that nothing’s crowded. I walk with the loaded pack to spot pressure points, shifting, or discomfort. I also route the hose through its exit and check that it’s easy to reach, unkinked, and not trapped.
Check Loaded Pack Fit
Before choosing a reservoir size, test your pack with the water and gear you’ll carry on your trip. I fill the bladder to my planned level, secure it in the sleeve, then load food, rain gear, an extra layer, navigation tools, and a first-aid kit. A tactical hydration carrier should close without a struggle. I check that the bladder sits securely and the hose isn’t trapped, sharply bent, or blocked.
- Look for bulging fabric or a strained zipper.
- Walk, then note pressure under padded shoulder straps.
- Tighten the waist belt and check for bladder shifting.
- Reach for essentials without unpacking everything.
I compare filled dimensions and weight, too: 3 L adds about 2.2 pounds over 2 L. A comfortable fit on foot may feel different while riding, so test your actual setup.
Test Hose Reach
Once the bladder’s in place, test the hose with your loaded pack on. I fill it to my planned carry level, seat it in the hydration sleeve, and route the hose through its intended exit. Put the pack on and bring the mouthpiece to your lips. It should reach comfortably without pulling taut.
I turn my head, swing my arms, bend, and walk. Check that the hose stays within reach, doesn’t snag, and isn’t trapped under the reservoir or sharply bent. Those kinks can restrict flow when you need a quick drink. Secure the hose with its clip or magnetic attachment, if available, then move again to confirm it stays accessible. Whether your pack has 500d cordura, molle webbing, or ykk zippers, test your setup before dealing with winter hose freeze outdoors.
Frequently Asked Questions
What Size Hydration Bladder Should I Get?
I’d choose a 2L hydration bladder for most trips; it balances capacity and weight well. I’d go with 3L for long, dry stretches when refill spots are scarce, remembering that the extra water adds about 2.2 lb. A 1.5L bladder can work when I plan a short carry or reliable refills, but leaves less room for changes. I’d check pack fit, then walk with it loaded before heading out.
Can a Water Bladder Go in Any Backpack?
A water bladder can go in many backpacks, but I wouldn’t assume every pack will hold one comfortably. I’d look for a hydration sleeve, a hose-exit port, and a clip to secure the tube. Check the pack’s reservoir compatibility and compare the sleeve dimensions with the bladder’s filled size; capacity alone doesn’t guarantee a fit. Before you head out, load it with your gear and make sure the pack closes easily and the hose stays unkinked.
What Is the Best Backpack for Carrying a Hydration Bladder?
For most day hikes, I’d choose the Osprey Skarab 30 or Skimmer 28: each carries an included 2.5L reservoir and leaves room for layers and snacks. Their hydration sleeves keep water close, like a trail-side stream within reach. If you’re taller than 5-foot-8, the Skarab generally fits better; if you’re shorter, consider the narrower Skimmer. For heavier loads, I’d step up to the supportive Osprey Manta 34 or Gregory Citro 30 H2O.
How to Fit a Hydration Bladder in a Backpack?
I fit a hydration bladder by checking that it matches the pack’s sleeve dimensions and stated capacity. I fill it, slide it into the dedicated sleeve, and fasten its hanger to the internal buckle to keep it upright. Then I load my gear, route the hose through the port and along a shoulder strap, and check for kinks. I walk with the pack on to confirm the bladder doesn’t shift or press uncomfortably against my back.
Conclusion
I choose a bladder that fits the sleeve, leaves room for essentials, and carries enough water for the route—not simply the largest one that will fit. Before I leave, I fill it, hang it, close the pack, and check the hose. That quick test can prevent a cramped bag or a leak miles from help. A well-fitted bladder is like a steady trail companion: quiet, dependable, and ready when the path gets long.
References
Water Disinfection for Travelers, https://wwwnc.cdc.gov/travel/yellowbook/2024/environmental-hazards-risks/water-disinfection-for-travelers
Emergency Disinfection of Drinking Water, https://www.epa.gov/ground-water-and-drinking-water/emergency-disinfection-drinking-water
Dehydration, https://medlineplus.gov/dehydration.html