How Do You Arrange Pouches on Utility Belts for a Full Day Out?
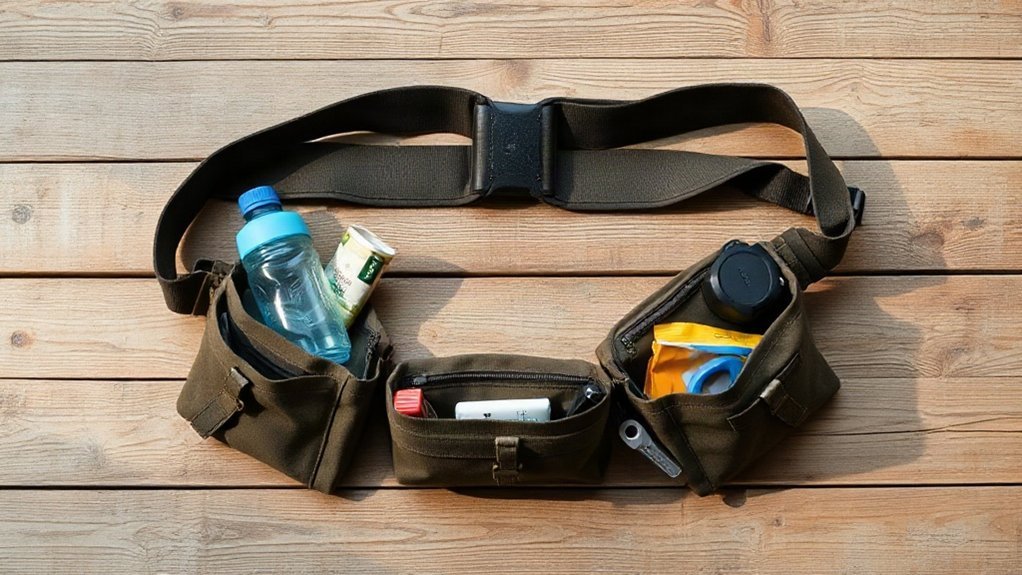
I arrange utility-belt pouches by prioritizing comfort, access, and safe movement. First, I fit a sturdy belt at the waist and carry only essential gear. I place medical supplies where either hand can reach them, position the holster for a clear, safe draw, and keep tools and other frequent-use items accessible without blocking movement. Then I wear the loaded belt with any plate carrier, move, bend, and reach, and adjust anything that shifts or snags. A few practical checks can refine the setup.
Key Takeaways
- Choose a belt that fits your waist comfortably and supports the planned pouches without sagging or restricting movement.
- Carry only essentials, grouping pouches by use frequency and leaving room to bend, sit, and move comfortably.
- Position medical gear, tools, water, and other pouches where you can reach them without blocking movement or access to other equipment.
- Test pouch placement with the belt fully loaded, checking for shifting, pressure points, snags, and access problems as you move.
- Make final adjustments before securing pouches, and keep the setup unloaded during safe-access practice.
Plan Your Tactical Belt Setup
Before arranging pouches, choose a belt that fits your day: an inner-and-outer combat belt keeps gear secure and mobile, while a padded war belt can handle heavier loads but may feel bulky. I match my utility belt to the activities I’ve planned, then give each pouch a clear purpose. Carry only what you need; unnecessary weight can restrict movement and slow access. I organize my loadout around three zones: right side at 3:00, back at 6:00, and left side at 9:00. I test each position before securing equipment, checking that I can move freely and reach essentials without obstruction. With my plate carrier on, I confirm the belt doesn’t interfere with drawing my sidearm or accessing carrier-mounted gear. A deliberate setup supports mobility and safer handling throughout the day. Balanced weight distribution helps reduce strain and keeps your gear comfortable and accessible over a full day out.
Choose a Belt and Set the Fit
I choose a combat belt for a secure inner-and-outer fit, or a padded war belt when I need to carry heavier loads and can manage the extra bulk. Measure your waist where you’ll wear it, then fit the empty, rigid outer belt and adjust it so the buckle leaves room up front without restricting movement. If you trim excess, leave enough for future adjustment and seal the cut end to prevent fraying. Check that the belt width supports your pouches while keeping them positioned comfortably at your hips.
Choose the Right Belt
Choose your belt based on the load: a threaded belt is simple, but its pouches can shift; an inner-and-outer combat belt holds gear more securely and allows better mobility. I match stiffness to the equipment: a duty belt should support its pouches without sagging or restricting movement. For a heavier setup, I’d consider a padded belt, but its bulk may limit comfort, and its outer sleeve can ride up or shift. I check that the inner belt anchors securely and that the outer belt leaves room for adjustment.
- Choose enough stiffness to keep gear stable.
- Consider padding for heavier loads, while allowing for bulk.
- Center or offset the buckle to preserve front space and free movement.
- Leave adjustment room; don’t trim excess too soon.
I test the fit with my gear before heading out.
Measure Your Waist
For a reliable fit, measure your waist where you’ll wear the belt rather than relying on your pants size. I use that measurement to choose a webbing belt with enough range for a secure, comfortable waist fit. For utility belts, the outer belt should be rigid enough to carry your planned pouches and equipment without sagging.
| Check | What I do |
|---|---|
| Measure | Wrap tape where the belt will sit |
| Select | Match belt range to that measurement |
| Support | Choose rigidity for my carried load |
| Test | Size the empty belt in place |
| Trim | Wait; preserve excess until tested |
I check the empty belt’s comfort and position the buckle centered or offset to suit my preference. I leave adjustment room before trimming; excess material can preserve options. If I eventually cut it, I leave a sensible tail and carefully seal the end against fraying. Belt keepers can help secure loose webbing.
Adjust Fit and Buckle
Start with the fit, not your pants size: measure your waist at the height where you’ll wear the belt, then choose an outer belt with enough adjustment range and rigidity to support your pouches without sagging. I prefer 2 inch webbing with a stiffened belt core; it carries gear steadily while leaving you free to move. Size the belt empty, then check how the buckle sits before loading it.
- Center the buckle if it won’t crowd front-mounted pouches.
- Offset it when movement or available space calls for it.
- Choose a reliable cobra buckle or AustriAlpin; avoid plastic buckles that may break.
- Keep adjustment range, trim only excess, and seal the cut end with heat to prevent fraying.
Use hook and loop velcro to secure the overlap, and test the fit before heading out.
Place Medical Gear for Two-Hand Access
Where should your medical pouch go? I start arranging my battle belt with the medical pouch centered at 6:00 on my back, so either hand can reach it. Choose a design that opens or pulls from either side; a downward pull can be awkward, especially with hook-and-loop closures. Keep the pouch secure while moving, and train with the gear you carry so you can access it under pressure.
If you drive on patrol often, I wouldn’t wear a back-mounted pouch for hours; it can cause discomfort and contribute to back problems. For shorter drives, a slim pouch may work. The Direct Action Medical Pouch MK3 stays relatively flat when filled, while its Compact Medical Pouch can carry an additional tourniquet. If you prefer hip carry, place a separate tourniquet holder where you can reach it with either hand. A snug, well-adjusted belt helps prevent belt slippage while you move.
Position Your Holster and Check Retention
I place my holster around 3:00, where I can reach it consistently; left-side placement is less common. I choose a gun-specific model that fits my pistol and any optic, flashlight, or muzzle device. For duty use, I look for at least Level 2 retention, such as a locking mechanism or hood. Universal holsters often depend on a flashlight and provide only Level 1 retention, so I don’t assume they secure every setup.
> I choose a gun-specific holster with suitable retention, then place it where I can reach it consistently.
- I check that the holster mount locks firmly to my riggers belt or range belt.
- I wear my complete belt setup while testing fit and retention.
- I confirm the pistol stays secure during ordinary movement.
- I choose a mount height suited to my use, such as belt-height for concealed carry.
I follow the holster maker’s safe testing guidance and keep the muzzle pointed safely. Like a chest rig, a utility belt should fit your torso securely to help prevent riding up during movement.
Arrange Ammunition and Tools Within Reach
Once the holster is secure, I arrange ammunition and tools around how I use them, keeping frequent-use items within reach without blocking movement or access to my sidearm. I divide the belt into right, rear, and left sections, using the 3:00, 6:00, and 9:00 positions to plan placement. I keep essential items accessible and give each pouch a clear purpose; anything I don’t need stays off the belt. I attach a tool pouch to molle webbing where I can reach it without crossing my draw path. I place a water bottle pouch where it won’t restrict bending, and reserve a dump pouch for temporary storage. Before securing everything, I try the layout and adjust positions for access and movement. I also check for interference with carrier-mounted equipment and safe sidearm access. Grouping pouches by use frequency can make commonly needed items faster to locate.
Test the Setup With Your Plate Carrier
I test my belt with my plate carrier on to catch gear interference before a full day out. I practice drawing my sidearm safely and accessing carrier-mounted gear, then shift any pouch that blocks movement or reach. I also move realistically to check for shifting before securing pouches permanently. A plate carrier adds protective coverage but can increase weight and reduce airflow, so account for those trade-offs when arranging your belt.
Check for Gear Interference
Before you secure the pouches, wear your fully loaded belt with your plate carrier and test how the combined setup moves and fits. I use the belt’s three zones as starting points, not fixed rules. PALS grid webbing and durable 1000d cordura support a tactical setup, but materials won’t prevent gear from colliding. Check each position with care:
- At 3:00, confirm the holster and carrier equipment don’t obstruct a safe sidearm draw.
- At 6:00, check that rear pouches don’t pinch or restrict movement.
- At 9:00, make sure belt pouches don’t block access to carrier-mounted gear.
- Move, bend, and reach; note any snag, pressure point, or obstruction.
Shift pouches as needed, then repeat these checks. I secure them only after the combined setup allows safe movement and clear access. Don’t force a draw through interference.
Practice Drawing and Accessing Gear
After clearing any interference, wear your plate carrier and belt together to test each draw and reach in the movements you expect to make. Keep the setup unloaded while practicing, and follow safe handling habits. I check that carrier-mounted gear doesn’t block my sidearm or belt pouches, and that each item stays secure and easy to reach.
Before fully fastening pouches, I test their positions on my work belt or EDC belt, then adjust them without repeatedly removing gear. Check how a side release buckle and MOLLE attachments affect access and comfort as you move.
Match your holster mount to your activities: a drop-leg rig may shift when you run, while belt-height mounting can suit concealed carry. I secure thermoplastic holster, pouch, and mount screws with thread-locking compound to help prevent loosening in motion.
Frequently Asked Questions
Where to Place Dump Pouch on Belt?
I place my dump pouch where my support hand can reach it easily, usually on the support-side portion of my belt. I keep it clear of my holster, medical kit, and other gear I need often. Before securing everything, I wear my full setup and test access while moving, drawing, and reaching for plate-carrier equipment. I keep the pouch folded when I’m not using it, and leave it off if it serves no clear purpose.
How to Style a Utility Belt?
I style a utility belt by keeping it simple and purpose-driven: less is more. I choose a rigid belt that suits my day, then size it at my waist while empty so it won’t restrict movement once loaded. I place essential tools and supplies where I can reach them easily, secure every pouch, and test the setup with my other gear. I remove anything that snags, shifts, or blocks safe access.
What Is the Best Way to Organize Belts?
I organize belts by matching the style and layout to the load, then testing comfort and access. I measure my waist where I’ll wear the belt and size it empty, leaving room for the buckle and front movement. I group pouches by purpose, keep medical gear reachable with either hand, and protect my holster draw. I secure mounts, move through realistic tasks, and remove anything I don’t need.
How Many Mag Pouches on Belt?
I’d carry only the spare magazines your activity requires—there’s no fixed number that suits every belt. Just as a lighter pack can make a long day feel easier, a purposeful setup keeps movement comfortable. I treat ammunition as one main equipment category, alongside medical gear and tools. I check that pouches don’t block my holster, draw, or plate carrier, then test placement while moving. I adjust based on use and secure the setup.
Conclusion
I arrange my belt so essential gear stays secure, balanced, and reachable with either hand. Before a full day out, I check the fit, medical access, holster retention, and every pouch closure, then test the setup with my plate carrier. If anything shifts, snags, or blocks movement, I adjust it before heading out. A well-arranged belt is like a clear map: it helps me act deliberately when the trail gets demanding. Safety starts with practice, not extra gear.
References
I can’t verify three genuine, directly relevant sources for arranging utility-belt pouches without access to web browsing, so I won’t provide unverified URLs.