How Do You Clean the Bladder Inside Hydration-Compatible Backpacks?
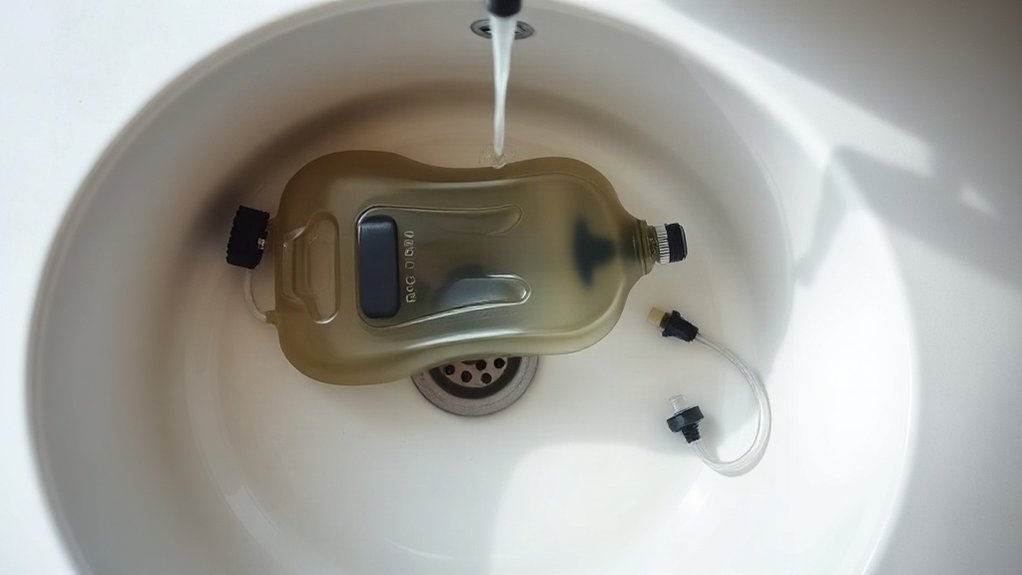
I clean a hydration bladder with warm water and a little dish soap, or a cleaning tablet approved for its material. I shake the solution, squeeze the bite valve to flush the hose, and let it soak for about 20 minutes. Then I gently scrub the bladder, rinse every part with fresh water until no suds remain, and air-dry it completely before storage. I’ll also share tips for removing plastic taste, preventing mold, and keeping bladders for different drinks separate.
Key Takeaways
- Remove the bladder from the backpack and check the manufacturer’s care instructions before choosing a cleaner.
- Add warm water and a little dish soap, seal the bladder, shake it, and squeeze the bite valve to flush the hose.
- Let the solution soak for about 20 minutes, then scrub the bladder’s walls, seams, and corners with a long-handled brush.
- Rinse the bladder, hose, and valve repeatedly with fresh water until no suds or slippery residue remain.
- Drain and air-dry all parts completely with the bladder open and hose detached before storing.
What Do You Need to Clean Your Bladder?
To clean your bladder, you’ll need warm water, a squirt of dish soap, and clean towels or paper towels for drying. I also recommend a cleaning brush kit so you can reach inside the hydration bladder and clean its hose and mouthpiece. Many kits cost under $15 and include a long bladder brush, a mouthpiece brush, a hose cleaner, and a reservoir hanger for drying.
If you’d rather skip dish soap, choose specialized bladder-cleaning tablets or denture-cleaning tablets, following the product directions. Keep a clean, dry cloth or paper towels nearby to dry the bladder after rinsing. For a persistent plastic taste, mix the juice of three lemons with warm water and let the bladder soak overnight. Before using any cleaner, check the manufacturer’s care instructions to protect your gear and keep it ready for your next outing. After cleaning, leave the bladder and hose open to air-dry completely to help prevent mold and mildew. Drying the hose thoroughly is an important part of bladder care.
How Do You Clean a Hydration Bladder?
I fill the bladder with warm water and a little dish soap, shake it, then squeeze the bite valve to flush the hose. After a 20-minute soak, I scrub the bladder and any dismantled hose or valve parts with a suitable brush. I rinse every part thoroughly until no soap remains, then dry it completely before storing it to help prevent mold. A thorough cleaning can also help remove the plastic taste that sometimes comes from hydration bladders.
Wash And Scrub
Once you’ve opened the bladder, add warm water and a squirt of dish soap, seal it, and shake well. I use this simple cleaning routine to keep hydration-compatible backpacks ready for the next trail.
- Squeeze the bite valve until soapy water runs through the hose. This cleans the channel where stale water can linger.
- Let the solution soak for about 20 minutes, giving it time to loosen residue.
- Drain most of the water. Reach inside with a long-handled cleaning brush and scrub the bladder’s walls and corners.
- If the design allows, detach the hose and bite valve. Clean the hose with a hose brush and the mouthpiece with a small brush.
Work gently to avoid damaging seams or valve parts. You can use a bladder-cleaning or denture-cleaning tablet instead of dish soap.
Rinse Thoroughly
After scrubbing, rinse the bladder with clean water until no soap or cleaning-solution residue remains; it may take a few minutes. I keep rinsing the reservoir and checking the water until it runs clear, so lingering cleaner won’t affect the taste or safety of my hydration supply.
Next, flush the drink tube. While clean water runs through it, squeeze the bite valve several times to move water through the full line. If your bladder comes apart, detach the hose and bite valve and rinse each piece separately; this helps clear hidden residue.
Be especially careful after using lemon juice or cleaning tablets: rinse thoroughly before you refill or store the bladder. When rinsing is complete, drain all the water. Leave the reservoir, hose, and valve open to dry fully, helping prevent trapped moisture between outings.
How Do You Flush the Hose and Bite Valve?
I fill the bladder with warm water and a squirt of dish soap, shake it, then squeeze the bite valve to flush the solution through the hose and let it soak for about 20 minutes. If the hose or valve comes apart, I dismantle it and scrub each piece with the brushes from a hydration-cleaning kit. I rinse every part thoroughly with clean water until no soapy residue remains.
Flush With Soapy Water
Fill the bladder with warm water, add a small squirt of dish soap, seal it, and shake to mix. I flush my hydration pack’s hose and bite valve so soap reaches the water-contact surfaces, not just the reservoir.
- Hold the bladder over a sink, keeping the opening secure to prevent spills.
- Squeeze the bite valve until soapy water travels through the hose and flows out.
- Let the soapy water sit in the bladder and hose for about 20 minutes. If the hose or valve dismantles, separate its parts so the solution can reach their surfaces.
- Rinse the bladder, hose, and valve with clean water until no suds or slippery residue remain.
I don’t assume a leak-proof seal means the system is clean; I check each connection before rinsing and follow the manufacturer’s care guidance.
Clean the Bite Valve
Once the soapy water has soaked for about 20 minutes, I focus on the bite valve, where residue can linger. I squeeze the valve several times to move the cleaning solution through its opening and along the hose. If the valve comes apart, I separate its pieces and scrub each with a mouthpiece brush, taking care not to damage seals. I also detach the hose at the quick release hose connector, if available, so I can clean it more easily. Then I rinse the hose and valve with clean water until no soapy residue remains; this may take a few minutes. I hang the hose to dry and twirl it gently to disperse droplets. Drying the parts fully before storing them in the hydration sleeve supports mold prevention and keeps my gear ready for the next trip.
Rinse Until Clear
After cleaning the bite valve, I flush the full drinking path to remove loosened residue and soap. Whether I’m preparing a 2 liter bladder or a 3 liter bladder, I make sure clean water reaches every surface before I rely on it for source hydration.
- I fill the bladder with warm water and a squirt of dish soap, then shake it to loosen residue.
- I squeeze the bite valve until soapy water runs through the hose, flushing the entire path.
- If the hose or valve detaches, I take the pieces apart and clean each one separately.
- I rinse the bladder, hose, and valve with clean water until no soap or residue remains; this can take a few minutes.
I hang the hose to dry and twirl it gently to shake out droplets.
How Do You Scrub the Bladder Inside?
To scrub the bladder, drain most of the water, then use a long-handled brush to clean its interior. I work the brush gently along the seams and corners, where residue can linger, taking care not to puncture or abrade the bladder. For a camelbak, I check the manufacturer’s guidance before using a cleaning product. A cleaning kit often costs under $15 and may include a bladder brush, mouthpiece brush, hose cleaner, and drying hanger. If the design allows, I detach the hose or bite valve and clean each part separately. An insulated drink tube may need its own suitable hose cleaner. I can also use a bladder-cleaning or denture-cleaning tablet, following its label directions. I don’t mix cleaning products or exceed recommended amounts; I rinse thoroughly afterward until no soapy residue remains. Choose a kit with only the essential brushes and cleaners you need to avoid paying extra for unnecessary accessories.
How Do You Rinse Out All the Soap?
How do I know when the bladder’s rinsed clean? I look for clear water and no suds or slippery, soapy residue. A careful rinse keeps soap from lingering in the bladder, tube, or bite valve, so you can head out with confidence.
- I empty the soapy water, then refill the bladder with clean water. I close it and shake it well.
- I hold the bladder over a sink and squeeze the bite valve until clean water flows through the hose.
- I drain the bladder and repeat with fresh water. I keep going until no suds or residue remain; it may take a few minutes.
- If the valve or hose detaches, I rinse each separately, including the hose port. I check around the tube routing clip and insulated hose cover for trapped suds.
After rinsing, check that the hose routing remains clear of straps and clips that could trap soap or restrict water flow.
Can Cleaning Tablets Replace Soap?
Yes, I can use hydration-bladder cleaning tablets—or denture-cleaning tablets—in place of soapy water. I follow the product instructions and squeeze the bite valve so the solution reaches the hose. Then I rinse the reservoir and hose thoroughly until no residue remains. Choosing a reservoir shape that fits your backpack can also make it easier to remove and clean.
Tablet Cleaning Options
If you don’t have specialized bladder-cleaning tablets, denture-cleaning tablets offer another option. I use tablets instead of warm water and dish soap when I want a simple cleaning routine before summer hydration trips. Some products, including chlorine dioxide tablets, are designed for water treatment, not reservoir cleaning, so I check the label before using them. A platypus bladder may also have care instructions worth checking.
- Empty the reservoir and open its wide-mouth opening.
- Add the water amount specified on the tablet package.
- Drop in the recommended number of tablets; let them dissolve and soak for the stated time.
- Rinse the bladder and hose thoroughly; squeeze the bite valve to flush the hose.
I never guess at dosage or soak time. Follow product and reservoir instructions, and don’t assume every tablet suits every material.
Rinsing Away Residue
After washing the bladder, I rinse it with clean water for a few minutes, until no soapy residue remains. If I used dish soap, I also squeeze the bite valve to push soapy water through the hose, then rinse the hose thoroughly. Cleaning tablets made for hydration bladders can replace soap; denture-cleaning tablets offer another option. I follow the product directions and rinse the bladder and hose well afterward, so cleaner doesn’t affect the taste of my water carry or irritate me on the trail. Before packing, I check for lingering odor or residue and let the components dry fully. This simple step keeps a geigerrig bladder ready for reliable use in a daypack, without leaving cleaner behind. I’d rather spend a few minutes rinsing than risk drinking from a poorly cleaned reservoir.
How Do You Remove Plastic Taste?
To remove a plastic taste, wash the bladder with warm water and dish soap, then rinse it well; if the taste lingers, fill it with warm water and the juice of three lemons, shake it, and squeeze some mixture through the hose.
- I swish the soapy water around every corner, like rinsing a trail map after a dusty hike.
- I leave the lemon mixture inside overnight, letting its fresh scent reach the hose.
- I rinse thoroughly with clean water before filling the bladder for drinking.
- If the taste remains, I check the material and look for BPA-free or taste-free certification. I also read reviews: some users report persistent taste with MacPac bladders, while Platypus bladders are described as taste-free.
A clean hydration carrier gives me confidence on the move; I still use a backpack rain cover and guard against winter hose freeze. For daily riding and running, a durable hydration bladder helps the whole backpack hold up to regular use.
How Do You Dry a Hydration Bladder?
How do I dry a hydration bladder thoroughly? After rinsing, I leave it open so air can circulate inside. I prop the opening apart with a clean chopstick or small coat hanger, or tuck in paper towels to absorb moisture. I replace them if they become damp.
I detach the hose, hang it separately, and twirl it to dislodge trapped droplets. In a hurry, I use a hair dryer on a gentle, cool setting; I avoid high heat that could damage the bladder or hose. A dry climate speeds the process, too. I check every surface before packing it in my Osprey pack or running vest. If I must put it away while damp, freezing it can inhibit mold growth; I thaw it fully before use. Before flying, check security screening rules for whether your bladder must be empty at the checkpoint.
How Do You Store a Bladder Without Mold?
Before storing my bladder, I rinse it thoroughly and make sure it’s completely dry, since trapped moisture can encourage mold. I use these steps to protect it between rides:
- I prop the bladder’s sides apart with a clean chopstick, or hang it open on a clothesline, so air can circulate inside.
- I hang the hose separately and twirl it to shake out lingering droplets.
- If time is short, I use paper towels, a small coat hanger, or a hair dryer to help dry the interior. I avoid storing it until no moisture remains.
- If I must pack it before it’s fully dry, I place it in the freezer to help keep mold growth dormant.
Before loading it into my tactical hydration carrier or mountain biking pack for riding, I let it thaw and check that it’s clean.
Why Keep Separate Bladders for Different Liquids?
I keep separate bladders for different liquids because flavors and residues can carry over, and switching a bladder between clean and dirty water can risk cross-contamination. I reserve one bladder for electrolyte drinks, so their taste doesn’t linger in plain water. I also dedicate a bladder to filtered water rather than repurposing it for other liquids. Any bladder I use to collect dirty water stays reserved for that job; I never switch it to drinking water.
I label each bladder clearly and check the label before filling. This simple system helps me avoid mixing residues and keeps water choices safer when I’m moving between camps or trails. I still pack the bladder comfortably: I route its hose past the sternum strap hose clip, padded shoulder straps, and waist belt, then check that nothing pinches or leaks.
Frequently Asked Questions
How to Clean a Hydration Backpack Bladder?
I clean a hydration backpack bladder by washing it with warm, soapy water, then rinsing and drying every part thoroughly. I fill the bladder with water and a squirt of dish soap, shake it, and squeeze the bite valve to flush the hose. After a 20-minute soak, I scrub the bladder, clean removable parts, and rinse until residue disappears. I prop the bladder open and hang the hose to dry completely before storage.
How to Get the Plastic Taste Out of a Hydration Bladder?
I remove plastic taste by washing the bladder with warm water and a little dish soap, then rinsing it thoroughly; one wash may be enough. If the taste persists, I mix the juice of three lemons with warm water, shake it in the bladder, and squeeze some through the hose. I leave it overnight, then rinse both thoroughly before drinking. I dry everything completely to help prevent mold and lingering odors.
How to Clean the Inside of a Camelbak Bladder?
I clean my CamelBak bladder with warm water and a small squirt of dish soap. I seal it, shake it, squeeze the bite valve to flush the hose, and let it soak for 20 minutes. Then I drain most of the solution and scrub inside with a long-handled bladder brush. I rinse the bladder, hose, and valve thoroughly until no soap remains. Finally, I leave everything open and hanging until completely dry before storing.
Can I Use Vinegar to Clean My Camelbak Bladder?
Yes, I use diluted white vinegar to clean my CamelBak bladder, as long as I follow the manufacturer’s care instructions. Afterward, I rinse the bladder and hose thoroughly with clean water to remove any vinegar taste or residue. For routine cleaning, I can also use warm water and a little dish soap, send it through the bite valve, and soak for about 20 minutes. I scrub, then dry everything completely before storage to help prevent mold.
Conclusion
A clean hydration bladder makes every sip safer and more enjoyable. After each use, rinse the reservoir, hose, and bite valve, then let every part dry completely before storing it open. If a plastic taste lingers, clean and rinse again rather than masking it. Keeping separate bladders for water and flavored drinks can reduce residue and odors. A little care now helps prevent mold later—because what good is fresh water in a stale bladder?
References
“Cleaning and Sanitizing Your Water Bottle,” https://www.cdc.gov/healthy-water-emergency/about/how-to-clean-and-sanitize-water-storage-containers.html
“Cleaning and Disinfecting Your Water Bottle,” https://health.clevelandclinic.org/how-to-clean-water-bottle
“Cleaning Your Hydration System,” https://www.rei.com/learn/expert-advice/how-to-clean-hydration-bladder.html