Why Does Water Taste Like Plastic in Hydration-Compatible Backpacks?
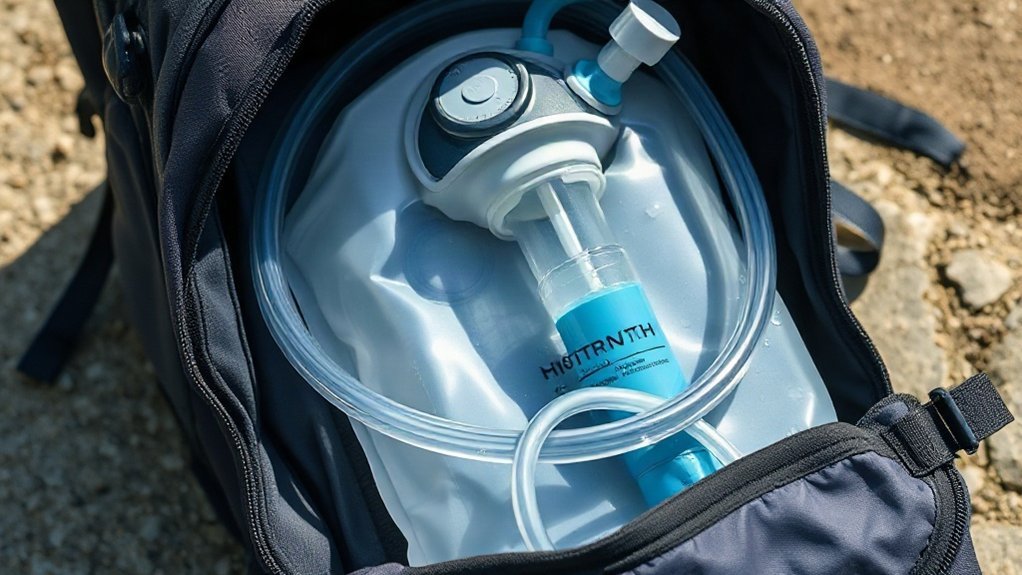
I find that water tastes like plastic in a hydration-compatible backpack when a new or rarely used bladder or hose transfers its flavor, especially after warm storage or when water sits inside. To reduce the taste, I fill the bladder about three-quarters full with room-temperature water, add fresh lemon juice, seal and freeze it overnight, then thaw, empty, wash, and dry it completely. I reconnect the hose only when everything’s dry. Below, I explain each step and its precautions.
Key Takeaways
- New or infrequently used hydration bladders can transfer a plastic-like taste to water.
- Warm storage and water left sitting in the reservoir can make the taste more noticeable.
- A plastic taste does not necessarily mean the bladder is damaged.
- Thoroughly wash and rinse the bladder and compatible components to remove residue and stale water.
- Lemon juice freezing may help reduce lingering plastic taste, but it does not replace cleaning.
Why Does Hydration Bladder Water Taste Plastic?
Why does hydration-bladder water taste like plastic? A new or infrequently used hydration bladder can transfer flavors from its material or hose into your water. Warm storage and water left sitting in the reservoir for a long time can make that taste more noticeable. This doesn’t necessarily mean the bladder is damaged, but it can make drinking unpleasant and limit your freedom to stay hydrated on the trail.
I rinse the bladder and hose thoroughly before use, then wash both with mild soap and water after every outing. If the taste lingers, I fill the reservoir about two-thirds to three-quarters full with room-temperature water, add the juice of one large lemon, seal it, swish, and freeze overnight. I thaw it fully, empty, rinse, and dry it, never filling it beyond three-quarters before freezing. These steps can help remove plastic taste from a hydration-compatible backpack.
Prepare the Bladder With Room-Temperature Water
I fill the bladder with room-temperature water before adding lemon juice. I stop when it’s about two-thirds to three-quarters full, leaving space for air. Give yourself enough time to fill it before moving to the next step. After cleaning, rinse the bladder thoroughly and let it dry completely to help prevent odors and buildup. The hose needs drying too, since moisture can remain inside.
Use Room-Temperature Water
Before adding lemon juice, I prepare the bladder with room-temperature water, not hot water. This measured start suits hydration-compatible backpacks and keeps my water carry routine simple. Hot water isn’t needed for this taste-adjustment method.
- I use clean, room-temperature water as the base.
- I leave room to swish the water and lemon juice together before freezing.
- I add juice from one large lemon, about 3–4 tablespoons.
- I seal the bladder securely and check that it’s leak proof.
Starting at room temperature helps me mix the ingredients without warming the bladder. It also gives me a practical baseline for the lemon-and-freezing method intended to improve the water’s taste. I follow the bladder maker’s care instructions, since materials and cleaning guidance can differ. This small preparation step leaves me free to use my pack as intended, without relying on hot water.
Fill the Bladder Partway
To leave enough room for mixing, I fill the bladder about two-thirds to three-quarters full with room-temperature water. I don’t exceed the three-quarter mark; for a 2 liter bladder, that means stopping at about 1.5 liters. This measured fill leaves room to add lemon juice later and prepare the bladder for freezing. I let the water settle before adding anything, rather than rushing the next step. Then I close the bladder securely to help prevent leaks during handling. If I’ve cleaned the reservoir with a cleaning brush kit, I make sure it’s ready for use and follow the product’s care directions. I can hang it from a reservoir hanger afterward to help it dry fully between uses, supporting mold prevention and keeping the bladder ready for my next outing.
Leave Space for Air
With the bladder ready, I add room-temperature water until it’s about two-thirds to three-quarters full, leaving air space inside. That space matters: I’ll need room to swish water and lemon juice around before freezing. Don’t top off even a 3 liter bladder; keep the fill below the three-quarter mark.
- I pour slowly to avoid spills and make the fill level easy to judge.
- I leave enough air to move the liquid freely, whether I’m prepping a camelbak or platypus.
- I allow time for filling before adding lemon juice, so I can check the amount first.
- I close the bladder securely once it’s filled, keeping water contained during the next preparation step.
This simple setup works in any hydration pack and leaves me ready to continue without crowding the bladder or restricting movement.
Add Fresh Lemon Juice to the Bladder
If your hydration bladder still tastes like plastic, fill it about two-thirds to three-quarters full with room-temperature water, leaving space for lemon juice and air. I squeeze the juice of one large lemon—about 3–4 tablespoons—into the bladder; a juicer makes this easier. Seal it, then swish the bladder gently to mix the juice throughout the water. This gives the liquid contact with the interior surfaces, including areas near the drink tube connection. Keep the hydration sleeve and any insulated drink tube clear of twists so the bladder can move freely. Check your gear’s care instructions before treating it, especially if you use a source hydration system with special materials. After the treatment, empty the bladder, wash it with mild soap and water, and let it dry fully before reassembling. The bladder’s shape affects fit inside your pack, so choose a reservoir that suits the space available.
Freeze the Sealed Bladder Overnight
Once you’ve swished the lemon mixture through the bladder, seal it securely and place it in the freezer overnight, or for about a day. I fill mine only two-thirds to three-quarters full with room-temperature water, leaving space for expansion. Freezing gives the lemon mixture time to work on lingering plastic taste; it isn’t a substitute for cleaning.
- Keep the bite valve attached only if your bladder’s instructions allow freezing it.
- Lay the bladder flat so it fits securely and won’t be crushed.
- Don’t freeze a full bladder; expanding water needs room.
- Remove the insulated hose cover if it prevents the bladder from lying flat.
This step can help make summer hydration taste fresher, but it won’t prevent winter hose freeze during use. An insulated hose can help slow heat loss, but it does not guarantee that water won’t freeze. After freezing, let the bladder thaw naturally in the sink; insulation may slow the process. Warm water can speed thawing.
Thaw, Empty, Wash, and Dry the Bladder
I let the frozen lemon-water mixture thaw naturally in the sink, using warm water if an insulated bladder slows the process. Then I empty the bladder and wash it with mild soap and water to remove lemon juice and residue. I let it dry fully before returning it to the vest and reattaching the hose. Regular cleaning and drying help protect the bladder’s durability through daily use.
Thaw the Bladder Naturally
After the bladder has frozen overnight, remove it and let it thaw naturally in the sink. I don’t force it open or apply direct heat; gradual thawing helps protect the material. If your insulated bladder takes longer, give it extra time, or use warm—not hot—water to speed things up. Before freezing, disconnect the quick release hose connector at the hose port and free the tube from the sternum strap hose clip.
- Set the bladder in the sink and wait until the ice has melted.
- Check that the hose and hose port have thawed too.
- Once thawed, empty the lemon-and-water mixture.
- Wash with mild soap and water, then let the bladder dry completely.
When it’s dry, return it to your vest and reattach the hose. This simple routine helps you stay ready to move without carrying a plastic-tasting drink.
Empty and Wash Thoroughly
When the bladder has thawed fully in the sink, I empty the lemon-water mixture, wash it thoroughly with mild soap and water, and let it dry completely before putting it back in the vest and reattaching the hose. I open the fill port wide and drain every remaining drop; trapped liquid can leave an unwanted taste. I gently clean the inside surfaces without using harsh cleaners that might affect the bladder material. If I use a geigerrig system, I check its components for care instructions and wash compatible parts as needed. I don’t add chlorine dioxide tablets during this wash; they’re for treating water, not a substitute for cleaning. Once the bladder is fully dry, I return it to my running vest and secure the hose with the tube routing clip for an accessible, ready-to-go setup.
Dry Before Reassembly
Once the overnight freeze is complete, I take the bladder out and let it thaw naturally in the sink; an insulated bladder may need more time. Don’t force a frozen bladder open. If you need to speed things up, use warm water instead.
- Once thawed, I empty every drop before cleaning.
- I wash the bladder with mild soap and water to remove lemon juice and residue.
- I let it dry fully before returning it to the vest or reconnecting the hose.
- I check that it’s dry before packing it for a trip.
This routine helps keep water tasting clean, whether I’m heading out with a daypack, mountain biking pack, backpack rain cover, or tactical hydration carrier. I reassemble only after the bladder is completely dry, so trapped moisture won’t linger inside.
Reattach the Hose and Return the Bladder to Your Vest
With the bladder completely dry, I return it to the vest and reconnect the hose securely, checking that the connection feels snug to help prevent leaks. I keep the vest and hose aside while the bladder dries, then route the hose through its usual guides so it sits within easy reach. Before filling the pack, I inspect the fitting and make sure the bite valve is accessible. I also check that the bladder lies flat and doesn’t bunch against the padded shoulder straps or waist belt. A secure setup helps me move freely while riding or hiking, without stopping to fix a loose connection. My Nathan vest has carried me hundreds of miles, and careful reassembly helps it remain dependable. If you use an osprey pack, follow its hose-routing design. Hose guides help keep the tube in place and reduce the chance of snags.
Frequently Asked Questions
How to Get Rid of Plastic Taste in Hydration Bladder?
I get rid of plastic taste by treating the bladder with lemon water. First, I remove it from the vest and detach the hose. I fill it two-thirds to three-quarters full with room-temperature water, squeeze in juice from one large lemon, seal it, and swish the mixture around. I freeze it overnight, then let it thaw in the sink. Finally, I empty, wash with mild soap and water, dry, and reattach everything.
Why Does My Camelbak Taste Like Plastic?
Your CamelBak probably tastes like plastic because its new or recently stored reservoir or hose hasn’t been thoroughly rinsed. Did you recently unpack it or leave it unused? I’d first wash the reservoir and hose with mild soap and water, rinse them well, then let them dry completely before reassembling. If the taste persists, try a lemon-water treatment and overnight freezing. Leave air space, and never fill it beyond three-quarters before freezing.
Why Does My Osprey Bladder Taste Like Plastic?
Your Osprey bladder may make water taste like plastic because it’s new or has absorbed odors during storage or previous use. I’d freshen it by filling it two-thirds to three-quarters full with room-temperature water, adding three to four tablespoons of lemon juice, sealing it, and swishing. Freeze it overnight, then thaw naturally. Empty it, wash with mild soap and water, let it dry completely, and reassemble it before your next outing.
Are Hydration Backpacks Good?
Yes, I find hydration backpacks useful when you want hands-free access to water during long runs, hikes, or rides. A well-fitting vest can stay comfortable over hundreds of miles, but fit and capacity matter: try it on loaded, check for bouncing or rubbing, and choose a bladder size that suits your route. I fill mine with room-temperature water, leaving some space, then clean and dry the bladder after each use.
Conclusion
A plastic taste in your hydration bladder is a small warning that its materials, residue, or storage conditions may need attention. I start with room-temperature water, add fresh lemon juice, seal and freeze the bladder overnight, then thaw, empty, wash, and dry it thoroughly. Finally, I reattach the hose and return the bladder to my vest. If the taste persists, I check the manufacturer’s care instructions and replace worn or damaged parts before drinking from it again.
References
Secondary Drinking Water Standards: Guidance for Nuisance Chemicals, https://www.epa.gov/sdwa/secondary-drinking-water-standards-guidance-nuisance-chemicals
Bisphenol A (BPA): Use in Food Contact Application, https://www.fda.gov/food/food-additives-petitions/bisphenol-bpa-use-food-contact-application
Bisphenol A (BPA), https://www.niehs.nih.gov/health/topics/agents/sya-bpa