Why Do Military-Style Backpacks Dig Into Your Shoulders and How Do You Fix It?
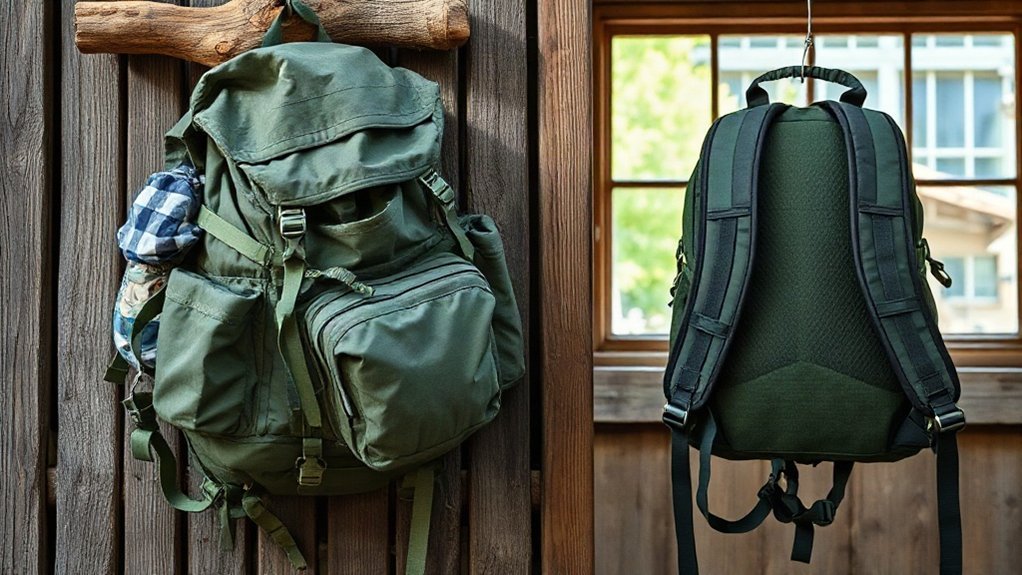
I find military-style backpacks dig into your shoulders when a poor fit, loose hip belt, or shifting load makes your shoulders carry too much weight. First, match the pack’s torso setting to your measurements and check its load limit. Center and secure the hip belt over your hip bones, then snug the shoulder straps and adjust the load lifters gently. Pack heavy gear close to your back and tighten compression straps to reduce sway. A quick fit check after walking can reveal what needs adjusting.
Key Takeaways
- Shoulder straps dig in when the pack is overloaded, unstable, or incorrectly sized for your torso.
- Set the torso adjustment correctly, keep the pack high and snug, and place heavy items close to your back.
- Fasten the hip belt over your hip bones first so it carries most of the pack’s weight.
- Tighten shoulder straps evenly, then adjust load lifters and sternum strap without pulling your shoulders down or restricting breathing.
- After walking about 10 minutes, check for shifting and retighten; loosen straps and reassess fit if pain persists.
Why Does Your Rucksack Dig Into Your Shoulders?
Why does a rucksack dig into your shoulders? I look first at how the pack transfers weight. If its suspension doesn’t suit your torso length, the load can shift from your hips onto your shoulders. A poorly seated shoulder harness may roll or sit unevenly, concentrating pressure in a narrow strip and creating painful hot spots.
Check your posture and the hip belt’s position, too. If it sits below your hip bones or pulls away from them, it can’t carry its share, so your shoulders take more strain. An overloaded, unstable pack—or heavy gear packed high and away from your back—can tug on the straps. Tighten shoulder and load-lifter straps only enough to stabilize the pack; load lifters should draw it gently toward your upper back, not press into your neck or collarbones. Redistributing the load so heavier items sit close to your back can help the pack feel more stable and reduce shoulder strain.
Check Rucksack Fit, Torso Length, and Load Limit
To reduce shoulder strain, I start by checking the rucksack’s torso setting and suspension: if the pack is too short, it can shift weight from my hips onto my shoulders. Adjustable suspension lets me match strap placement to my torso length and improve load distribution. I fit the loaded pack according to the maker’s instructions, then snug the shoulder straps and set load lifters to draw the frame toward my upper back without pressing near my neck or collarbones. Measuring from the base of the neck to the top of the hips helps identify the right torso length for the pack.
| Check | What I do | Why it helps |
|---|---|---|
| Torso length | Match suspension | Supports posture |
| Shoulder straps | Snug evenly | Limits shifting |
| Load lifters | Adjust gently | Avoids neck pressure |
| Pack weight | Stay within limit | Protects frame |
If straps still dig in, I’d try another size or an adjustable framed pack. Don’t exceed the stated load limit; excess weight can cause discomfort or damage the frame.
Position the Hip Belt Over Your Hip Bones
I locate my hip bones and center the belt over them, not at my waist or pants line. With the shoulder straps loosened, I tighten the belt until it feels secure and supports the pack without digging in. I check that the pads rest evenly on my hips, leaving room for two fingers beneath the belt. A sturdy frame and stays help transfer a heavy load to the hip belt and reduce shoulder strain.
Locate Your Hip Bones
With the shoulder straps loosened, feel for the bony points at the top of your hips and position the hip belt over them—not at your waist or where your pants sit. I use these landmarks to help the belt transfer pack weight from my shoulders to my hips, supporting a more balanced posture and freer movement.
- Fasten the padded hip belt snugly so it rests securely on your hip bones without pinching.
- Keep it comfortable; for a ruck’s waist strap, I leave space for about two fingers beneath it.
- Walk for about 10 minutes, then check whether the belt has slipped and retighten if needed.
With the shoulder straps still loose, make sure your hips—not your shoulders—support the pack. A secure fit shouldn’t restrict your breathing or movement.
Center The Belt
Once the belt rests over your hip bones, center it so the lumbar pad sits against your lower back and the hip pads lie evenly on both sides. Don’t place it at your waist or simply where your pants sit; those spots may not transfer the pack’s weight effectively. I check that the lumbar support pad contacts my lower back evenly and that neither hip pad rides higher. With the shoulder straps loosened, the belt should hold the pack on your hips without slipping. That check shows whether the position can shift weight away from your shoulders and support a more balanced posture. Load lifter straps won’t correct a belt that’s off-center. After about 10 minutes of walking, I recheck the belt because the load may have settled and shifted its position.
Tighten For Support
Before tightening the straps, loosen them so you can position the loaded pack correctly. Place the hip belt over your hip bones, not where your pants sit. This lets your hips support most of the weight, easing shoulder pressure and helping you maintain an upright posture.
- Tighten the belt until it feels secure, not pinched. You should fit a couple of fingers underneath.
- Snug the shoulder straps to remove slack. They should stabilize the pack, not carry its full weight.
- Walk for about 10 minutes, then check the belt and retighten if the load has settled.
Adjust the sternum strap for comfort without letting it pull your shoulders forward. A balanced setup can make heavy load carry feel steadier, leaving you freer to move without fighting the pack.
Adjust Rucksack Straps in the Right Order
I start with the loaded pack’s compression straps tight and loosen the hip belt, shoulder straps, load lifters, and sternum strap. I fasten the hip belt over my hip bones first, then snug the shoulder straps without letting them lift the pack or press into my shoulders. I finish by drawing the pack gently toward my upper back with the load lifters, then set the sternum strap lightly so it stabilizes the straps without restricting my breathing. Keeping heavy items close to your back can also help maintain a balanced center of gravity.
Fit the Hip Belt First
To reduce shoulder strain, I fit the hip belt first: loosen the rucksack straps, place the belt over your hip bones—not your waist or trouser waistband—and tighten it until it feels secure and supports most of the load. This gives your pelvis a larger share of the weight, helping you stay upright and move freely. I check the fit before fine-tuning anything else:
- With the shoulder straps loosened, see whether the belt holds the tactical backpack securely.
- If the pack slips, reposition the belt over your hip bones and tighten it until stable.
- Keep your shoulders relaxed; the belt should carry most of the load, not pinch or restrict movement.
This first step matters whether I’m adjusting a rucksack for a short walk or a long trek. A stable hip-belt fit provides a sound foundation for the remaining adjustments.
Adjust Shoulder Straps
Once the hip belt sits securely over my hip bones, I tighten the shoulder straps just enough to remove slack without lifting the pack. This keeps most of the load on my hips, where it’s better supported, rather than pulling my shoulders down or rounding my posture. Before putting on a loaded rucksack, I loosen its straps so I can set each part in order. After snugging the shoulder straps, I adjust the load lifters to draw the frame slightly toward my upper back. If the frame extends above my shoulders, I aim for roughly a 45-degree angle and avoid overtightening. Aluminum frame stays help transfer weight, but a poor fit can still create pressure. After ten minutes of walking, I check the fit and retighten the hip belt and compression straps as needed.
Finish With Load Lifters and Sternum Strap
With the hip belt and shoulder straps set, I tighten the load lifters just enough to draw the pack toward my upper back and stabilize it; if the frame extends above my shoulders, I aim for an angle near 45 degrees.
Use this order to keep your posture balanced and pressure manageable:
- Set the hip belt so it carries the load on your hips.
- Adjust shoulder straps to sit snugly without pulling your shoulders down.
- Tighten load lifters, then fasten the sternum strap comfortably across your chest.
I avoid cranking the lifters; excess tension can cause hot spots near my neck and collarbones. The sternum strap should steady the shoulder straps without restricting breathing or circulation. This sequence helps military-style backpacks feel secure while leaving you free to move. After about 10 minutes of walking, I check the fit again and retighten the belt or straps if my loadout has settled.
Fix Shoulder Strap Pressure and Neck Hot Spots
If your shoulders ache or hot spots form near your neck, loosen every strap before putting on the ruck and secure the hip belt over your hip bones so your hips carry most of the load. I tighten shoulder straps only enough to remove slack; pulling them too hard can cause pain and restrict circulation. Set load lifters to draw the pack gently toward your upper back, around a 45-degree angle when the frame allows. Cranking them can create pressure near your neck and collarbones. Keep the sternum strap comfortable across your chest, and loosen it if it draws the straps inward or makes breathing difficult. If pressure persists, check torso length and strap placement with the pack loaded. Edges that dig in or straps that slip off may signal a poor fit, whether you carry a tactical assault pack or military rucksack. For shorter frames, a pack with adjustable torso length can help position the shoulder straps and hip belt more comfortably.
Pack Heavy Gear High and Close to Your Back
After adjusting your straps, pack dense gear close to the frame and spine, centered around your upper-middle back near shoulder-blade height. Keeping the load near your body helps limit backward pull, so you can stand tall and move freely without fighting your pack.
Keep heavy gear close to your spine at shoulder-blade height to reduce backward pull and move comfortably.
- Place water, food, a stove, fuel, or tools in this central zone, not at the bottom, where dense gear can increase shoulder strain.
- Brace the heavy core with medium-weight items; use light, compressible gear to fill gaps and prevent shifting.
- Keep the top pocket light, then tighten compression straps from bottom to top to draw the load inward.
For a three-day trip, balance the load by keeping dense items centered and preventing gear from shifting as you move.
I use molle webbing to secure compatible gear, but avoid letting attachments swing or sit far from your back. Check the webbing and pack contents before setting out; a stable load supports balanced posture over long miles.
Use Medium-Weight Gear to Stabilize the Load
I place medium-weight gear around the heavy core to brace it and keep dense items from shifting. I fill gaps with soft items, then tighten the compression straps to pull the load close and limit movement. Keep the pack balanced side to side; a lopsided load can tug on your shoulders and undermine stability. Arrange frequently used items in accessible pouch locations so you can reach them quickly without disrupting the load.
Brace Heavy Items
Brace dense gear close to your back at mid-back height, then surround it with medium-weight items like shelter pieces, extra layers, or a cook kit. This bracing keeps the heavy core from shifting, helping your torso stay upright and reducing shoulder tug as you move.
- I place compact ruck items, such as MREs, between footwear or other side-packed gear to create a steady middle layer.
- I press each item into position as I pack, keeping the load compact and balanced from side to side.
- I tighten compression straps to draw the load inward and limit movement on the trail.
Use packing cubes to organize soft layers, and secure modular pouches to the molle webbing without letting them pull the pack off-center. A stable load moves with you, so you can travel farther with less strain and more freedom.
Fill Empty Spaces
Once the heavy core is in place, fill the gaps around it with medium-weight gear—such as food, shelter pieces, extra layers, or a cook kit—to keep the load snug and reduce shifting. I pack these items around the core so the ruck stays compact and its weight sits close to my back, supporting an upright posture. In a military-style pack, I arrange roughly two-pound MREs at varied angles, like Tetris, to form a snug middle layer. I place spare boots or shoes along the sides, then fit medium-weight gear between them to support the pack’s shape. Pressing contents into gaps removes air pockets without forcing the load. Think of this as footlocker packing, adapted to a flexible ruck; the pals webbing grid helps organize exterior gear without crowding the interior.
Prevent Load Shifting
A stable load helps keep your shoulders from absorbing the pull of shifting gear. When I pack a bug out bag, I brace the heavy core with medium-weight shelter pieces, extra layers, or a cook kit. This reduces sway, helping you maintain an upright posture and move freely over distance.
- Place medium-weight gear high and close to your back. Turn compact items at different angles to fill gaps and stabilize the core.
- Use light, compressible clothing or a sleeping bag to block remaining spaces, so heavier items can’t slide as you walk.
- Tighten compression straps from the bottom upward, drawing the load toward the frame. Secure outside gear to prevent swinging or shoulder-tugging.
Check the pack as you move. A compact, steady arrangement supports comfort and durability without limiting your freedom.
Fill Gaps and Keep the Top Pocket Light
Fill the empty spaces around the pack’s heavy core with light, compressible gear—such as a sleeping bag, spare clothing, or a poncho liner—to stop items from shifting and tugging at your shoulders. I pack soft gear around dense items to brace them, keeping the load stable against my back. That close, balanced fit helps me stay upright instead of leaning forward to counter a pack that pulls backward. Keep the top pocket light: I use it for quick-grab essentials like a headlamp, gloves, snacks, and a map. Dense gear placed high or far from your back shifts the pack’s center of gravity and can strain your shoulders. Whether I’m loading a daysack or an assault pack, I leave heavier items close to my torso, so I can move freely and comfortably.
Tighten Compression Straps to Stop Load Sway
After packing, I tighten the compression straps from the bottom upward—bottom, middle, then top—to pull the load close to the frame and keep it from shifting against my shoulders. A stable pack reduces sway that can tug me backward, strain my posture, and make each step less efficient.
- Fill empty space: I use soft, lightweight gear to stop heavy items sliding inside. I keep the hydration bladder sleeve secure and avoid letting its contents shift.
- Secure the outside: I fasten external gear so it can’t swing, and tuck away loose straps or laces to prevent snags.
- Check strap tension: I tighten each side evenly without crushing the load. Durable 1000d cordura nylon can handle field use, but balanced packing—not fabric alone—keeps my shoulders comfortable and my movement free.
Retighten Your Rucksack After Walking 10 Minutes
Even a well-packed military-style backpack can settle as you walk, so I stop after about 10 minutes to check its fit. A shifting load can pull my shoulders backward or encourage a forward lean, so I reset the pack before discomfort builds.
I tighten the hip belt over my hip bones first, letting it support the rucksack and take pressure off my shoulders. Then I snug the compression straps from the bottom upward: bottom, middle, then top. This sequence draws the load close and limits sway, whether I’m carrying a tactical pack or one made with 500d cordura fabric.
I check that the rucksack sits high and snug against my back, with no gear swinging or load sagging. I make small adjustments, keeping straps secure without overtightening or restricting circulation. A quick reset helps me move freely and maintain balanced posture.
Frequently Asked Questions
What Are Those Military Backpacks Called?
I call military-style backpacks rucksacks, or simply rucks. The terms describe packs built to carry equipment, often with modular attachment systems. MOLLE II is one well-known military rucksack system; the Crossfire DG3 is another example. You might also hear “ruck” used for a weighted training walk, called a ruck march. When choosing a pack, I’d check its fit and adjust the straps so the load sits securely without restricting comfortable movement.
What Is Backpack Syndrome?
Backpack syndrome is informal shorthand for shoulder and upper-back discomfort caused by carrying a pack that puts too much weight on your shoulders. Does your pack feel like it’s pulling you backward? I’d check whether the hip belt sits snugly over your hips and carries most of the load. Keep heavy items close to your back, balance the contents, and adjust the straps to stabilize—not squeeze. Persistent pain warrants a fit check or another pack.
How Long Does Backpack Palsy Last?
Backpack palsy can last days to weeks in mild cases, but significant weakness or numbness may take weeks to months to improve. I can’t give you a fixed recovery timeline; it depends on how long and how severely the pack compressed the nerves. Take the pack off and avoid pressure on your shoulders. If symptoms worsen or persist, or you have marked arm weakness or loss of sensation, seek medical care promptly.
What Are the Straps on Military Backpacks For?
Military backpack straps stabilize the load, spread its weight, and help you move freely. I snug the shoulder straps so the pack doesn’t sag, but avoid overtightening. I place the hip belt over my hip bones to transfer weight off my shoulders. I fasten the sternum strap comfortably across my chest, adjust load lifters to draw the top closer, and tighten compression straps to stop contents shifting. I check posture and circulation.
Conclusion
I’ve found that shoulder pain usually points to a fit or loading problem, not a need to tough it out. Start with torso fit, seat the hip belt on your hip bones, then adjust straps in order and stabilize the load. After 10 minutes, retighten everything. One useful benchmark: your hips should carry most of the pack’s weight, leaving shoulder straps to steady it. If numbness or sharp pain persists, stop and reassess before your next walk.
References
Soldier Load Carriage: Historical, Physiological, Biomechanical, and Medical Aspects, https://pubmed.ncbi.nlm.nih.gov/14964502/
Back Injuries, https://medlineplus.gov/backinjuries.html
Backpack Safety, https://orthoinfo.aaos.org/en/staying-healthy/backpack-safety/