How Can You Carry Military-Style Knives Safely During Outdoor Adventures?
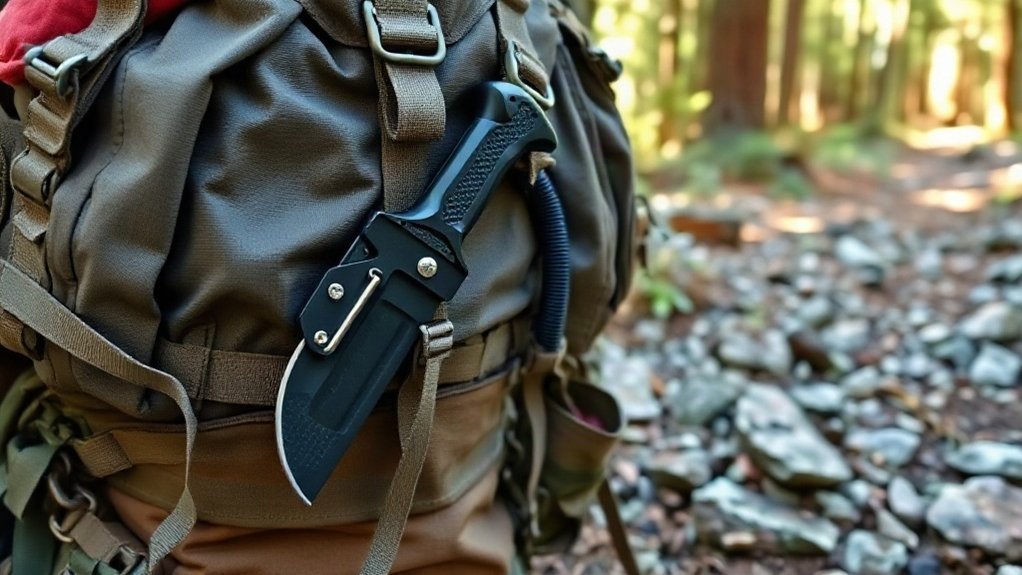
I choose a knife sized for the hike: a compact blade for an easy day trip, or a larger fixed blade only when remote tasks justify it. I check carry laws for every destination and route, since rules can vary by blade length and carry method. Then I secure the sheathed knife to a sturdy belt or pack attachment, test its retention, and make sure it stays accessible without snagging or interfering with gear. The steps below cover safe carrying and transport.
Key Takeaways
- Choose a knife size suited to the trip: a compact blade for day hikes, or a larger one only for remote-country tasks.
- Check official laws for every destination, including rules on blade length and open or concealed carry.
- Secure the sheath to a sturdy belt, pack strap, or exterior webbing, then tug-test it for movement and retention.
- Position belt carry behind the hip, clear of your leg, clothing, pack straps, and hipbelt; test access while moving.
- Store the knife secured in a pack or closed vehicle compartment; for flights, lock it in checked baggage, never carry-on.
Choose a Knife Size for Your Hike
How much knife you need depends on the hike. For a short, familiar day hike, I’d choose a small folder or compact fixed blade. It’s easier to carry than a large military-style knife and leaves me free to move without extra bulk. A 3–4-inch fixed blade works well on a belt; a 4–5-inch option can handle basic wood tasks, such as splitting wrist-thick rounds.
I match Blade length to task demands, not to an image of toughness. If I’m heading into remote country to build shelter or prepare firewood, I might pack a larger knife. For chopping, though, I’d reach for an axe or tomahawk instead. A 7-inch-or-longer blade may make sense for search-and-rescue work or training, but it’s more knife than I need on an ordinary trail.
I also consider my carry setup: a folder or multitool suits populated routes, while I can keep a fixed blade in my daypack for backcountry travel.
Check Local Laws for Knife Carry
Before you pack a knife, check the laws for every state, county, or country on your route; rules can vary by blade length and whether you carry it openly or concealed. I check state carry laws before each trip, then verify county knife rules for trailheads, campsites, and other places I’ll visit. Local regulations may also treat a sheathed belt knife, a blade in a pack, or a readily accessible knife differently. Don’t assume a knife inside your backpack legally counts as concealed; interpretations can conflict, including around California law. When I can’t find a clear answer, I consult an official government source rather than relying on a forum or guesswork. That quick check helps me protect my freedom to explore while respecting local limits. For international travel, I declare knives at customs and pack them in checked baggage; I never bring one in cabin luggage. A little research can prevent a trip from turning into a legal problem.
Choose a Secure Carry Method
Once you’ve checked local rules, choose a carry method that keeps your knife secure while you move. I attach the sheath to a sturdy belt, pack strap, or exterior MOLLE webbing, then tug it to make sure it won’t shift on the trail. Strong gear attachment gives you room to move without letting your knife bounce loose.
I also check Sheath retention before heading out. A well-fitting sheath should hold the blade firmly, and a distinct click when it seats helps confirm it’s secure. For belt carry, I place it on my dominant side behind the hip and high enough to avoid striking my leg. If I use scout carry for a longer fixed blade, I mount it horizontally across my lower back and check that the handle won’t catch on pack straps or other gear.
I never carry a fixed blade loose in a pocket or vehicle. I use its sheath or a closed, secured gear bag instead.
Position Your Knife for Easy Access
I position a belt-carried fixed blade on my dominant side behind the hip—around 3–5 o’clock if I’m right-handed or 7–9 o’clock if I’m left-handed. I secure the sheath high enough that the knife won’t strike my leg as I walk or run, with the handle at or just below my belt line for a quick draw.
Before I head out, I test reach from natural positions and check clearance while bending my legs and moving in my usual clothes and gear. The knife should stay accessible without snagging on fabric, vines, or equipment. If I wear a backpack hipbelt, I check whether it presses or digs into the sheath; if it does, I move the knife to a pack strap or exterior webbing. I may choose scout carry, positioning it horizontally across my lower back to spread the weight and keep the handle clear of some gear. I use an adjustable sheath so I can set the draw direction that suits me.
Pack and Transport Your Knife Safely
When I’m carrying a knife on my pack, I secure its sheath to exterior MOLLE webbing, a pack strap, or an outside pocket so it stays accessible and doesn’t shift inside. This Secure Pack Attachment keeps the blade controlled while I move freely on the trail. If a thick waist belt chafes, I carry the sheathed knife on my pack instead. Before leaving my pack behind, I transfer the knife to my person, where local rules allow.
For Safe Vehicle Storage, I place the knife in a closed gear bag, locked console, or securely strapped pack in the trunk or truck bed. I never leave it loose on a seat, dashboard, or in a cup holder. When I fly, I lock it in checked baggage, never carry-on luggage, and declare it at customs on international trips. Before traveling, I check local blade-length and open- or concealed-carry rules; laws vary by state, county, and country, so I plan accordingly.
Frequently Asked Questions
What Is the Safest Way to Transport Knives When Traveling?
I transport knives in a closed gear bag, locked console, or strapped pack in my vehicle’s cargo area; I never leave one loose in the cabin. I use Secure sheath storage for fixed blades and add blade edge protection to prevent damage or exposure. Before traveling, I check local carry rules and blade limits. For international trips, I declare knives at customs and pack them securely in checked baggage—never carry-on.
Should I Carry a Knife While Hiking?
I’d carry a knife hiking only when it serves a clear purpose—it’s a useful tool, not a trail talisman. For a familiar day hike, I’d choose a small folder or multitool; remote terrain may justify a compact fixed blade for shelter or fire tasks. I weigh hiking knife necessity against trail safety considerations, checking local laws and securing any fixed blade. You’re free to travel light; let your route guide your choice.
How to Carry a Knife While Travelling?
I carry a travel knife only after checking the rules for every place on my route. For Secure sheath carry, I use a fitted sheath or closed gear bag, then stow it securely in a vehicle’s cargo area—not on a seat. I follow airline regulations by packing it in checked baggage, secured against shifting, never in carry-on luggage. Before crossing borders, I check blade laws and declare it when required, so I can travel confidently and responsibly.
What Is the Holy Trinity of Pocket Knives?
I’d call the holy trinity a folding knife, a multitool, and a Swiss Army Knife (SAK): three compact options that cover different needs. I’d choose a folder for quick pocket access, a multitool for pliers and screwdrivers, and an SAK for handy everyday tools. Your knife selection should fit your hike and personal preferences. I’d secure a folder with its clip, not carry it loose, and keep up with blade maintenance for dependable use.
Conclusion
I carry a military-style knife only when its size suits the hike and local laws allow it. A secure sheath keeps the blade steady; thoughtful placement makes it reachable without turning access into a scramble. When I pack up, I protect the edge and stow the knife firmly, away from loose gear. These small habits are trail markers of their own: they help me move with confidence, keep others safer, and let the adventure—not the blade—take center stage.